¡Vuela, mariposa!

maris6

Después de pasar varios meses con la cara pegada a la pantalla del ordenador y con cierta otra parte del cuerpo pegada a una silla, por fin he conseguido llegar hasta la cocina y he podido pegar la cara a la puerta de mi horno. Y no solo eso, hasta me ha dado tiempo a echar dos o tres tardes disfrutando con la manga pastelera. Ya casi se me había olvidado (espero que las chicas de nuestros talleres de galletas no lean esta parte jajajajaja)

Y tenía muchas ganas de hacer unas mariposas, en tonos pasteles y con mucho rosa a lo «girly style». Como ya sabéis, nos gusta mucho cuidar el horneado de las galletas. Además de usar tapetes de tipo silpat para que queden más lisas por la cara inferior, estamos muy pendientes de ellas para que no se tuesten. ¿Qué ventaja tiene esto? Pues que al quedar tan blanquitas y lisas, puedes aprovechar el revés para decorarlas y hacer unas mariposas que parezcan que vayan a volar.

maris5

Lo primero que tenemos que hacer es estirar la masa muy finita, de 2 mm de grosor. Luego decoramos por un lado con glasa (en este caso lleva decoraciones wet on wet), y esperamos hasta el día siguiente para que se seque un lado y poder decorar el revés. Cualquiera de esos dos días podemos ir haciendo los cuerpecitos, que no son más que bolitas de glasa madre, cubiertas luego con glasa más fluida (la primera hace las funciones de cimientos para que no haga crack y la segunda para que la superficie quede lisa). Al tercer día ya podemos hacer el montaje. Solo hay que echar en el borde de cada ala un hilo de glasa madre que hará las veces de pegamento y dejarlas secar un par de horas en algún recipiente curvo. Yo usé unas bandejas para hornear barras de pan que tenía en casa(esperando a que las estrene algún día)

collagemaris

Una vez secas ya están listas para comer, mejor dicho, para echarlas a volar

maris3

maris4

¡Hala, a volar!

mariposaenmanos

Un beso,

Estíbaliz

Love is in the air, literalmente hablando.Love is in the air, literally speaking.

LO-VE

Sirva esta entrada bien cortita a modo de inspiración por si no se os ocurre qué galletas hacer para San Valentín. Son sencillísimas porque solo tenéis que preparar una manga con un poco de glasa madre que pondremos a modo de cimientos para que no se nos hundan los volúmenes y cubrirla luego con glasa roja. Si queréis tirar la casa por la ventana, aplicadle un poco de purpurina para darle alegría.

LOVE2

La masa esta vez no está tan blanca como otras veces, sino que al cambiar el azúcar blanco por el moscobado en nuestra receta de galletas de vainilla, tiene un bonito color dorado y un sabor espectacular.

Y dicho esto, para quienes lo celebren ¡Feliz San Valentín!

Un beso,

Estíbaliz

¡Muchas gracias, Gloria!

LO-VE

May this really short post serve as an inspiration in case you don’t know what cookies to make for Valentine’s Day. They are super easy, you just have to prepare a piping bag with basic royal icing that we will use as foundations so the volumes do not sink, and then cover it with red icing. If you want to go overboard, use a bit of glitter to perk them up.

LOVE2

This time, the dough is not as white as usual, using muscovado sugar instead of the normal granulated one, gives cookies a beautiful golden colour and a wonderful flavor.
That said, and for those who celebrate it, Happy Valentine’s Day!

Love,
Estíbaliz

Thank you very much, dear Gloria!

Locas de amorCrazy in love

locas3

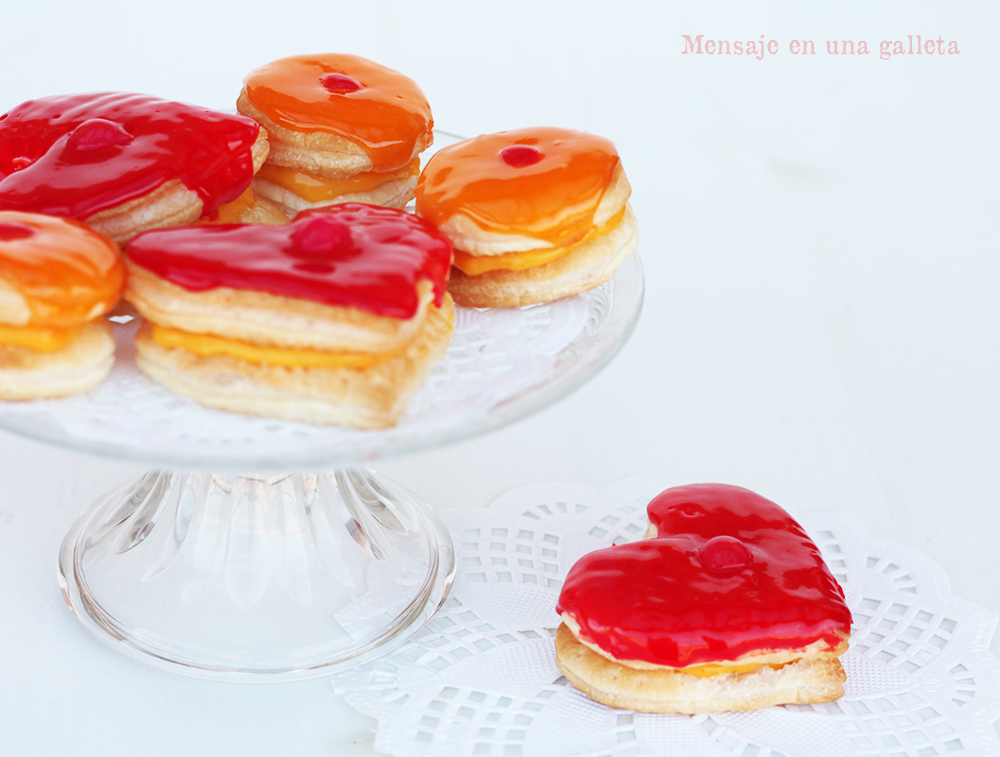
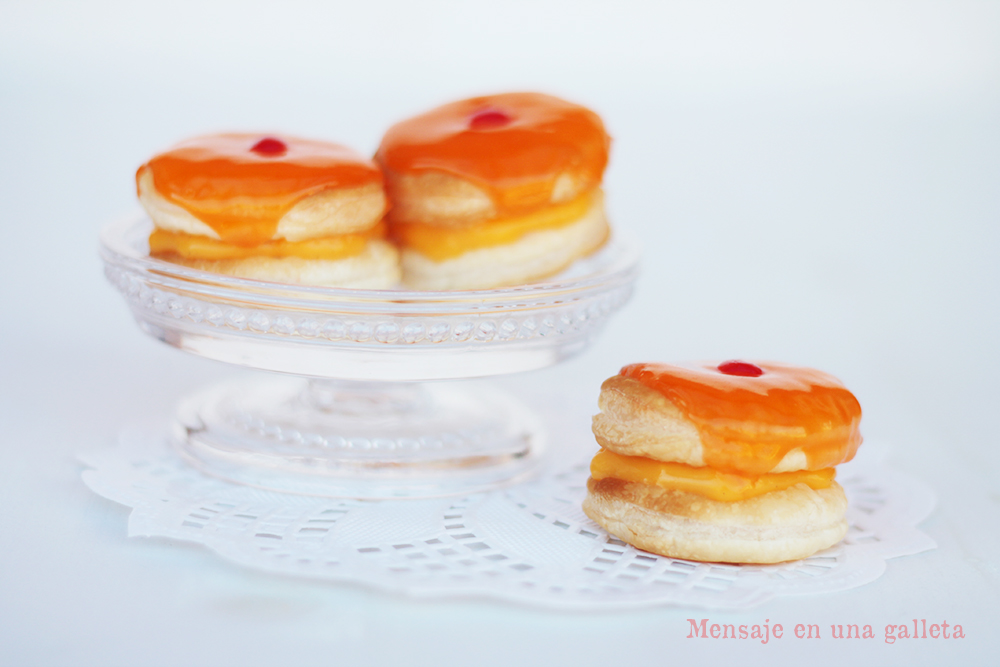
Si venís por Málaga alguna vez, no podéis iros sin haber pasado antes por El pimpi, por calle Larios, por el paseo del parque, etc y, por supuesto, sin haber probado las «locas». No, a nosotras no. Es un dulce hecho con ingredientes muy modestos cuya mezcla resulta extraordinariamente deliciosa. Cuando te encuentras con uno, sabes que lleva crema pastelera arropada por dos capas de hojaldre, cubierto todo por «algo» de color naranja. Un misterio.

locas0

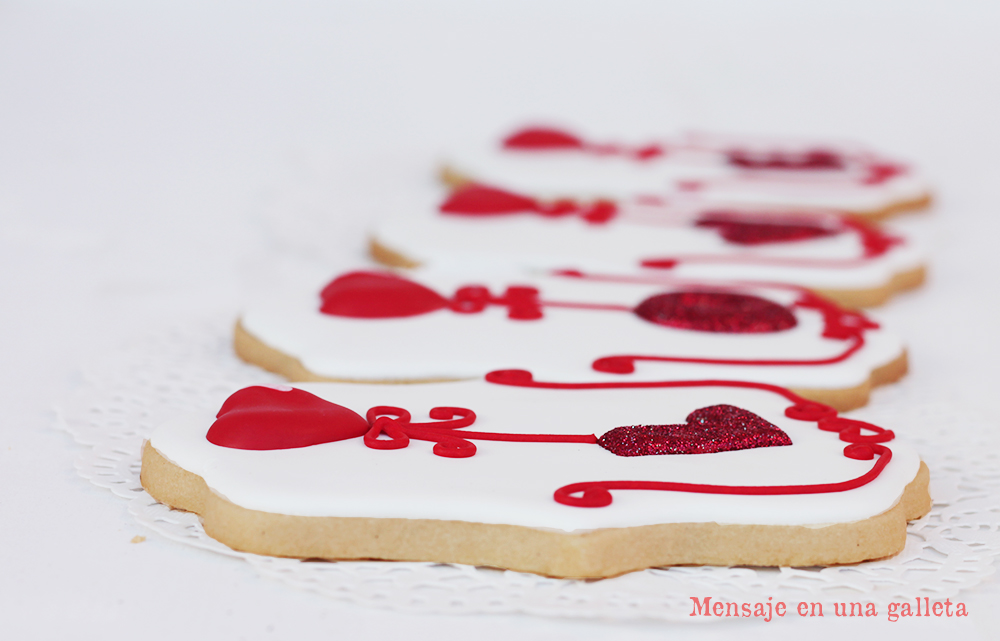
Me picaba tanto la curiosidad que fui a la panadería «La talega» de mi amiga Yolanda (está detrás del Clínico, no dejéis de ir porque no hay nadie más encantador y amable que Yoli) y, con el desparpajo que me caracteriza, me atreví a preguntarle por la intrigante cobertura de las locas. Ella me la dio encantada y no perdió el buen humor a pesar de que la freí a preguntas por el Whatsapp. La tenéis un poco más abajo, cuando acabe de contaros todo este rollo. Y como en esta semana celebramos San Valentín pues ¿por qué no iban a tener las locas forma de corazón en vez de ser redondas?

Como en mi vida he hecho hojaldre, que Dios y Luis Olmedo me perdonen, pues fui y me compré un rollo de masa de hojaldre del supermercado. Ni que decir tiene que espero con ansia que empiece YA ese taller online que Luis va a dar en nuestra Tallerería  dentro de pocas semanas.

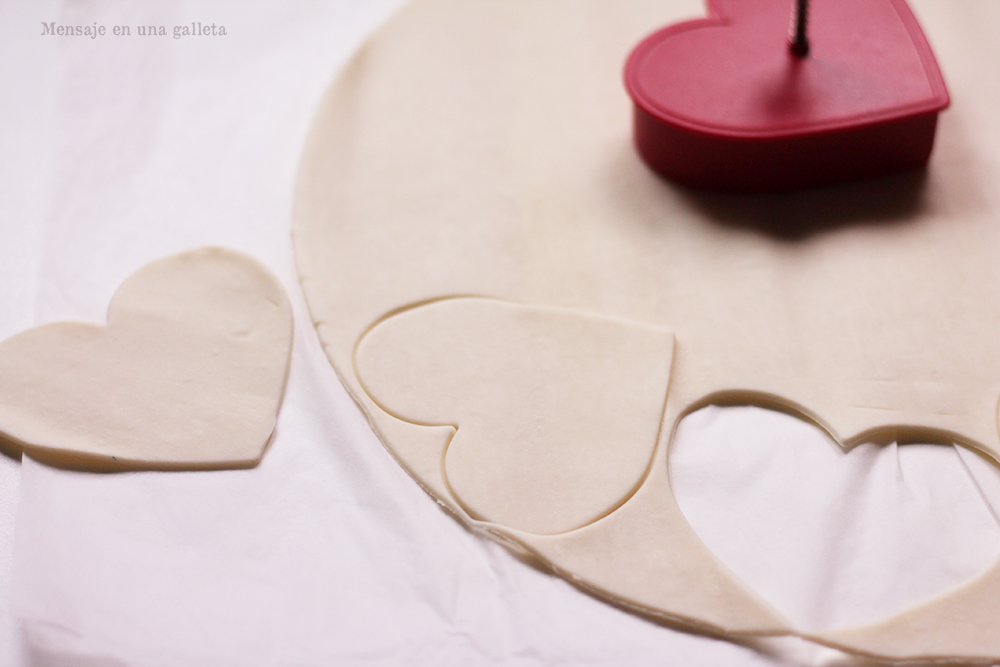
Sigamos. Cortamos el hojaldre con forma de corazón y lo horneamos

cortandohojaldre

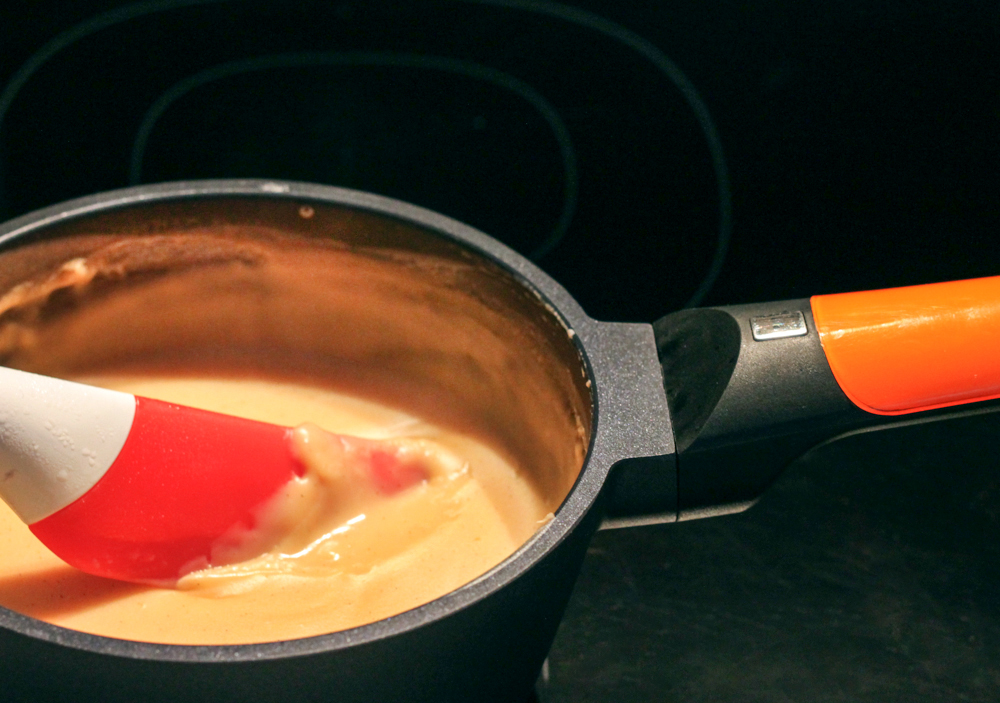
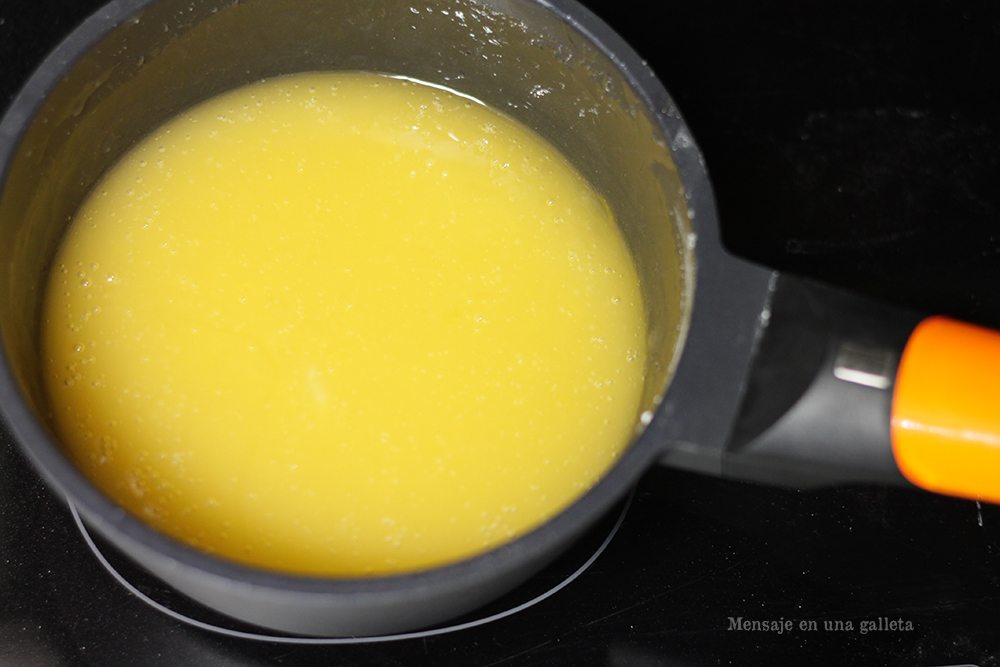
En un cazo hacemos la crema pastelera, que lleva los siguientes ingredientes

1/2 l de leche

80 gr de azúcar

2 yemas

30 gr. de harina blanquita

1 tsp de vainilla

Se mezcla todo con la batidora y se pone al fuego sin dejar de remover:

cremapastelera

Ahora llega el turno de la cobertura de las locas, una deliciosa crema de yemas, que lleva lo siguiente:

250 ml de agua

150 azúcar en grano

150 azúcar glas

40 gr de Maizena

3 yemas

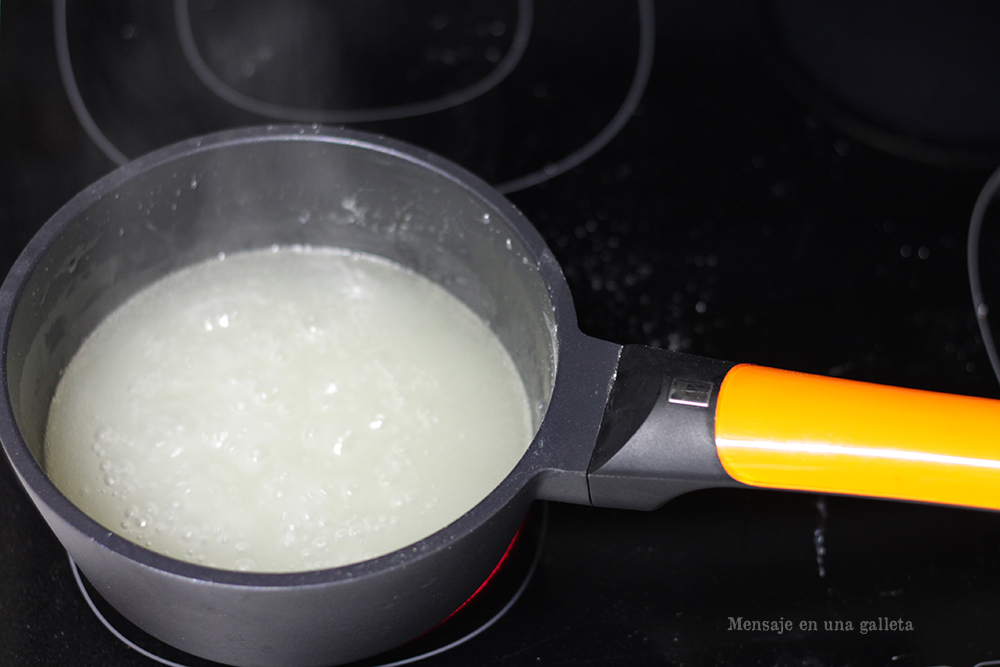
Se pone a hervir en un cazo el agua con el azúcar en grano, mientras tanto se mezcla el azúcar glas con la Maizena y se incorpora todo al almíbar, se remueve bien y se deja espesar un poco.

cremadeyemas0

Se aparta del fuego para que baje la temperatura (unos 10 minutos) y se incorporan las yemas batidas, de esta forma no se cuajan. Se remueve todo hasta que las yemas estén integradas y lo ponemos de nuevo al fuego para que espese sin dejar de remover.

cremadeyemas

Si los huevos son camperos, la mezcla tendrá un bonito color anaranjado y si no, nos ayudamos de colorante naranja para darle ese empujoncito de color extra. Si las hacemos para San Valentín, en vez de naranja usamos el color rojo, como manda la tradición.

Cuando están frías las cremas, empezamos a montar todo el conjunto, poniendo la crema pastelera entre dos hojaldres y cubriendo con la crema de yemas, adornándolo todo con un trocito de guinda confitada.

Lo último que queda es cubrirlo la crema de yemas con una nueva mezcla de agua y azúcar, la proporción es de 2 partes de azúcar por una de agua. Se calienta y se cubren las locas con ella.

Un beso,

Estíbaliz

¡Muchas gracias, Gloria!

locas3

If you ever come to Málaga, you can’t leave without visiting ‘El Pimpi’, walk along Larios street, through the park, etc. and of course, without having tried the ‘locas’ (crazy). No, not us. It is an elaboration made with very modest ingredients whose mixture results extraordinarily delicious. When you get a hold of a ‘loca’, you know that it contains custard cream covered by two layers of puff pastry and coated with ‘something’ orange. A mystery.

locas0

I was so intrigued that I went to ‘La talega’ bakery, (located behind the Clínico, do not miss it as there is no one as sweet and lovely as my friend Yoli), and with that innate self-confidence of mine, I dared to ask her about the puzzling cover of the ‘locas’. She gladly gave me the recipe and didn’t lose her temper even though I showered her with questions via Whatsapp. It is a bit further down, when I stop telling you all this drag. And, as we are celebrating Valentine’s Day this week, why shouldn’t they be heart-shaped instead of plain round?
As I have never made puff pastry in my life (May God and Luis Olmedo forgive me) I just went to the supermarket and bought a frozen sheet. Needless to say that I am really looking forward to the online course that Luis is going to give in our Tallerería in a few weeks.

Let’s continue. Cut the puff pastry with a heart cutter and bake it.

cortandohojaldre

We prepare the custard cream in a saucepan, with the following ingredients:
1/2 liter of milk
80 grams of sugar
2 egg yolks
30 grams of white flour
1 tsp. vanilla
We mix everything with a mixer and then heat in the saucepan stirring constantly.

cremapastelera

Now is the turn of the ‘locas’ coating, a delicious egg yolks cream made with:

250 ml of water
150 grams of granulated sugar
150 grams of icing sugar
40 grams of cornstarch
3 egg yolks
In a saucepan, bring water and sugar to a boil; in the meantime, mix icing sugar with the cornstarch and then add it to the syrup, stir well and let it thicken a bit.

cremadeyemas0

Remove it from heat for about 10 minutes so the mixture cools down. Then add the egg yolks, previously whisked, so they do not curdle. Mix everything until the yolks are fully incorporated and then take it to the heat again, stirring constantly, until it thickens.

cremadeyemas

If you’re using free-range eggs, your coat will have a beautiful orange colour. If not, we will use a little bit of orange food coloring to give it that extra kick. If we are making these for Valentine’s Day, instead of orange, we will use red, as tradition dictates.
When both creams are cold, we start assembly the dessert, putting the custard cream between the two puff pastry hearts, coating it with the egg cream, and decorating it with a piece of candied cherry.
Last thing to do is to coat the egg cream with another syrup made with water and sugar; the proportions are 2 parts of sugar per 1 of water. Heat it and cover the ‘locas’ with it.

Love,
Estíbaliz

Thank you very much, dear Gloria!

Arbolito de Navidad con glasa, solo con glasa.Christmas tree made with royal icing, only royal icing

arbolalzado2

Antes de empezar el post quiero hacer una advertencia: LAS PERSONAS QUE PADEZCAN DEL CORAZÓN, DEBEN ABSTENERSE DE HACER ESTE ÁRBOL. Durante la realización del mismo se producen episodios de mucho estrés y llantinas, y no todos los corazones pueden soportar tal carga emocional. Efectivamente, lo pasé fatal.

Ahora ya puedo continuar con el post. Si estáis decididos a hacerlo tendréis que agenciaros los siguientes materiales:

  • Cucuruchos de helado, como ya os habréis figurado.
  • Papel de horno o bolsas para galletas de tamaño suficiente como para cubrir el cucurucho
  • Glasa madre con 65 ml de agua, en vez de los 70 para que, al añadirle el colorante, siga siendo espesa (vamos a trabajar con la fuerza de la gravedad en nuestra contra y no queremos que el diseño termine siendo un churro)
  • Boquilla del 4, para que las decoraciones sean más robustas
  • Una peana de galletas para que el árbol luzca como se merece, incluso encima de unos macarons también tiene que quedar precioso
  • Sirope claro de maíz para pegar la estrella

Empezamos recortando los cucuruchos, los que yo conseguí no tenían el borde igualado así que los corté, primero con un cuchillo de sierra y luego con otro de borde liso para terminar de pulirlos. Esmeraos en esta parte porque un cucurucho «cojo» se tumba fácilmente.

Después recortamos el papel de horno (o la bolsa de galletas) y envolvemos con él el cucurucho pegándolo al principio y al final con esa glasa que ya tendremos lista. Y ya podemos comenzar a decorar.

Collagecucuruchos

No cometáis el mismo fallo que yo y os entusiasméis decorando el cono hasta abajo porque luego no hay quien lo maneje y se pasa muy mal intentando no tocar ninguna de las decoraciones. Por cierto, intentad que queden pegadas unas con otras para darle más solidez al árbol.

Sigamos. Al día siguiente ya sabía que los arbolitos estaban secos, pero fui dilatando el tema del despegue (y no me refiero a aviones) buscándome otras tareas caseras para no «enfrentarme» a ellos. Cuando ya no tenía más excusas me atreví a sacar el cucurucho de helado, eso estaba chupado. Ahora llegaba lo verdaderamente estresante: despegar el papel de horno, con mucho cuidado, ya os lo habréis imaginado. Pues a pesar de todo el cuidado del mundo, aquello terminó en tragedia:

desastre

No pasaba nada, tenía todavía dos oportunidades más, que terminaron siendo una sola ¡qué estrés! Pero mirad por dónde las musas vinieron a visitarme y se me ocurrió ayudarme de un palo de brocheta para despegarlo todo.

brocheta

Fui introduciendo el palo entre la glasa y el papel y aplastándolo contra el eje del cono, suavemente pero pulso tembloroso… Y aquí es donde viene la llantina porque no podía creerlo ¡se había despegado entero! ¡y sin romperse! ¡qué alivio! Menos mal que era la hora de la siesta y nadie me vio ¡lo había pasado tan mal!

Ahora ya todo era cuesta abajo, le pegué la estrella (un transfer de glasa) con un poco de sirope de maíz y di por cumplida la misión ¡Qué alegría!

arbolplanta arbolpicado

Un beso,

Estíbaliz

P.D.: Muchas gracias, Gloria. No la dejamos descansar ni en Navidades

arbolalzado2

Before I start I want to add a word of caution: people suffering from heart disease must refrain from making this tree. During its elaboration you may sob, suffer stress episodes and not every heart can cope with such emotional burden. Yes, I had a rough time.

Now I can keep writing the post. If you are determined to make this tree you will need the following materials:

  • Ice cream cones, as you may have imagined.
  • Parchment paper or cookie bags big enough to cover the cones
  • Royal icing made using 65 ml of water instead do the usual 70, so when we add the food colouring it’s still thick (we are going to work with gravity against us and we do not want our design to end up being a disaster)
  • Tip #4 so the decorations are more robust
  • A  base of cookies so the tree looks as it deserves to do so, even on top of some macarons it may look fantastic
  • Corn syrup to glue the star

We start by cutting the cones, the ones I got didn’t have even edges so I cut them, first with a serrated knife and then with a blunt one to make them smoother.

Then we cut the paper (or the cookie bag) and wrap the cone with it, using some RI to glue it. Now we can start decorating.

Collagecucuruchos

Do not make my very same mistake and get too excited decorating the cone to the bottom, as later on there will be no way for you to manipulate it and it’s really stressful trying not to touch any decoration. And speaking of decorations, try to glue them together so the tree gets more solid.

Let’s continue. Next day I knew the trees were dry, but I delayed the take off moment (and I’m not talking about airplanes here) looking for some other home errands so I didn’t have to ‘face’ those trees. When I ran out of excuses, I dared to remove the cone. That was easy. Now he next step was tricky: taking the parchment paper off. Well, in spite of me being extremely careful, it ended up being a tragedy.

desastre

Ok, it was fine, I still had two more opportunities, which turned into just one. How stressful! But just like that, muses came to visit me and I thought about using the help of a skewer to remove the paper.

brocheta

I introduced the skewer between the RI and the paper and pushed it against the cone’s axe, very softly and with a trembling pulse…and here is where the sobbing appears, I couldn’t believe it! It came off completely and without breaking! What a relief! Thank God it was siesta time and no one saw me, I’d had such a hard time!

Now it was all down the hill, I glued the star (a royal icing transfer) with a bit of corn syrup and then it was mission accomplished.

arbolplanta arbolpicado

Love,

Estíbaliz

P.S.: Thank you very much, Gloria We don’t even let her rest on her holidays