Una receta vieja y un proyecto nuevo – An old recipe and a new project

cerezas3-2

Una receta vieja siempre es buena, las malas no envejecen. Y esta que os traigo hoy además de buena es muy especial porque gracias a ella “conocí” a Sonia Martín. Y ella no lo sabe, pero probablemente lo bien que me salieron estos pastelitos la primera vez que los preparé, es lo que me ha convertido en lo que soy hoy, una repostera valiente.

An old recipe is always good, old recipes never grow old. And this one I bring you today, apart from a good one, is very special because thanks to it I ‘met’ Sonia Martín. And she doesn’t know it, but probably the fact that the first time I prepared these little cakes they came out so nice, it’s what has turned me into what I am today, a brave confectioner.

fotografiaculinaria

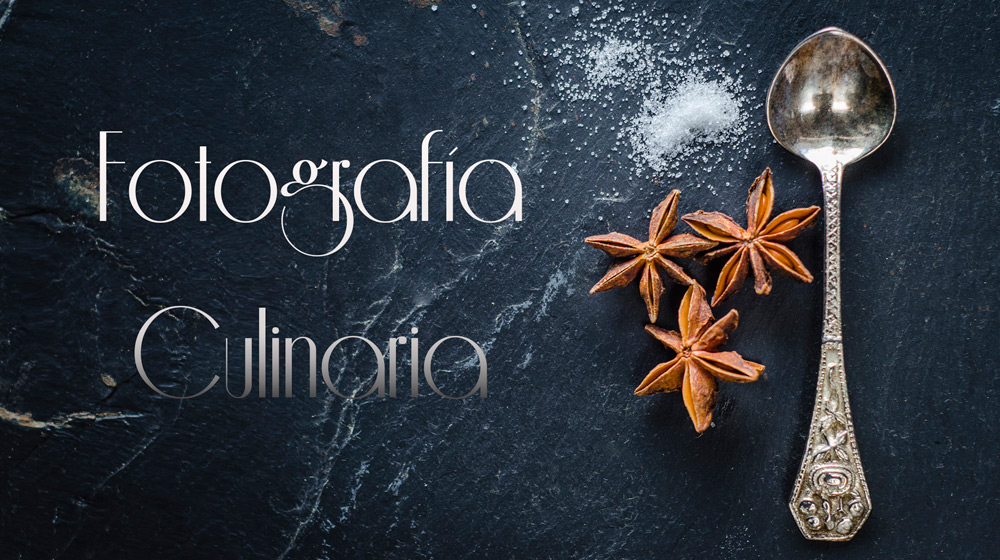
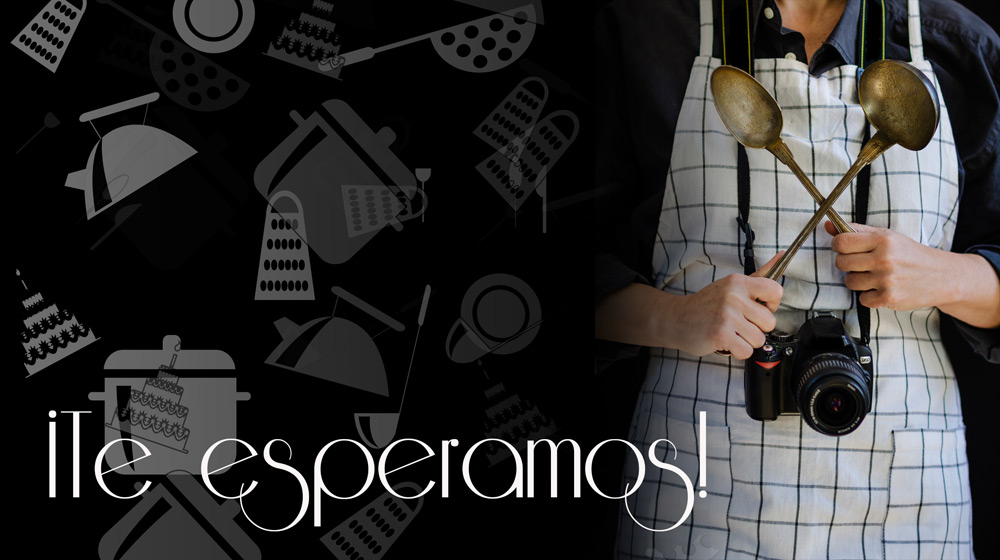
¡Los proyectos nuevos son tan emocionantes! Os cuento como surgió este: Después de años leyendo ¿A que saben las nubes? y recomendando a las alumnas de los talleres de galletas que leyeran ¿A que saben las nubes? Un día le digo a Estíbaliz, “vamos a preguntarle a Sonia que si quiere dar un taller de fotografía culinaria en la tallerería”. No la conocíamos personalmente, ni siquiera compartíamos amistades cibernéticas, nada. Estíbaliz me miró de esa forma que me mira ella, pero le escribió. Y nos dijo que sí. Y en septiembre todos podremos asistir a un completísimo taller en el que en palabras de Sonia:
“Vamos a aprender fotografía, vamos a aprender a fotografiar lo que cocinamos y vamos a aprender a cocinar para fotografiar.”

New projects are so exciting! I will tell you how this one came up: after years reading ¿A qué saben las nubes? and recommending the students in our cookie workshops to read that blog, one day I told Estíbaliz: ‘let’s ask Sonia if she wants to host a workshop about food photography in La Tallerería’. We had never met her in person; we didn’t even share cyber friends, nothing. Estíbaliz looked at me that way she does, but she wrote to her. And she said yes. And in September we will all attend a very complete workshop in which, in Sonia’s words:
‘We will learn photography, we will learn how to photograph what we cook and we will learn how to cook to photograph’.

teesperamos

Nosotras ya hemos asistido a un curso de con Sonia, el de photoshop, así que os puedo asegurar que esta mujer es un pozo inagotable de sabiduría, paciencia y simpatía.

We have already attended a course with Sonia, one about Photoshop, so I can assure you that this woman is an inexhaustible source of knowledge, patience and friendliness.

El jueves a las cuatro abrimos las inscripciones, sí, lo hemos dicho muchas veces en las redes sociales, pero sabemos que muchos de vosotros nos seguís sólo en el blog, y también sabemos que el movimiento se está invirtiendo, la gente está regresando a los blogs porque, seamos sinceros, crea mucho menos estrés leer tus tres o cuatro blogs preferidos que intentar sobrevivir a la vorágine. Así que, aunque parecía que Facebook killed the blog star, finalmente no ha sido así:

Thursday, at four o’clock we will open registrations for the workshop, yes, we have said it many times on our social media, but we do know that plenty of you follow us just via the blog, and we do also know that the movement is inverting, people are going back to blogs because, let’s be honest, it is less stressful to read your three or four favourite blogs than trying to survive the turmoil. So even though it looked as if Facebook killed the blog star, finally it has not been like that:

Vamos con la receta, que es una variación de la receta de Sonia que, a su vez, es una variación de una de las recetas del libro “Cupcakes” de Martha Stewart:

Ingredientes:

  • 60 gr de mantequilla
  • 70 gr de almendras molidas
  • 65 gr de harina
  • 80 gr de azúcar
  • 1 pizca de sal
  • 30 ml de albúmina en polvo + 90 ml de agua (o tres claras de huevo)
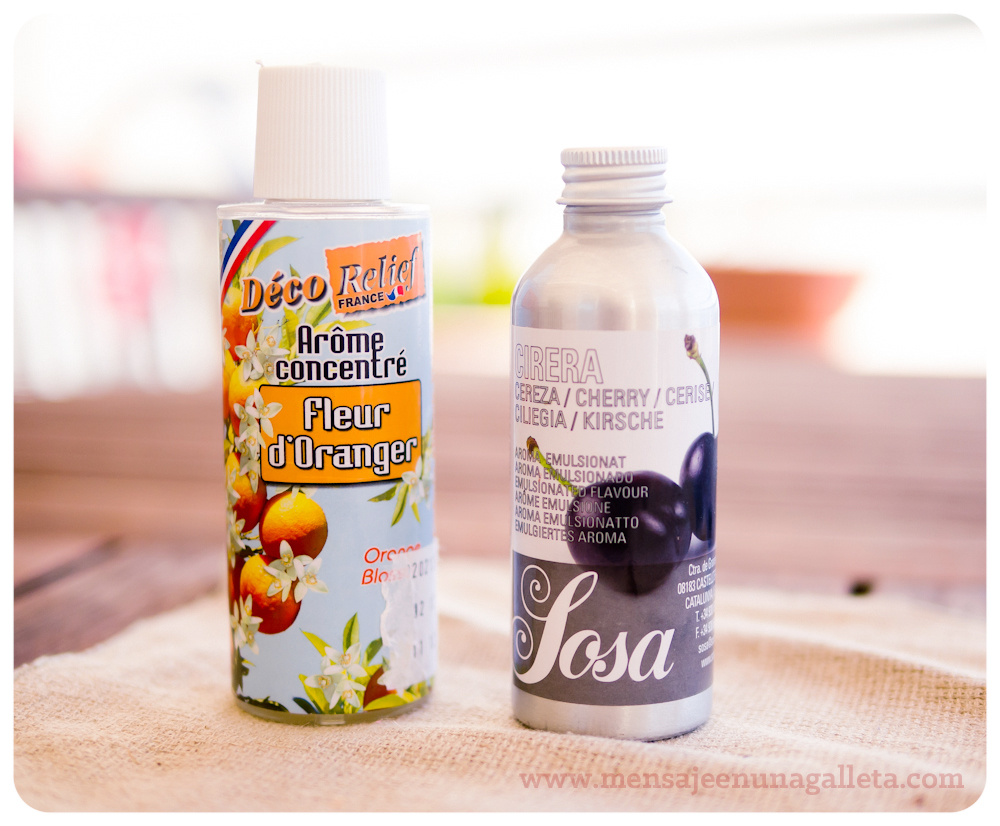
  • 1/2 cucharadita de agua de azahar
  • ½ cucharadita de aroma de cerezas
  • 24 cerezas

Elaboración

Con el agua y la albúmina reconstituíamos las claras y las montamos en la thermo, tres minutos y medio al tres y medio. Si no tenemos albúmina o si lo preferimos, montamos tres claras con otro método.

Let’s go for the recipe, which is a variation from Sonia’s, which at the same time, is a variation of one of the recipes in the book ‘Cupcakes’ from Martha Stewart:

Ingredients:

  • 60 gr butter
  • 70 gr almond flour
  • 65 gr all purpose flour
  • 80 gr sugar
  • 1 pinch of salt
  • 30 ml albumin powder + 90 ml water (or 3 egg whites)
  • 1/2 teaspoon of orange blossom water
  • ½ teaspoon of cherry aroma
  • 24 cherries

Elaboration

With the water and the albumin powder we reconstitute the egg whites and whip them in the Thermomix, 3.5 minutes, speed 3.5. If we do not have albumin powder or if we prefer it, we whip 3 egg whites with a different method.

thermo-2

Mezclamos todos los sólidos y los tamizamos o no, según nuestro humor. Derretimos la mantequilla. Y medimos los aromas.

We mix all the solid ingredients and sift them or not, according to our humour. Melt the butter and measure the aromas.

aromas-2

A continuación lo vamos echando todo por el bocal de la thermo hasta que tengamos una mezcla uniforme.

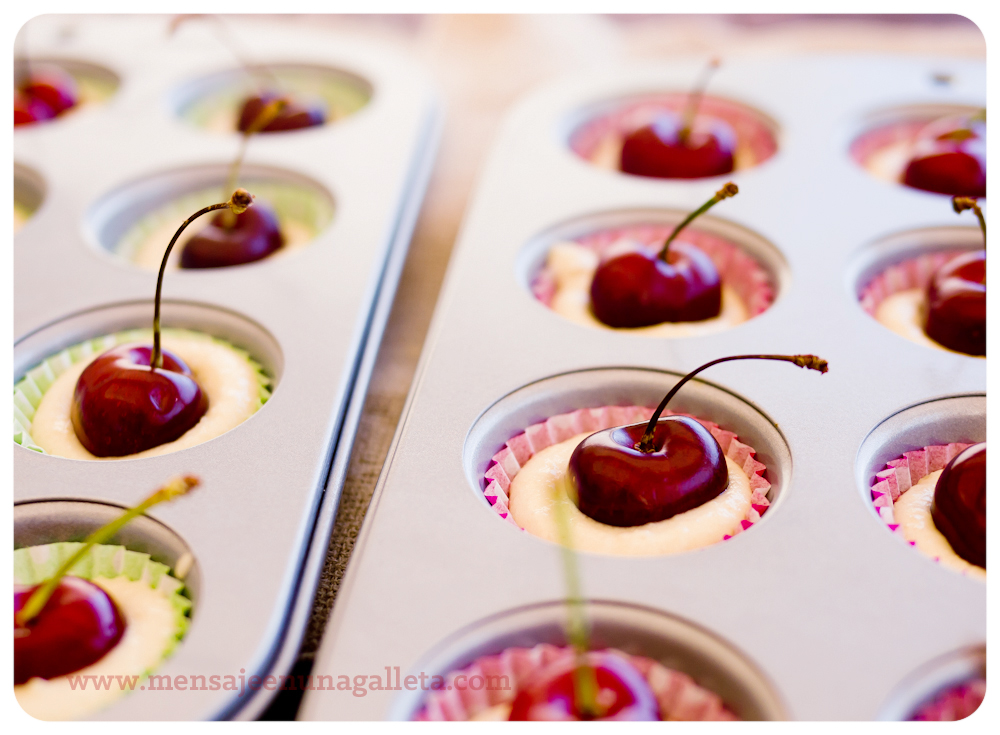
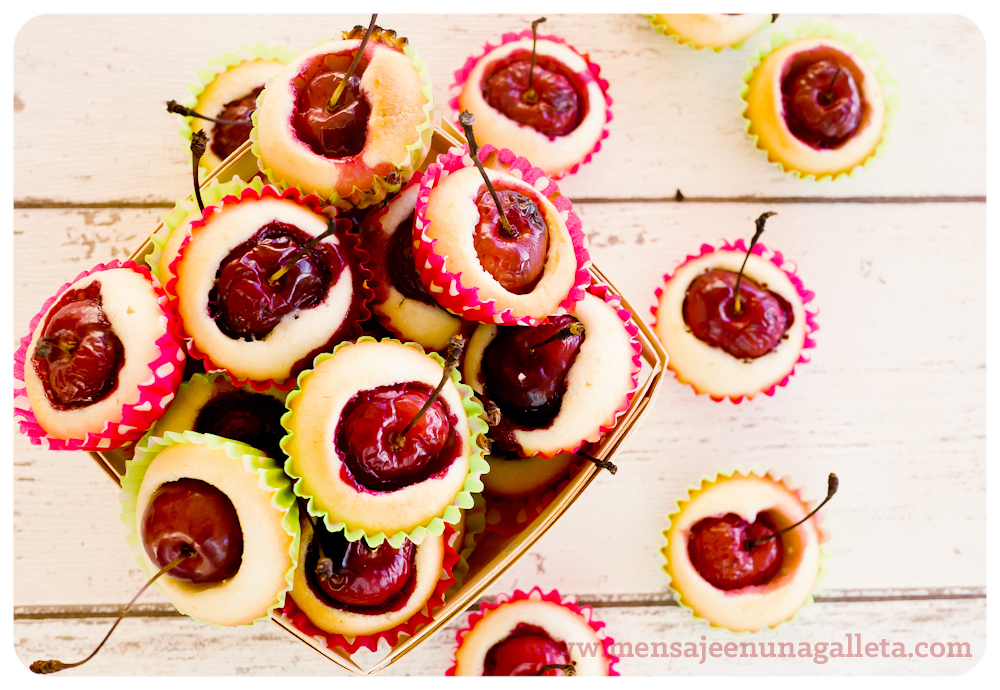
Repartimos la masa en 24 mini papelitos y les colocamos encima las cerezas:

Next, we start adding everything through the lid hole of the Thermomix until we get a uniform mix.

We distribute the batter in the 24 mini cupcake liners and put a cherry on top:

cerezas0-2

Horneamos unos 12 minutos. Y dejamos enfriar sobre una rejilla.

Bake for 12 minutes. Let cool down on a rack

cerezas-2

Después advertimos a nuestros invitados sobre el hueso de la cereza o no, dependiendo de nuestro humor.

Then, we warn our guests about the cherry pit or not, depending on our humour.

cerezas2-2

Un beso, Miriam G.

A kiss, Miriam G.

Thank you, thank you, thank you Gloria.

Como hacer mariquitas rellenas de floresHow to make ladybugs filled with flowers

Para hacer las mariquitas que aparecen en el vídeo necesitamos armarnos de paciencia y además:

-Masa de chocolate

-Masa de mantequilla

– Bolitas negras para los ojos (Y unas gotitas de glasa negra para pegarlos)

-Unas gotitas de glasa blanca para el centro de las flores

Empezamos por la recta de mantequilla, esta vez con sabor a coco. Hace tiempo que no lo decía, se tarda exactamente lo mismo en preparar una receta despacio que deprisa. Pero si lo hacemos deprisa manchamos más y nos sale peor. Yo siempre pongo todos los ingredientes en cuencos antes de comenzar, parece a priori que da más trabajo, pero lo ahorra. Y sobre todo evita errores.

– 100 gramos de azúcar glas

– 50 gramos de sirope claro de maíz, si no tenemos lo sustituimos por otros 50 gramos de azúcar, pero el sirope aporta elasticidad a la masa. Y creedme cuando os digo que nos vendrá bien.

– 225 gramos de mantequilla a temperatura ambiente.

– 1 huevo pequeño, ecológico o de corral. (Nosotras siempre usamos huevos cuya numeración empieza por cero o por uno)

– Una cucharadita de sal.

– 400 gramos de harina.

– Una cucharadita de aroma de coco. El coco y el chocolate combinan a la perfección. Podéis elegir cualquier otro aroma transparente que os guste o simplemente no usar ninguno.

– Colorantes alimentarios. Esta vez he utilizado colorantes en polvo modecor  Y estoy encantada, al ser en polvo no cambian la textura de la masa, pero lo mejor es que no le dan ningún sabor. Esta semana pienso hacer un pedido a HelloCakes.es y agenciarme media tonelada de cada.

masmariquitas

Batimos un poco la mantequilla, el azúcar, la sal, sólo para mezclar los ingredientes sin añadirles aire. A continuación añadimos el sirope de maíz, el huevo, el aroma y volvemos a mezclar. Cuando tenemos una especie de crema de textura uniforme, añadimos la harina en dos o tres veces. Amasamos y dejamos reposar.

El último paso es teñir la masa del color que queramos hacer las mariquitas. Yo usé siete diferentes con la intención de formar un arco iris, pero intercambié las posiciones del amarillo y del naranja. Cuando quise darme cuenta ya se las habían comido.

error

Para la receta de chocolate los ingredientes son:

– 100 gramos de azúcar glas.

– 50 gramos de sirope claro de maíz, si no tenemos lo sustituimos por otros 50 gramos de azúcar.

– 125 gramos de mantequilla a temperatura ambiente.

– 1 huevo pequeño, ecológico o de corral.

– Una cucharadita de sal.

– 50 gramos de cacao puro en polvo Valor

– 230 gramos de harina

– Una cucharada de aroma de vainilla.

– Colorante alimentario negro.

Batimos la mantequilla ligeramente, le añadimos el azúcar, después el sirope de maíz, el cacao Valor, la sal, el huevo, el colorante y por último la harina en dos veces. Cada vez que añadimos uno de los ingredientes batimos para que se integre.

Tenemos listas nuestras dos masas. Ahora vamos a ver las herramientas que necesitamos. No son muchas ni muy raras.

– Mi super rodillo Joseph&Joseph nuevo y reluciente, cortesía de Mummy Crafts.

– Molde de silicona con cavidades semiesféricas.

– Tres cortadores de galletas redondos de tamaño decreciente, el más pequeño de los tres tiene que tener un diámetro similar al de las semiesferas.

– Dos cortadores redondos muy pequeñitos. (Sí, de fondant, pero ya sabéis cual es mi teoría, no existen cortadores de fondant, sólo cortadores para galletas pequeñas)

– Un cortador pequeño de flor.

– Un cortador cuadrado grande.

masanegra

Fijaos en la foto:

1 – Con el cortador mediano cortamos un círculo

2- Colamos el círculo sobre la semiesfera y ajustamos con los dedos.

3- Con el cortador redondo pequeño cortamos el exceso de masa.

P1160373

¿Preparadas para sufrir? Estiramos la masa coloreada en caliente con un grosor de 2 mm. Lo hacemos sobre un trozo de papel de hornear para que podamos transportarla y separarla con “facilidad”. Marcamos el círculo grande y con el cuadrado definimos las intersecciones.

Estiramos lo más fina que podamos la masa negra y la metemos unos minutos al congelador. Cortamos pequeños circulitos y los incrustamos en la masa coloreada. Lo hacemos con cuidado y con el dedo, creo que se pueden sacar mis huellas dactilares de la foto.

Colocamos sobre las semiesferas negras con muchísimo cuídado, apretamos y retiramos el exceso otra vez con el cortador pequeño, pero esta vez mucho más despacio, y con menos presión, para que no llegue a verse la masa negra de debajo. Horneamos unos 8 o 9 minutos a 180º C.

thinkorange

Con el cortador de galleta pequeña preparamos círculos y sobre ellos colocamos círculos diminutos, seis, que simularán las patitas del insecto. No hace falta ningún pegamento, se unen en el horno.

patitas

Cortamos y horneamos millones de flores minúsculas. Y les colocamos un puntito de glasa blanca en el centro.

flores

Finalmente rellenamos la mariquita de flores y la colocamos sobre sus patitas.

rellenoflores

Y por último, tras un par de días de mucho trabajo, casi sin haberles sacado ninguna foto a tus preciosas galletas, te sientas y observas (con terror) desde la distancia como un grupo de ¿niñas? las devoran.

Un beso, Miriam G.

In order to make the ladybugs that appear in the video, we need a lot of patience and:

-Chocolate cookie dough

-Butter cookie dough

-Little black balls for the eyes (and a drop of black royal icing to glue them)

-A few drops of white royal icing for the centre of the flowers.

We start with the butter cookie recipe, this time with coconut flavor. I have not say this for a while but it takes exactly the same to prepare a recipe slowly than quickly. But if we do it quickly, we make a mess and the result will come out worse. I always separate all the ingredients in bowls before I start, it seems to be more work for us but in the end it’s not. And most of all, it prevents us from making mistakes.

-100 grams of icing sugar

-50 grams of Light corn syrup, if we do not have it, we will add another 50 grams of
sugar, but the syrup gives elasticity to the dough. And believe me when I tell you it
will be useful.

-225 grams of butter at room temperature.

-1 organic or free-range egg, size S. (We always use eggs whose numeration starts with zero or one)

– A teaspoon of salt.

– A teaspoon of coconut flavour. Coconut and chocolate are a perfect combination. You can choose any other transparent flavour that you like, or simply not to use it.

– 400 grams of flour.

– Food coloring. This time I have used Modecor dust colors.and Iam very pleased, they do not change the dough texture, and the best thing is that they do not add any flavour to it. This week I will order half a ton of each color from HelloCakes.es.

masmariquitas

We beat butter, sugar, and salt just enough to mix the ingredients without incorporating air to the mixture. Then we add the light corn syrup, the egg, flavour and mix again. When we have a cream with a smooth texture, we add the flour in two or three times. We knead for a while and let the dough rest.

The last step is to dye the dough in the colour we want for our ladybugs. I used seven different colours with the intention of creating a rainbow, but I swapped the positions of yellow and orange and when I noticed it, those cookies were already gone.

error

For the chocolate cookie recipe the ingredients are:

-100 grams of icing sugar

-50 grams of light corn syrup; if we don’t have it we will add another 50 grams of sugar.

-125 grams of butter at room temperature.

-230 grams of flour.

-1 organic or free-range egg, size S.

-A teaspoon of salt.

– 50 grams of Valor pure powdered cocoa.

– A teaspoon of vanilla aroma.

-Black food colouring.

With our two types of dough ready, now we are going to see what tools we need. They are not too many or too hard to find.

-My super brand new Joseph&Joseph rolling pin, courtesy of MummyCraft.

-A silicon mould with semicircular cavities.

-Three round cookie cutters, decreasing in size, the smallest has to have a diameter similar to the one of the semicircular cavities.

-Two very small round cutters. (Yes, fondant cutters, but you already know my theory, there are no such things as fondant cutters, just cutters for very small cookies).

-A small flower cookie cutter

-A big square cookie cutter

masanegra

Take a look at the pictures:

1-With a medium size cutter we cut a circle.

2-We put that circle of dough on the semicircular cavities and adjust using our fingers.

3-With the small round cutter we cut the dough excess

P1160373

Ready to suffer? We roll out the coloured dough, warm, 2 mm thick. We do it on a sheet of parchment paper so we can transport it and separate it ‘easily’. We mark the big circle and with the square cutter we mark the intersections.

We roll out the black dough as thin as we can and put it in the freezer for a few minutes. We cut small circles and embed them in the coloured dough. We will do it very carefully and using a finger, actually I think you can even get my fingertips from the picture.

We place them on the semicircles very, very carefully, press a bit and remove the excess again using the small cutter, but this time very slowly and applying less pressure so the black dough underneath is not visible. We bake for 8 or 9 minutes at 180º

thinkorange

Using the small cookie cutter we make some circles and place minuscule circles on them, six to be precise, which will simulate the tiny insect legs. There’s no need for glue, they will get fixed in the oven.

patitas

We cut and bake millions of tiny flowers. We add a small drop of white royal icing in the centre.

flores

Then, we fill the ladybug with flowers and place them on their tiny legs.

rellenoflores

And finally, after a couple of days of hard work, and having taken just a few pictures of your beautiful cookies, you sit down and (terrified) you observe from a distance how a group of girls? devour them.

Love, Miriam G.

Cucharitas de caldo Aneto y chorizo del Bierzo – Chorizo cookies

cucharitasaneto

A mis hijas si les pinchas en una vena no les sale sangre, les sale caldo Aneto de pollo. Les encanta y lo toman en cantidades industriales. Ésta es la respuesta a por qué no tengo kitchenaid, me gasto todo el presupuesto en caldo Aneto. He preparado esta receta en homenaje al caldo que lleva en mi casa una década y al chorizo de mi tierra. Sí, también lleva un poco de queso francés, pero cuantas más cosas buenas le eches a una receta, en general, más rica está.

If you puncture my daughters’ veins you will get no blood but Aneto chicken stock. They love it and have it in industrial quantities. This is the reason why I do not have a Kitchen Aid, I spend all my budget in Aneto chicken stock. I have prepared this recipe in homage to this brand, which has been present at home for a decade, and to my hometown chorizo. Yes, the recipe also contains a bit of French cheese, but the more good things you put into a recipe, the tastier it is.

Es sencillísima de preparar y no manchamos casi nada. La única complicación es la albúmina, si no disponéis  de ella podéis sustituirla por un huevo y entonces tenéis que reducir la cantidad del caldo a la mitad, no estarán tan tan buenas, pero estarán muy buenas, os lo aseguro.

The recipe is very easy to prepare and your kitchen will barely get dirty. The only complication is the albumin, if you don’t have any; you can use an egg, but then you will have to reduce the amount of stock by half, they will not be so nice, but I assure you they will be very good anyway.

galletitasaneto

Empezamos por los ingredientes:

• 250 gr de harina

•  1/2 cucharita de sal

• 1 cucharita de polvo de hornear (impulsor)

• 125 gramos de mantequilla

• 50 gramos de gruyere

• 2 cucharadas de albúmina en polvo

• 100 ml de caldo aneto

• 100 gramos de chorizo del Bierzo

Let’s start with the ingredients:

• 250 grams of flour

• 1/2 teaspoon of salt

• 1 teaspoon of baking powder

• 125 grams of butter

• 50 grams of gruyère cheese

• 2 tbsps of albumin powder

• 100 ml Aneto chicken stock

• 100 grams of chorizo from El Bierzo

Seguimos con la elaboración.

Picamos el chorizo lo más fino que nos permita nuestro robot de cocina y lo reservamos.

Rallamos el gruyere lo más fino que nos permita nuestro rallador y lo  reservamos.

Derretimos la mantequilla y … efectivamente, la reservamos.

Mezclamos la harina con la sal y el impulsor y reservamos la mezcla.

En nuestro robot de cocina batimos a muy alta velocidad el caldo Aneto y la albúmina. Cuando ya no queden grumos batimos un rato más hasta obtener una espuma. Añadimos la mantequilla que ya se habrá atemperado y el queso, seguimos batiendo. Añadimos la mezcla de la harina en tres veces y, por último, el chorizo.

Sacamos la masa del robot, la ponemos sobre una superficie enharinada, amasamos unos segundos y cuando la masa se vuelve manejable, no tarda mucho, la envolvemos en papel film y la metemos en la nevera una media hora. La sacamos, la estiramos a unos 3 ó 4 mm y vamos cortando las cucharas, o de cualquier otra forma con un cortador.  Horneamos las galletas entre 12 y 15 minutos a 180 º C  o hasta que veamos que están bien cocidas.

Elaboration:

We chop the chorizo as thin as possible using our kitchen robot and set aside. Grate the cheese as well as thin as our grater let us and set aside.

Melt the butter and yes…set aside.

Mix flour, salt and baking powder and reserve.

Using a kitchen robot we mix the Aneto stock and the albumin at maximum speed. When there are no lumps we keep mixing for a little more until obtaining some froth.

We add the butter, already tempered, and the cheese. We keep mixing.

Add the flour mix in three times and finally the chorizo.

We take the dough out of the robot, place it on a floured surface, knead for some seconds and when it turns manageable (it doesn’t take very long), wrap it in cling film and keep it in the fridge for half an hour. After that, roll it out, 3-4 mm thick, and cut the spoons, or any other shape depending on the cutter we use. Bake the cookies for 12-15 minutes at 180ºC or until we see they are well done.

cucharita

Cómo hacer props para fotos. How to create props for photographs

tiramisuvistafrontal

Uno de los principales quebraderos de cabeza a la hora de hacer fotos para un blog de cocina, no sólo son las recetas en sí, sino todo el attrezzo o props que salen en la foto. Hace unos días nos compramos unos cortadores de cuchara y Miriam me comentó lo monas que quedarían unas cucharas de colores con esos cortadores. Efectivamente, con los electric colors de Americolor y empleando la técnica del doble horneado y la técnica para conseguir galletas azules, así fue.

One of the main headaches when it comes to photographing food for a blog, it is not just the recipes themselves, but all the attrezzo or props that you can see in the photos. Some days ago we bought some spoon cutters, and Miriam said that some colourful cookies using those cutters would be really cute. And she was right. I made the cookies using the Electric Colours from Americolor, the double baking technique and the steps for making blue cookies.

tiramisucucharas

Vale, ya tenía mis props, ahora faltaba lo más «fácil», la receta. Como en casa tenía muchos huevos, aproveché para hacer un tiramisú, todo un clásico. En lugar de usar bizcochos de soletilla, hice una plancha de bizcocho sin levadura pero que lleva mucho aire incorporado durante la elaboración.

Ok, I already had my props, now ‘the easiest’ part was missing: the recipe. As I had a lot of eggs at home, I prepared a classic dessert, tiramisu. Instead of using ladyfingers, I made a sheet of sponge cake with no baking powder in it but incorporating a lot of air to the batter.

Ingredientes para el «falso» bizcocho

120 gr de azúcar, 120 gr de harina de fuerza, 4 huevos, un pellizco de sal y una cucharadita de vainilla en pasta

Ingredients for the ‘false’ cake

120 grams of sugar, 120 grams of strong flour, 4 eggs, a pinch of salt and a teaspoon of vanilla paste.

Ingredientes para el resto del tiramisú

100 gr de azúcar glas, 5 yemas de huevo, 500 gr de queso mascarpone, nuevamente una cucharadita de vainilla en pasta, café ya enfriado y cacao en polvo para decorar.

Ingredients for the rest of the tiramisu

100 grams of icing sugar, 5 egg yolks, 500 grams of mascarpone cheese, another teaspoon of vanilla paste, some cooled coffee and cocoa powder for decorating.

Vayamos con la preparación del bizcocho.

Introducimos la harina y batimos a velocidad 6 durante 1 minuto para tamizarla y la reservamos. Ponemos los huevos y el azúcar en el vaso, acoplamos la mariposa, seleccionamos temperatura 37 grados y, durante 5 minutos, batimos a velocidad 3 y medio. Paramos la máquina, quitamos la temperatura y batimos otros 5 minutos a la misma velocidad.

Let’s go for the cake elaboration.

We put the flour in the Thermomix bowl and mix on speed 6 for 1 minute to sift. Set aside. We put the eggs and the sugar in the bowl, attach the butterfly, select 37º, and mix on speed 3.5 for 5 minutes. We turn the robot off, no temperature, and mix for another 5 minutes using the same speed.

A continuación, echamos la mezcla en un bol y añadimos la harina poco a poco, mezclando con una espátula suavemente para no eliminar las burbujas de aire que contiene la mezcla. Ponemos un papel de horno encima de una bandeja con tapa, como ésta de Bra, y vertemos ahí la mezcla.

Then we put that mixture in a bowl and start adding the flour little by little, stirring very softly with a spatula trying not to eliminate the air bubbles of the batter. We cover a lidded tray like this one from Bra with parchment paper and pour the batter in it.

bizcochoantesdehornear

La altura del bizcocho es de un cm de grosor aproximadamente. Horneamos durante 25 minutos a 180 grados

The cake height is approximately 1 cm. We bake it at 180ºC for 25 minutes

bizcochohorneado

En este punto, podemos cortar varios rectángulos de bizcocho o bien, usar un cortador circular del tamaño de unos vasos bajos que tengamos para montar las capas.  Si usáis el cortador, podréis comprobar cómo se oye un ssssshhhhhhhhh cuando lo apretéis contra el bizcocho.

This is the moment when we can either cut several cake rectangles or use a round cutter, the size of a rock glass, to arrange the layers. If you use the cutter, you will hear a kind of sssssshhhhhh when you press it against the cake.

Vamos ahora con la elaboración de la parte cremosa.

Batimos las 5 yemas con el azúcar y la vainilla a velocidad 3 y medio con la mariposa de nuevo durante 3 minutos. Incorporamos el queso y batimos a la misma velocidad durante 2 minutos y ni un minuto más porque si batimos en exceso, el queso pierde toda su cremosidad y pasa a ser completamente líquido.

Now, the elaboration of the creamy part.

We whisk the 5 egg yolks with the sugar and vanilla on speed 3.5, butterfly attached, for 3 minutes. Add the cheese and whisk on same speed for 2 minutes, not a second more, because if we over mix, the cheese will lose all its creaminess and will be completely liquid.

Llegamos al montaje.

En el recipiente que hayamos seleccionado, ponemos una capa de bizcocho, vertemos un poco de café sobre él hasta que se empape y después ponemos una capa de crema. Seguimos sucesivamente hasta terminar en una capa de crema que espolvorearemos con cacao, adornamos con nuestras preciosísimas cucharas y damos por finalizada la receta.

Assembling the dessert

In the glass/bowl we have selected, we put a cake layer, pour a little bit of coffee on it until it is soaked and then add a cream layer. We repeat the process until we finish with a cream layer that we will dust with cocoa powder. Decorate using our precious spoons and the recipe is done.

tiramisusdesdearriba

Por cierto, hice también algunas cucharas de chocolate que no sé si van a llegar para la próxima sesión de fotos 😉

By the way, I also made some chocolate spoons which I doubt will survive the next photo shoot  😉

Un beso/Love

Estíbaliz

PS: Once again, thank you Gloria!