Galletas de jengibre para decorar, la receta definitiva. Gingerbread cookies to decorate. The definitive recipe.

genjibrecandela

A la pregunta ¿Existe un cortador de hombrecillo de jengibre tan grande? La respuesta es sí, lo venden Alemania, y una buena amiga me lo ha mandado, ¡gracias Lola! Es estupendo.

El gusto español, y por gusto me refiero al sentido, es delicado. Al español medio, una cantidad moderada de picante le pica una barbaridad, y una cantidad razonable lo lleva a urgencias. Lo mismo ocurre con las especias, si lleva alguna, ya lleva muchas, y si lleva muchas solo por el olor rechaza el plato. No es mi caso, mastico los chiles, y abuso de las especias cuando cocino, pese a esto, las galletas de jengibre me gustan suaves, quizá porque el jengibre no me gusta nada. He estado a punto de no echarle, pero me pareció complicado “vender” la receta definitiva de galletas de jengibre, sin jengibre. Pero no importa, si te gusta con mucho jengibre échale más, o si quieres añádale cayena, yo no le puse por las niñas, cambiará el sabor, pero no la textura, ni facilidad con la que se corta y se trabaja con esta masa.

Ingredientes:

– 100 gramos de azúcar moscabado, lo sé, me he enamorado, se lo pongo a todo. Pero si no tienes puedes ponerle azúcar moreno, cuanto menos refinado mejor.

– 75 gramos de miel de caña. Yo he usado una malagueña facilísima de encontrar, al menos aquí.

– 200 gramos de mantequilla a temperatura ambiente.

– 1 huevo pequeño.

– 400 gramos de harina, más la que admita.

– 1 cucharadita de nuez moscada en polvo.

– 1 cucharadita de jengibre en polvo.

– 1 cucharadita y media de pimienta rosa (o una de pimienta negra).

– 2 cucharaditas de canela.

Preparación:

Ponemos en la thermomix o en un molinillo el azúcar y las especias, bolitas de pimienta rosa incluidas, y molemos hasta obtener un polvo fino. Añadimos la mantequilla y mezclamos bien. Añadimos el miel de caña y el huevo y batimos hasta tener una pasta uniforme, añadimos los 400 gramos de harina en dos veces y mezclamos muy bien. Ponemos la masa sobre un tapete enharinado y vamos añadiendo poco a poco la harina que nos pida, cuando no nos pida más amasamos un poco y aplanamos con la mano hasta obtener una altura que sea más o menos el doble de la que queramos para las galletas, enfriamos un rato en el frigorífico y estiramos. Estirar la masa fría nos garantiza una superficie lisa. Volvemos a enfriar y cortamos y horneamos.

horno

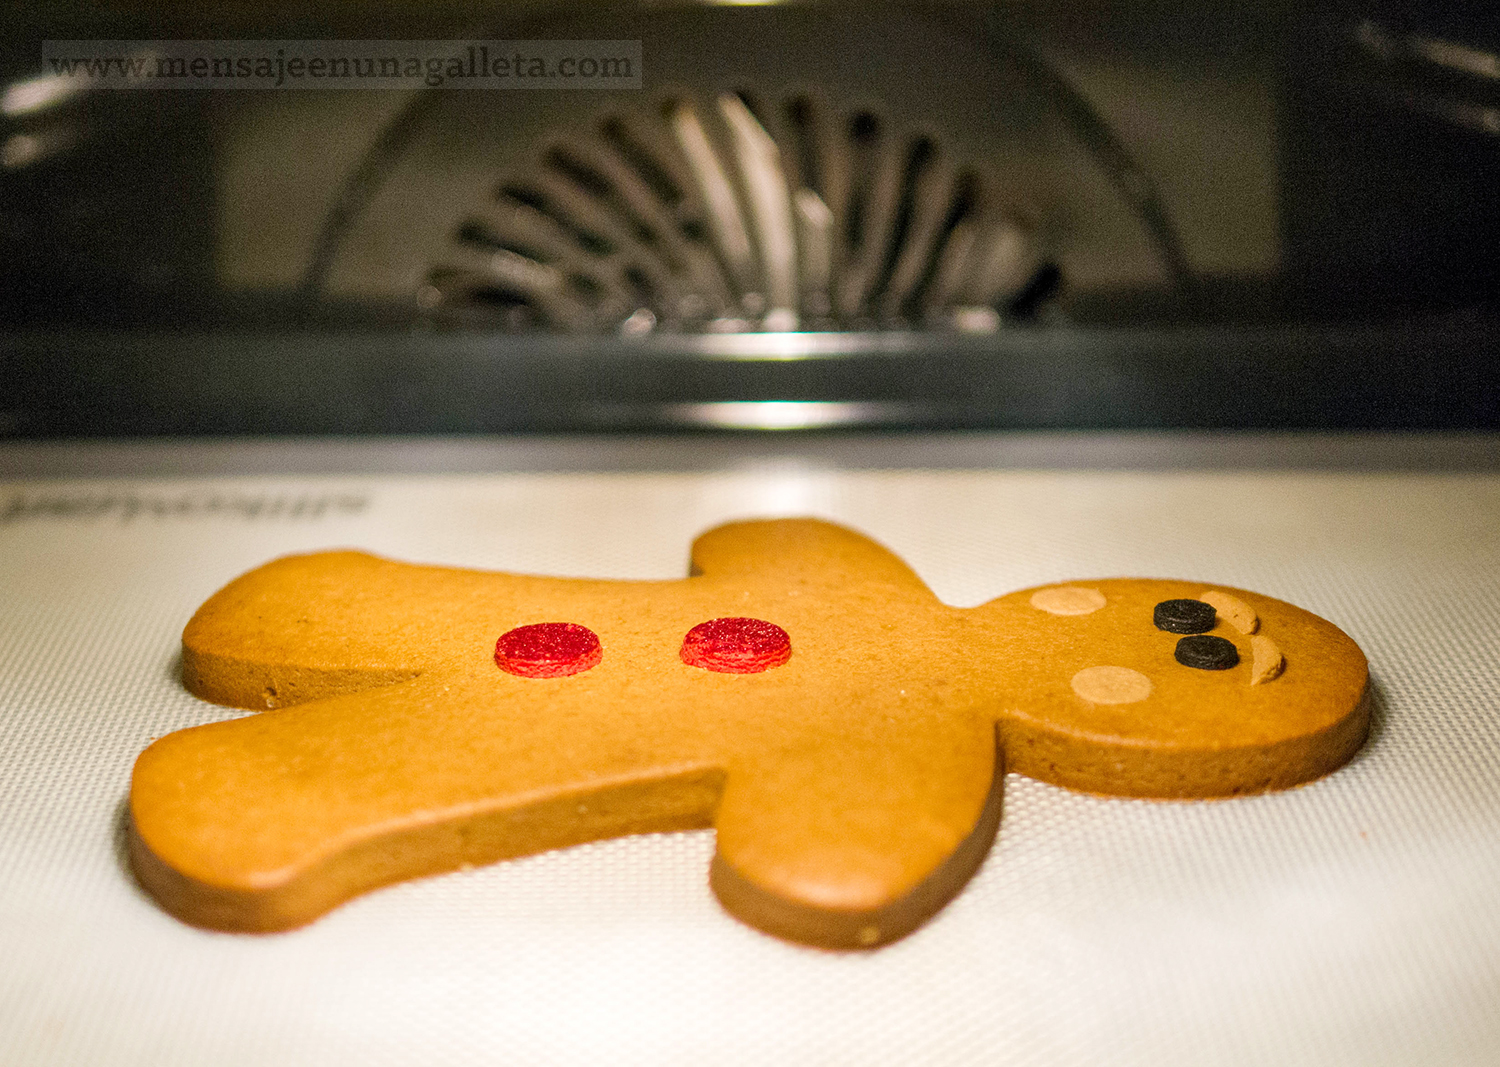
Truco para hornear megagalletas: Hornear 10 minutos a 180 grados o hasta que la masa se vuelva mate, bajar la temperatura a 150 grados y hornear otro buen rato, 15 minutos en mi caso. Apagar el horno y dejar la galleta dentro todo lo que podamos.

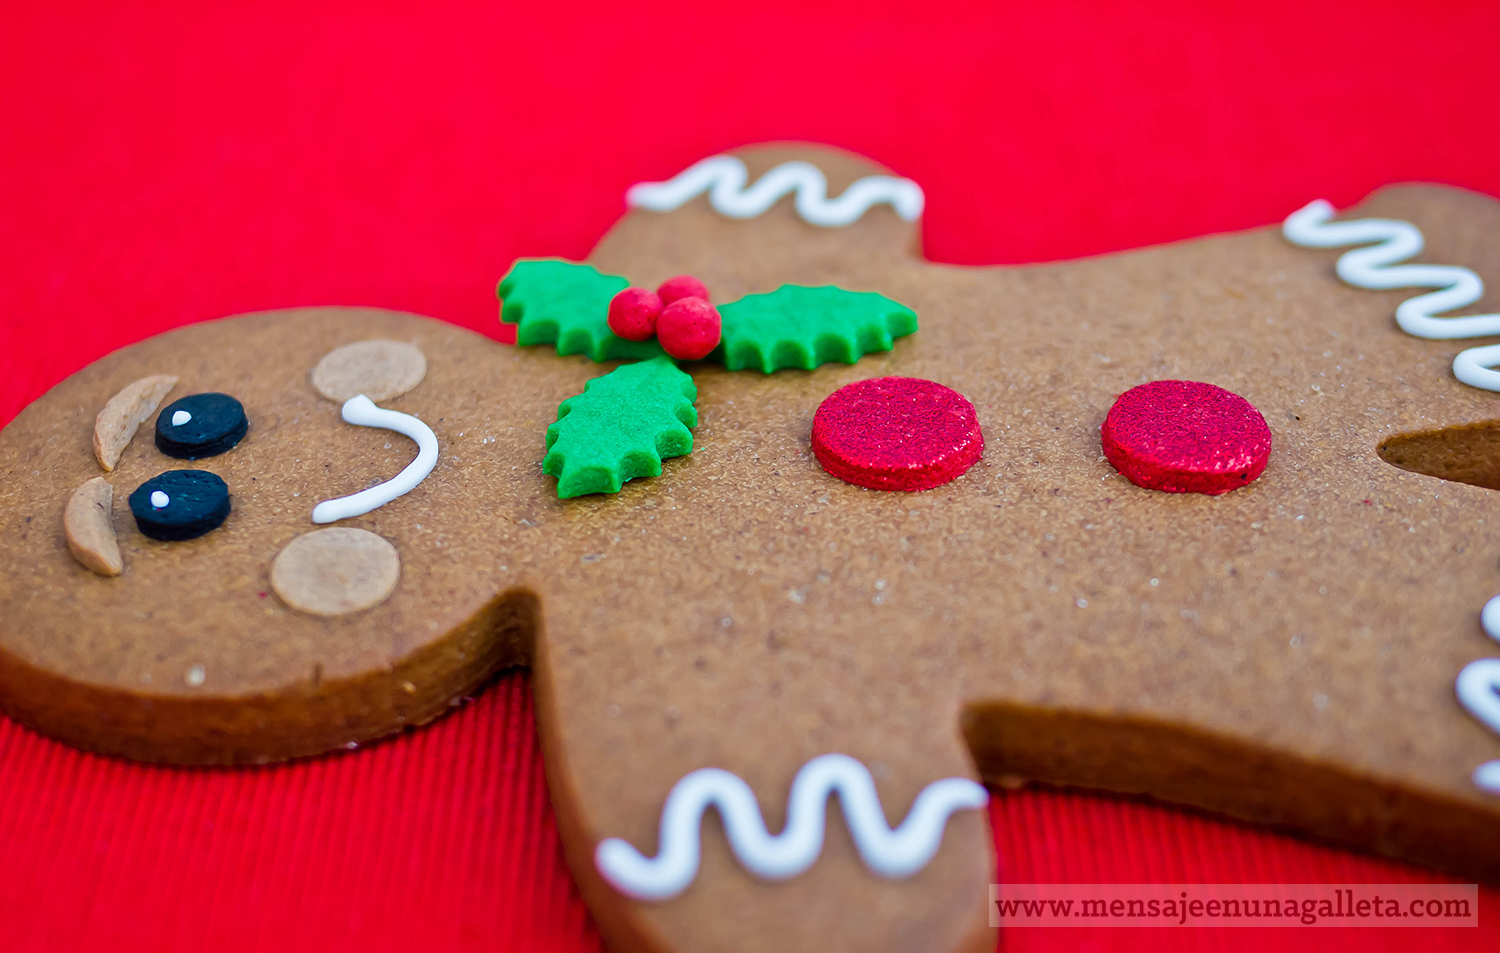
Y ahora vamos con la decoración. Lo blanco es glasa, todo lo demás es masa. Y casi toda la masa de decoración va al horno junto con el hombre de jengibre porque así se pega:

detalles

– Los ojos son de masa de chocolate coloreada de negro, la preferida de mis hijas, se los arrancaron y se los comieron lo primero

– Cejas son de masa de jengibre con un pelín de colorante blanco.

– Coloretes, de masa de jengibre también, muy muy finos, de menos de 1 mm. Os cuento cómo lo hago, cojo el rodillo blanco de fondant sin ninguna anilla, estiro la masa finísima y marco el círculo, enfrío y, muy frío, saco el círculo y lo coloco sobre el muñeco. Nota, tengo las manos heladas, eso ayuda.

– Botones, son de masa de vainilla roja, con purpurina. Y sí, la purpurina se puede hornear. Se estira la masa roja y se extiende sobre ella purpurina roja, después se corta.

Transfer de masa pegado con glasa al muñeco:

– Acebo, masa de vainilla coloreada. Las hojas las he cortado con un cortador con expulsor. No existe esa cosa… ¿Cómo se llama? ¿Cortadores de fondant? Solo es que algunas galletas son grandes y otras más pequeñas. Las bolitas rojas también son de masa, si las horneas juntas se pegan.

Y por fin la glasa, para boca, brazos, piernas y pupilas.

genjibremaria

Por favor, cuando probéis la receta contadme qué os ha parecido.

Un beso, Miriam G.

(¡Muchísimas gracias Gloria!)

genjibrecandela

The question: is there a gingerbread man cookie cutter that big? The answer is yes, they sell it in Germany, and a good friend has sent it to me. Thanks Lola! It’s great!

Spanish taste, and by taste I mean the sense, is delicate. For the average Spaniard, a moderate amount of spice tastes super spicy, and a reasonable amount of it, takes him to the E.R. immediately. The same happens with spices themselves, if you add some, they seem to be too many, and if you add a lot of them, just the smell makes you reject the dish. It’s not my case, I chew chili peppers, and I abuse them when I cook. In spite of this, I like my gingerbread cookies to have a delicate flavor, maybe because I do not like ginger at all. I have been about not to use it, but then it would have been complicated to ‘sell’ the definitive gingerbread cookies recipe without any ginger at all. It doesn’t matter, if you like ginger, add more, or add some cayenne if you prefer; I didn’t use it because my girls don’t like it, it will change the flavor a bit, but not the texture, and the dough will be equally easy to cut and work with.

Ingredients:

– 100 grams of muscovado sugar; I know, I’m in love with it, I use it in every recipe, but if you don’t have it, you can use brown sugar, the less refined the better. 

–  75 grams of cane honey. I’ve used a local brand, very easy to find in this area.

–  200 grams of butter, room temperature.

– 1 egg (S)

–  400 grams of flour, plus whatever amount it needs.

–  1 tsp. of powdered nutmeg

–  1 tsp. of powdered ginger.

–  1 ½ of pink pepper (or 1 tsp of black pepper).

–   2  tsp. of cinnamon

Elaboration:

In the Thermomix or in any other robot we grind the sugar and the spices, pink pepper seeds included, until we get a fine powder. Then we add the butter and beat well. Add the cane sugar and the egg and beat until obtain a uniform dough. Incorporate the 400 grams of flour in two batches and mix very well. Put the dough on a floured surface and little by little start adding all the flour it needs; when it asks for more, we knead a bit and flatten the dough until we get a height that is more or less double the one we want for our cookies. Let it cool in the fridge and roll out. When we roll it out cold, this guarantees us a complete smooth surface. We put it back in the fridge and after a while we cut it and bake it.

horno

A trick to bake huge cookies: bake them for 10 minutes, 180ºC or until the dough gets matt, then lower the temperature to 150ºC and bake for another 10 minutes, 15 in my case. Turn off the oven and let the cookies inside for as long as you can

Let’s go with the decoration.  The white you see on the cookie is royal icing, the rest is dough. And most of the dough used as decoration goes into the oven with the gingerbread man, as that’s the way it sticks to the cookie:

detalles

– The eyes are made with chocolate dough dyed in black, my daughters’ favorite, that’s why they plucked them out and ate them first. 

– The eyebrows are made with gingerbread dough with a bit of white food coloring.

– Blush: very thin gingerbread dough, less than 1mm. I tell you how I make it: I take the white rolling pin that you use with fondant, and without any of the leveling rings I roll out the dough extremely thin, mark the circle, cool the dough, and when it is very cold I take the circle out of the dough and put it on the gingerbread man. Note: my hands are very cold, that helps.

– Buttons are made of red vanilla dough, with some glitter. Yes, glitter can be baked. You roll out the red dough, put the glitter on it and then cut it. 

Dough transfer glued to the cookie using royal icing:

–          Holly leaves are made with colored vanilla dough. Leaves have been cut using a plunger cutter. That thing…how do you call it? Fondant cutters? They do not exist. It’s just that some cookies are big and others are small. The small red balls are also made from dough. If you baked them together, they will glue to each other.

And finally, some royal icing for the mouth, arms, legs and pupils.

genjibremaria


When you try this recipe, please let me know what you thinUn beso, Miriam G.k.

A big kiss, Miriam G.

( Thanks Gloria!)

Menta y chocolate – Mint and chocolate

corte1

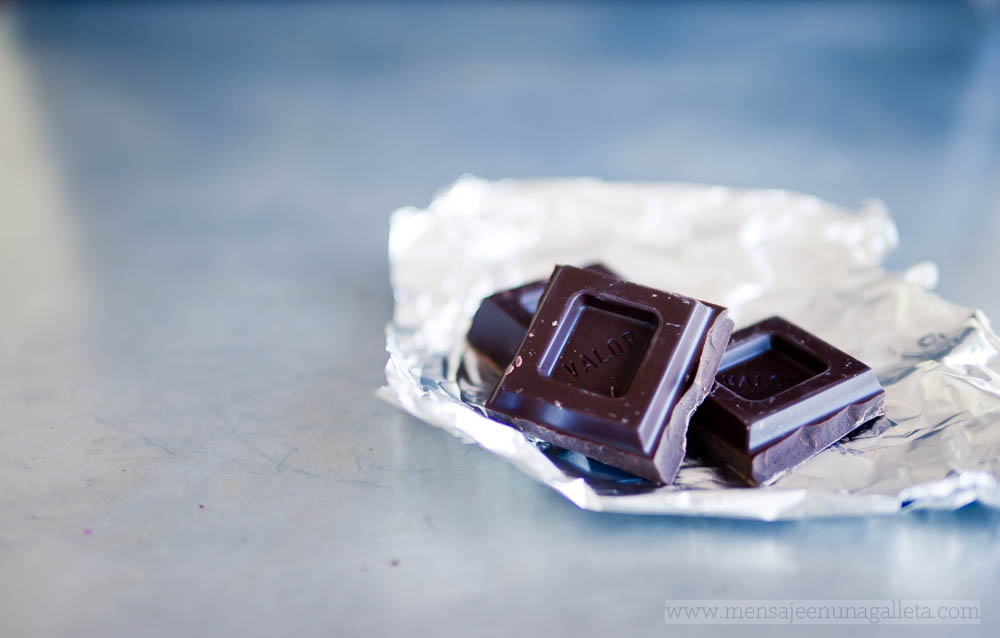
Cuando suena el portero automático y dicen «¿Miriam González? Traigo un paquete para usted», cruzo los dedos y pido que sea de Chocolates Valor. Abro el paquete, y dentro ¿qué hay? ¡Chocolate! ¡Claro! Da igual el tipo, siempre es bueno. Ideo cuatro o cinco escenarios para fotografiarlo como se merece, y me prometo a mí misma que esta vez repartiré con Estíbaliz.  ¿Pero qué hago? Me lo como, hasta la tableta de postres me la zampo.  Cuando empiezo a ver en redes sociales un montón de agradecimientos de otros blogueros afortunados,  la conciencia me da un pellizco, pero en esos momentos me queda todavía, y la conciencia con 50 gramos de chocolate encima es mucho menos crítica.

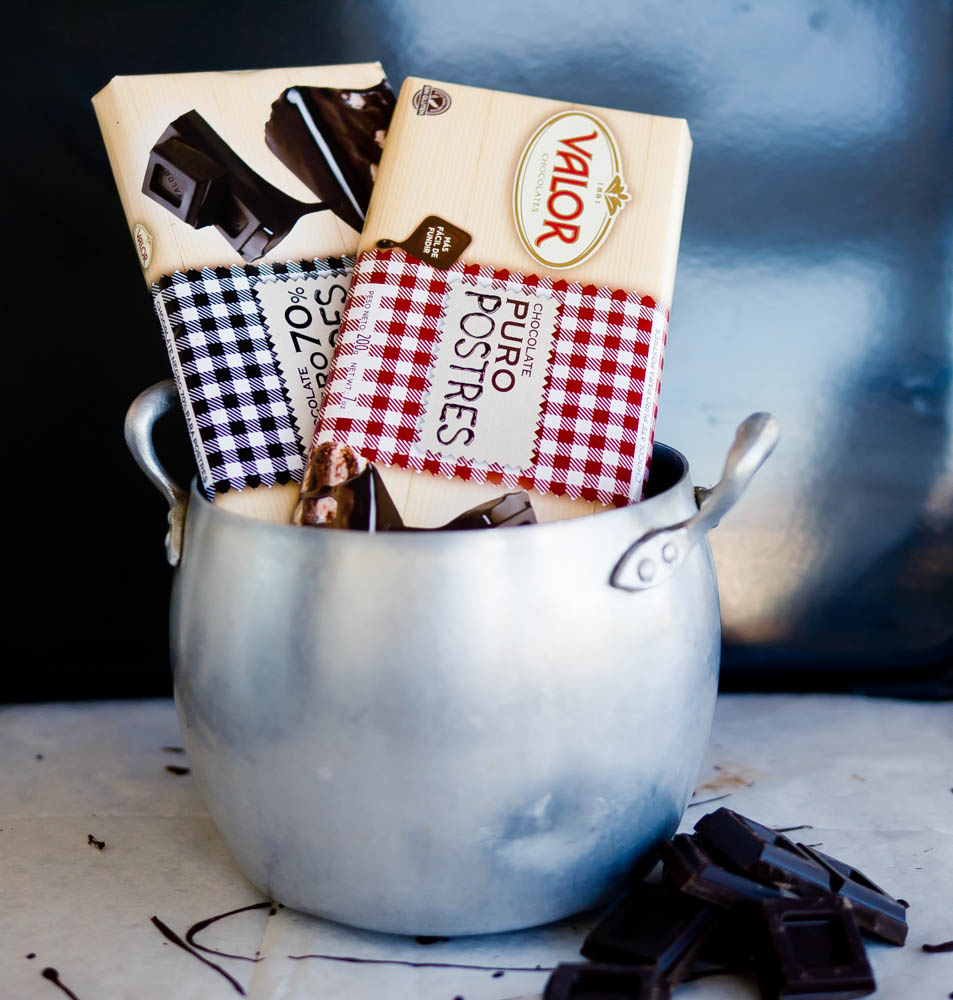
¡Gracias Valor! Por mandarme chocolate, pero sobre todo por tener una gama tan amplia, con tanta calidad, y tan asequible. Corre al súper de la esquina por  este chocolate:

P1190994

Every time the intercom rings and a voice say: ‘Miriam González? I have a package for you’, I cross my fingers and pray to God it comes from Valor Chocolates. I open the package and what’s inside? Chocolate! Of course! It doesn’t matter what kind of chocolate, it’s always good. Then I immediately imagine four or five different scenarios to photograph it as it deserves, and I promise myself that this time I will share that chocolate with Estíbaliz. But, what am I doing? I am eating it, even their desserts chocolate bars!. When I read in the social networks the way some other lucky bloggers express their gratitude, I get a pinch in my conscience, but in those moments, I still have a bit left, and a conscience with 50 grams of chocolate on top it’s still much less critical.

Thank you Valor! Thank you for sending me chocolate, but mostly for having such a wide product range, with high quality and affordable. Go to your nearest supermarket and get this chocolate:

chocolatevalor70

Valor postres 70% una maravilla. La necesitarás para preparar está receta y compra también cacao puro Valor, lo utilizaremos.

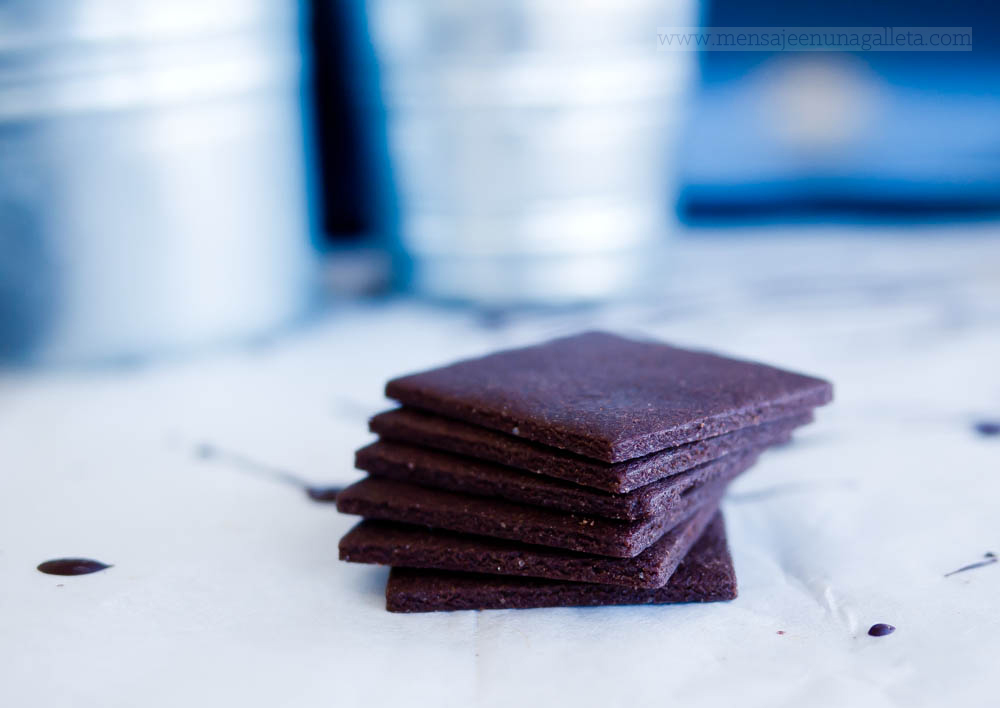
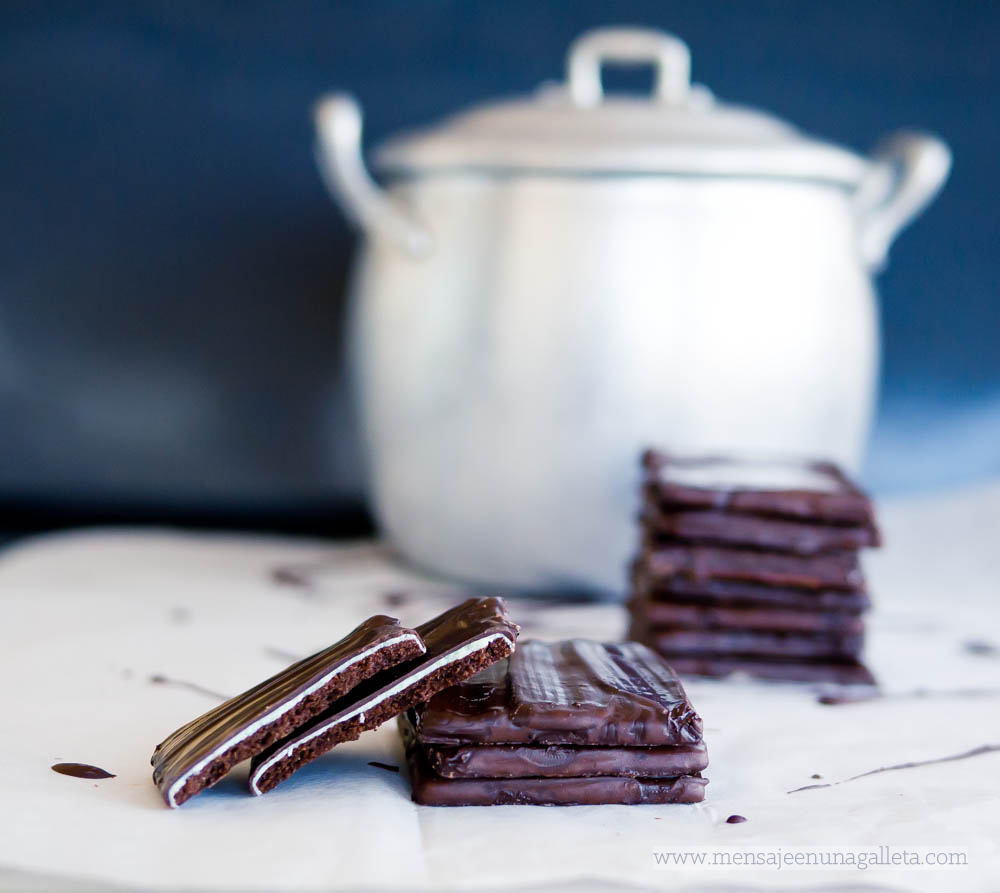
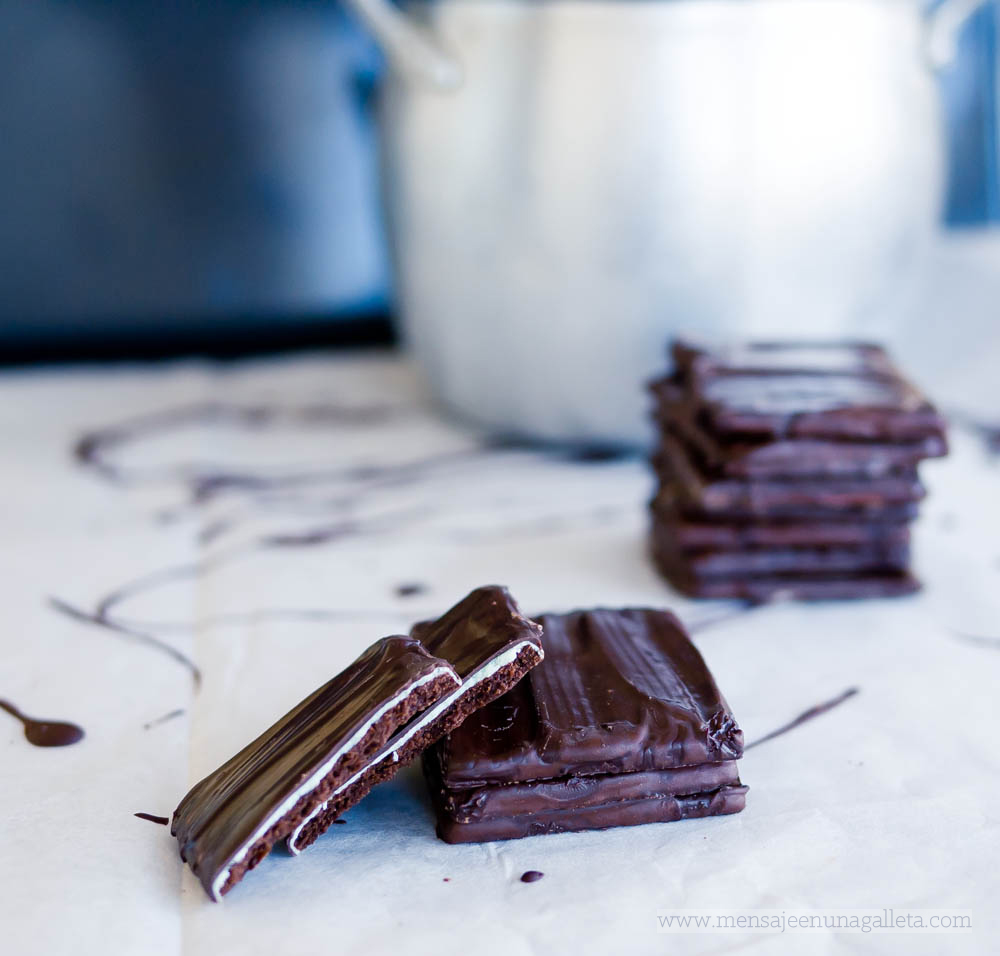
Estas galletitas de chocolate y menta, que recuerdan mucho a esas populares chocolatinas que llevan un reloj, son sin duda la cosa más deliciosa y adictiva que he preparado jamás.  ¡Vamos allá! Lo primero es preparar las mejores galletas de chocolate del mundo, y os puedo asegurar sin ningún pudor a pesar de ser la autora de la receta, que no hay otras galletas como estas.

Ingredientes:

–          150 gramos de azúcar moscabado triturado en thermomix o molinillo.

–          125 gramos de mantequilla.

–          1 huevo ecológico pequeño

–          45-50 gramos de cacao puro Valor, lo sé parece mucho.

–          225 gramos de harina a veces menos, nunca más.

–          ½ cucharadita de sal, no es opcional.

–          ½ cucharada o más de una buena vainilla en pasta.

Valor desserts 70%. Wonderful. You will need it in order to prepare this recipe, and buy some Valor pure cocoa powder, we will use it too.

This small mint and chocolate cookies, which I’m sure remind you of those popular chocolates with a clock in their packaging, are no doubt the most delicious and addictive thing I’ve ever made. Let’s go! The first thing is to make the best chocolate cookies in the world, and I can assure you without any shame that in spite of being the recipe author, there are no other cookies like these.

Ingredients:

• 150 grams of muscovado sugar (grind it using a thermomix or another grinder).

• 125 grams of butter

• 1 organic egg size S

• 45-50 grams of Valor pure cocoa powder (I know, it looks like a lot)

• 225 grams of flour, sometimes a bit less, but never more than that.

• ½ teaspoon of salt, not optional.

• ½ tablespoon or more of a good vanilla paste

sincobertura

Claro que puedes utilizar azúcar blanquilla, y el huevo puede no ser ecológico, y el cacao puede no ser Valor, y puedes no echarle la sal y usar esencia en lugar de vainilla natural, y seguirán siendo muy ricas, pero ya no serán las mejores galletas de chocolate del mundo, serán unas galletas de chocolate  muy ricas y eso no es poco.

Prepararlas es facilísimo, a mano o a máquina, como prefieras. Batimos ligeramente la mantequilla con el azúcar, y le añadimos el huevo, la sal y la vainilla, batimos un poco más y añadimos el cacao, seguimos batiendo y añadimos el harina, cuando está integrada, amasamos un rato y pensamos que esa masa nunca se va a poder estirar, amasamos un poco más y a la nevera una hora o dos. El frío la transforma y ya la podemos estirar, muy fina, dos o tres mm y vuelta otro rato al frigo. Cortamos las galletas y las horneamos mucho, tienen que quedar crujientes. Las escondemos muy bien, para que no desaparezcan mientras preparamos la crema de menta.

You can use normal granulated sugar, and the egg doesn’t need to be organic, it’s not necessary that the cocoa powder is Valor, you can do without the salt, and use some vanilla essence instead of vanilla paste and they will still be very nice, but they will not be the best chocolate cookies in the world, they will just be some nice chocolate cookies, which is fine.

It is very easy to make them, by hand or using a robot, as you prefer. We beat the butter and the sugar slightly, then add the egg, salt, vanilla and beat a bit more, then add the cocoa and keep mixing. Add the flour, and when all of it has been integrated and after kneading for a while we think we will never be able to roll it out, we knead a bit more and put it in the fridge for one hour or two. Cold transforms the dough and then we can easily roll it out, very thin, two or three millimeters thick, and then take it back to the fridge. Cut the cookies and bake them a lot, they need to be crunchy. Finally we hide them very well so they do not disappear while we prepare the mint cream.

corte2

Para la crema de menta necesitamos:

–          100 gramos de azúcar glas

–          15 ml d leche entera, esto es una cucharada.

–          1,25 ml de aroma de menta de deco relief. Esto es ¼ de cucharita.

Si es otro aroma necesitaremos  más cantidad probablemente. Los aromas de Deco relief nos tienen enamoradas. Gracias a Esther ahora es fácil encontrarlos on line, los tenéis en Mummy Crafts. Lo removemos todo y ya tenemos crema de menta espesa.

For this cream we need:

• 100 grams of icing sugar

• 15ml whole milk, that is a tablespoon

• 1,25 ml of Deco Relief mint aroma, ¼ teaspoon.

If we are using another aroma we will probably need more. We are in love with Deco Relief aromas. Thanks to Esther it is very easy to find them online now; you can buy them in Mummy Craft. We just have to mix it all together and then we have a thick mint cream.

dentropuchero

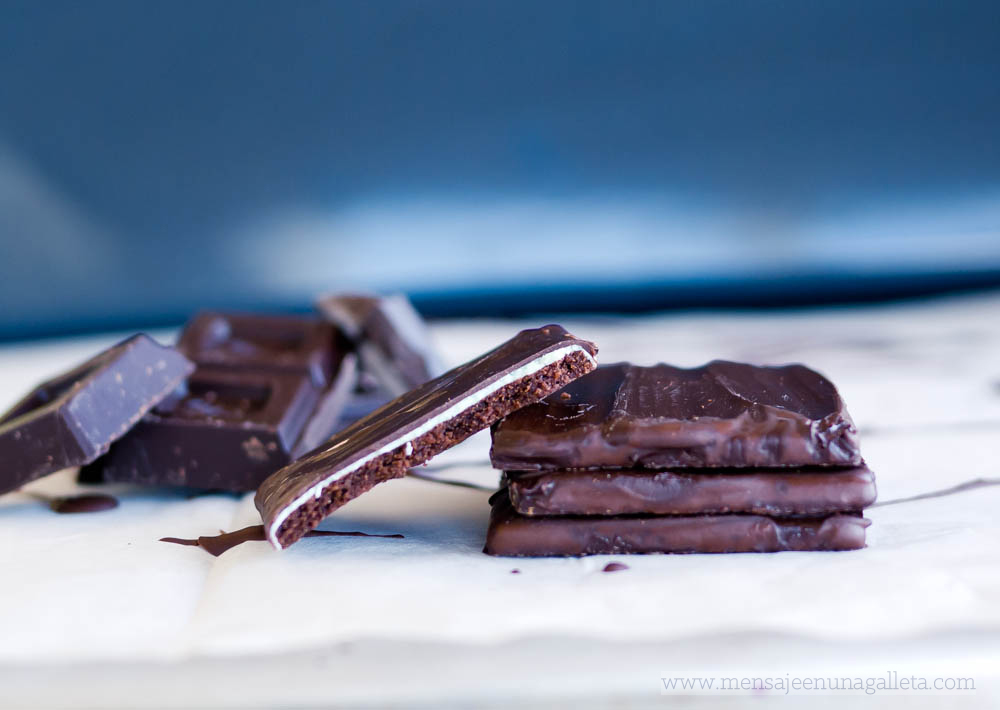
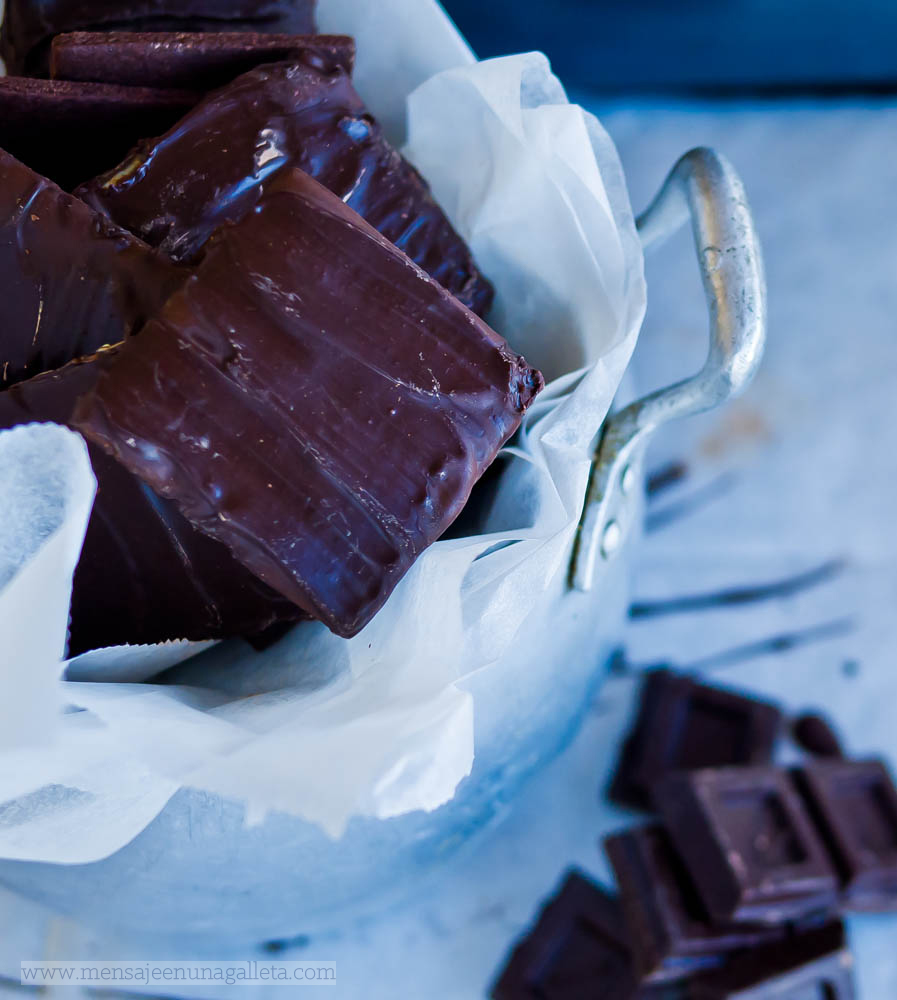
Con un cuchillo la untamos sobre las galletas de chocolate como si fuera mantequilla.  Derretimos una tableta de chocolate Valor 70 y las bañamos en chocolate. Las ponemos a enfriar sobre un papel de horno, si queremos la superficie ondulada cuando el chocolate este a punto de solidificarse dibujamos los surcos con un cuchillito de plástico  o un utensilio similar y voilà, ya está.

Si sois grandes amantes del chocolate y menos amantes del azúcar pasad de la crema y añadid unas gotitas de aroma de menta: ¡Espectacular!

Using a knife we spread the cream on the chocolate cookies as if it was butter. Then melt a Valor 70 chocolate bar and dip the cookies in the chocolate. Let them cool on parchment paper and if we want to give them a wavy surface, when the chocolate is about to solidify we draw the waves with a plastic knife or a similar utensil and Voila!

If you are truly chocolate lovers and you don’t like sugar that much, forget about the cream and just add some aroma drops. Spectacular!

corte3

Un beso, Miriam G.

A big fat Kiss, Miriam G.

Gloria eres un sol!)

Apples in love

tarta-entera-2

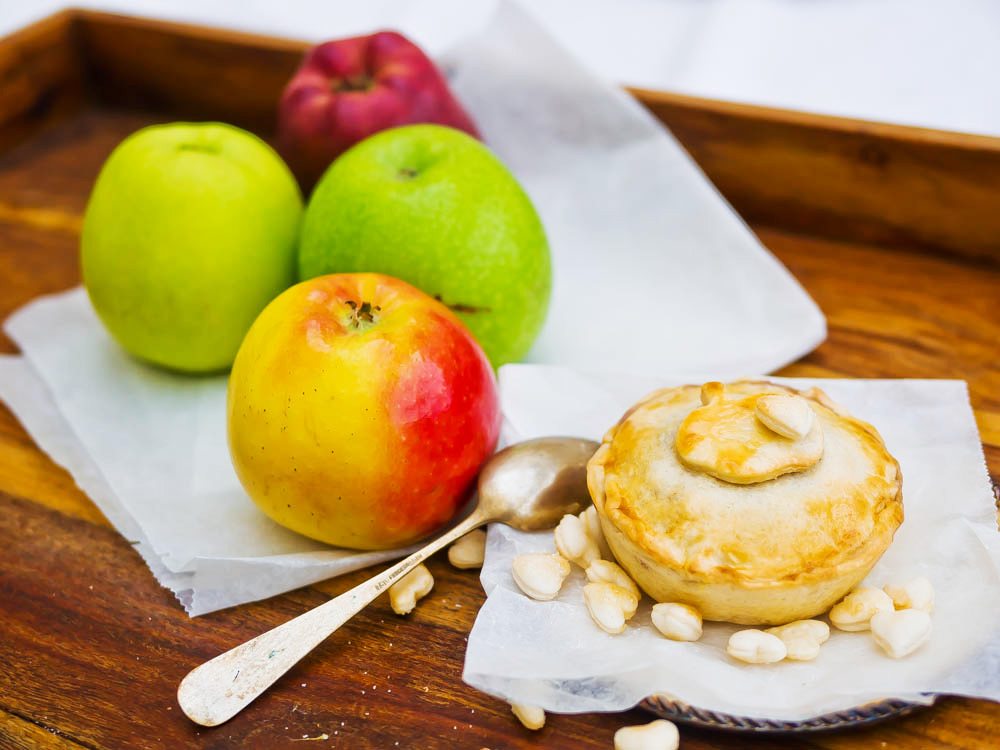
Me gusta con locura la tarta de manzana, pero la tarta, los bizcochos con manzanas me los como, pero para merendar o para desayunar: ¡No son un postre!

Cuando era pequeña mi madre hacía una tarta de manzana deliciosa que no se parecía a ninguna otra, no era grande pero tampoco pequeña, tenía una masa dura con mucho sabor, y no no es la que he utilizado para preparar la tartita de la foto, y no porque quiera llevarme el secreto a la tumba conmigo ¡ojalá! Mi madre perdió la receta, sí, como lo leéis, y ya no hubo más tartitas en mi casa, solo bizcochos.

I’m crazy about apple pie. I like apple cakes but for breakfast or with an afternoon coffee or tea, but they are not desserts as such. Apple pies are.

When I was a child, my mom used to bake a delicious apple pie not comparable with any other, it was neither big, nor small; its crust was crunchy and very tasty, and no, that is not the one I have used to prepare the recipe you see in the picture, and not because I want to take the secret to my grave, I wish! My mom lost the recipe, yes, literally, and since then, there were no more apple pies at home, just apple cakes.

Vamos con la receta, que parece complicada, no lo es, que parece laboriosa, sí lo es. Se compone de tres elementos, masa, crema y manzanas salteadas. Podemos tenerlos preparados previamente y montar las tartitas el día que vayamos a agasajar a nuestros invitados con ellas. Aviso, cuando las prueban quieren repetir y cada vez que vuelven a tu casa preguntan por ellas.

Para la masa podéis elegir la que más os guste, incluso hojaldre, aunque todo el mundo sepa que una tarta con una base de hojaldre no es una verdadera tarta. Suelo utilizar la receta de pasta brisa de Martha Stewart, y si tengo manteca de cerdo casera sustituyo una parte de la mantequilla por manteca. Sí, me gusta la manteca, mucho, me la como untada en pan, no digo más. Y no es cardiosaludable, y no podemos abusar, pero no es una grasa hidrogenada, podemos permitirnos el lujo de utilizarla de vez en cuando.

You can use the crust recipe you like the most, even puff pastry, though everybody knows that a pie with a puff pastry base is not a real pie. I normally use the short crust pastry recipe from Martha Stewart, and if I have some lard around I use it to replace part of the butter in the recipe. Yes, I like lard, a lot, I spread it on bread, I say no more. And it’s not heart-healthy, and we can’t abuse it, but it is not a hydrogenated fat, so we can use it every so often.

Let’s go for the recipe, which seems to be complicated but it’s not. It appears a little time-consuming, which it is. It contains three elements: crust, cream and sautéed apples. We can prepare them all in advance and assemble the tartlets on the day we are going to entertain our guests. I warn you, when they taste them they want to repeat, and every time you have those guests back for dinner at your place, they will ask for those tartlets again.

Es recomendable prepararla el día de antes.
It’s recommendable to make it the day before.

Estos son los ingredientes:

– 275 gramos de harina
– 225 gramos de mantequilla muy fría
– Un poco de agua helada
– Sal, una pizca
– Azúcar, una cucharita

These are the ingredients:

– 275 grams of all purpose flour
– 225 grams of very cold butter
– Some iced water
– A pinch of salt
– 1 tsp of granulated sugar

Un rato antes de prepararla pongo la mantequilla cortada en trocitos y el agua en un vaso dentro de uno de los cajones del congelador. Y cuando están bien fríos pongo la mantequilla y la harina en la thermo le doy dos meneos hasta que la mezcla alcanza una textura terrosa. Añado el agua poco a poco y sigo mezclando a velocidad media-alta hasta que se despega del vaso. Hago una bola, la envuelvo en papel film y hasta el día siguiente.

A while before preparing it I put the diced butter and the glass of water into one of the freezer drawers. When they are very cold, I put the butter and the flour in my food robot and mix it until I get a crumbly texture. Then I start adding the water little by little and keep mixing on medium to high speed until it doesn’t stick to the sides of the bowl. I make a ball with it, cover it with cling film and let it stand until the next day.

tartaentera1

La crema pastelera, esa cosa tan buena. Aquí va mi versión abreviada del asunto.

Ingredientes:

– 4 yemas de huevo
– 150 grs de azúcar
– 50 grs de maizena
– 30 grs de harina con levadura
– medio litro de leche entera
– 1 cucharita una buena de vainilla en pasta

Batimos las 4 yemas con el azúcar hasta que blanqueen, añadimos un par de cucharadas de la leche, la harina y la maicena y revolvemos hasta tener una mezcla homogénea. Ponemos el medio litro de leche menos las dos cucharadas a calentar, y cuando empiecen las primeras burbujas le añadimos nuestra mezcla, y empezamos a remover como si nos fuese la vida en ello, cuando empieza a espesar retiramos del fuego y seguimos removiendo. Mientras se enfría lo cubrimos con papel film en contacto con la superficie para que esta no se endurezca.

Pastry cream, that tasty thing. Here is my abbreviated version of it.

Ingredients:
– 4 egg yolks
– 150 grams granulated sugar
– 50 grams cornstarch
– 30 grams cake flour
– Half a liter of whole milk
– 1 tsp of a good vanilla paste

Beat the 4 egg yolks with the sugar until they are light and frothy, add a couple of tablespoons of milk, the flour and cornstarch and stir until well mixed. Put the rest of the milk to boil and when you get the first bubbles, add the previous mixture and start stirring as if your life depended on it. When it all begins to thicken, remove from the heat and keep stirring. We let it cool, covering it with cling film touching the surface so it doesn’t get dry.


manzanas

Y por fin vamos con las estrellas de esta receta, las manzanas salteadas.

Ingredientes:

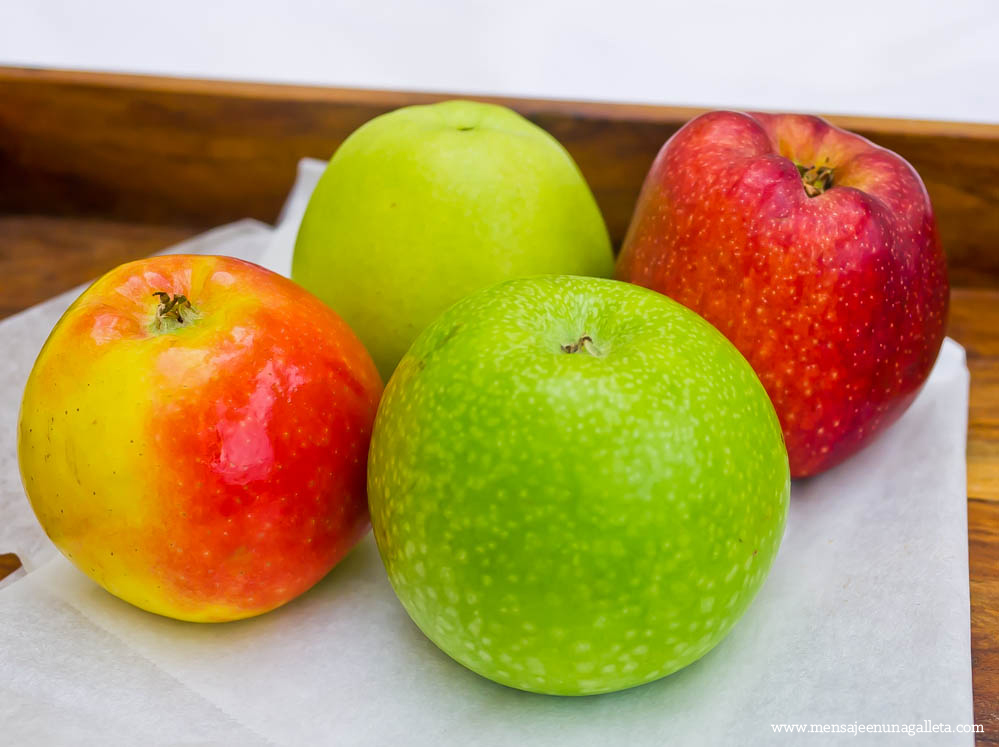
– 4 manzanas de distintos tipos.
– 50 gramos de mantequilla
– 75 gramos de azúcar moscabado o más, va al gusto de cada uno
– Canela en polvo, yo le pongo mucha
– Nuez moscada recién rayada, no mucha
– Piñones, todos los que tengamos. Yo puse 75 gramos.

And finally let’s go with the stars of this recipe, the sautéed apples.

Ingredients:

– 4 apples of different types
– 50 grams of butter
– 75 grams of muscovado sugar or more, according to your living.
– Cinnamon. I use a lot.
– Freshly-grated nutmeg, not too much.
– Pine nuts, all we have. I used 75 grams.

manzanas-en-sarten

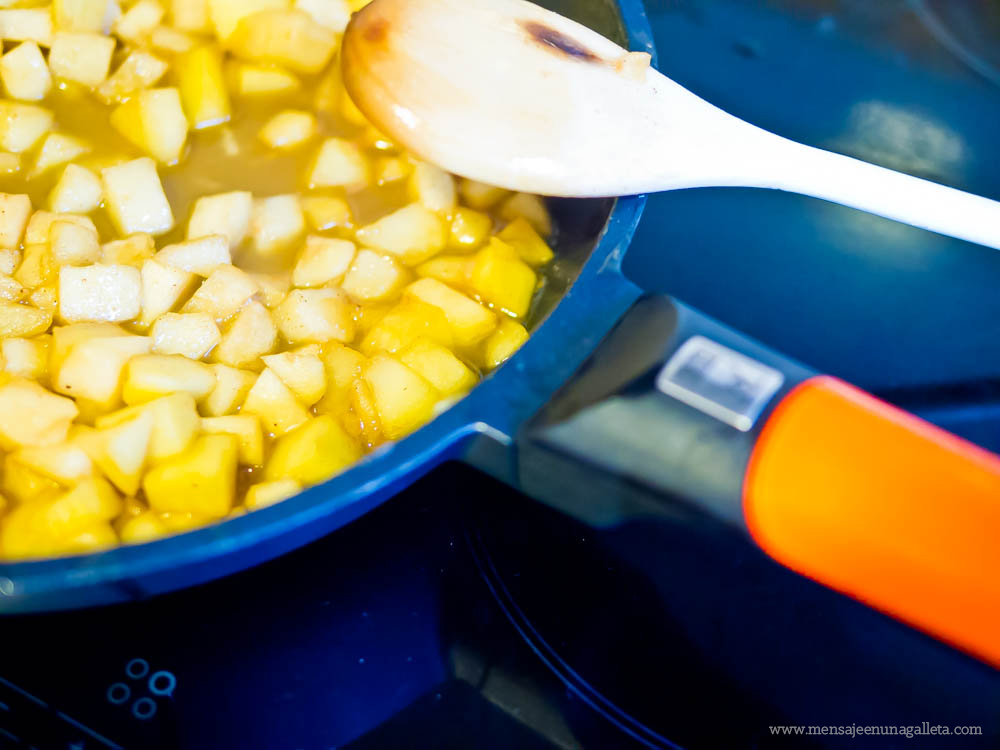
Ponemos la mantequilla en la sartén a fuego medio-bajo, cuando está caliente añadimos las manzanas cortadas en cuadraditos pequeños, el azúcar y las especias, y salteamos hasta que las manzanas empiecen a ablandarse, pero no mucho, retiramos del fuego y añadimos los piñones. El uso de cuatro tipo de manzanas diferentes es opcional, pero como no se cocinan todas al mismo ritmo, unos trocitos quedarán más crujientes y otros casi como compota, lo que le da una textura muy agradable a la tarta.

Put the butter in a pan, medium to low heat. When it’s hot enough add the apples cut into small dices, sugar and spices, and sauté until apples start to soften a little, then remove from the heat and add the pine nuts. The use of four different types of apples if of course optional, but as they do not cook all at the same time, some of the pieces will be crunchy and some others will be like apple compote, which will give the pie a very nice texture.

pasos

Y ahora a montar las tartas.

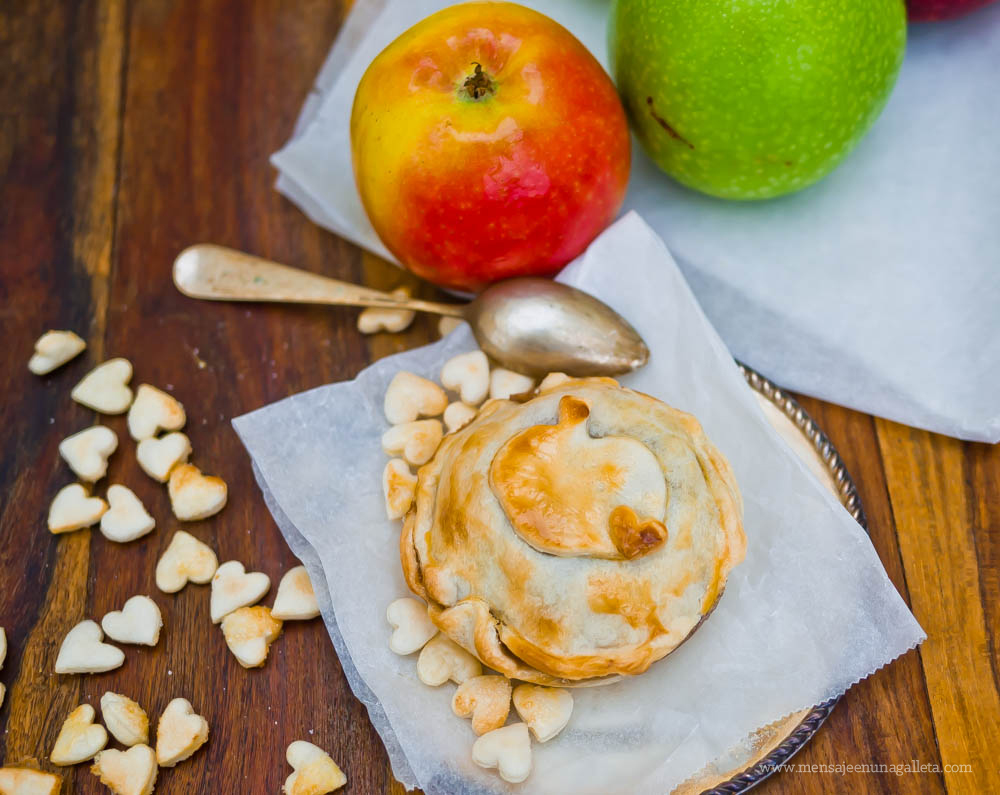
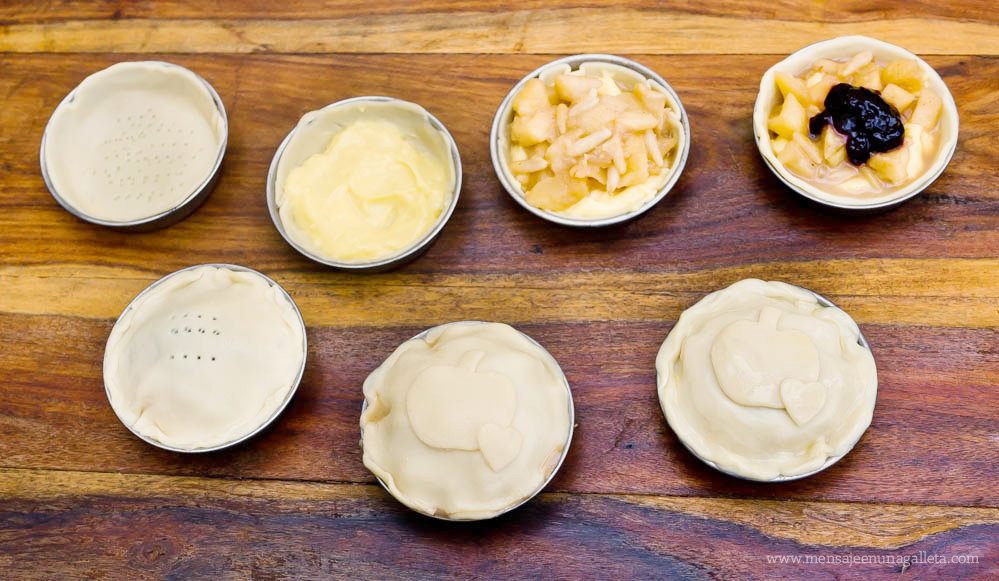
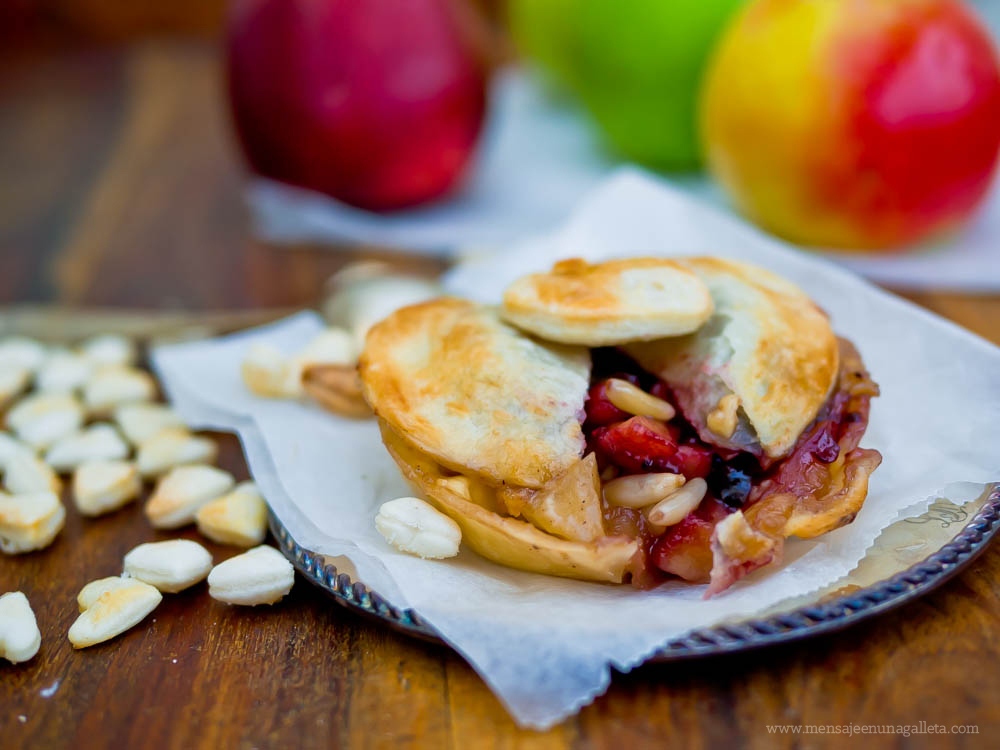
Estiramos la masa muy fina, a unos 2 mm. Con un cortapastas cortamos círculos de tamaño mayor que los moldes. Los colocamos sobre el molde engrasado y perforamos con un tenedor, ponemos la crema, las manzanas y una cucharada de mermelada, en mi caso, de mora. Tapamos, perforamos y decoramos con una manzanita y un corazón. Para finalizar pincelamos con huevo.

Horneamos unos 15 minutos a 180º C, no necesitan más.

A mi me gustan templadas, pero frías también están muy ricas.

Let’s assemble the tartlets now:

Roll the crust out very thinly, about 2mm thick. With a pastry cutter, cut circles bigger than the tartlet molds. Place them on the greased molds and puncture the crust with a fork. Put the cream, apples and a spoonful of jam (I used some blackberry jam) on top. Cover with more crust, puncture and decorate with a small apple and heart. And finally we brush our tartlets with whisked egg and put them in the oven, 15 minutes, 180°C.

 I like them warm, but they are also very nice if served cold.

tartaabierta


Un beso gordo, Miriam G.

A big fat kiss, Miriam G.

¡Millones de gracias Reynolds!


Home made

fotoportadamousse

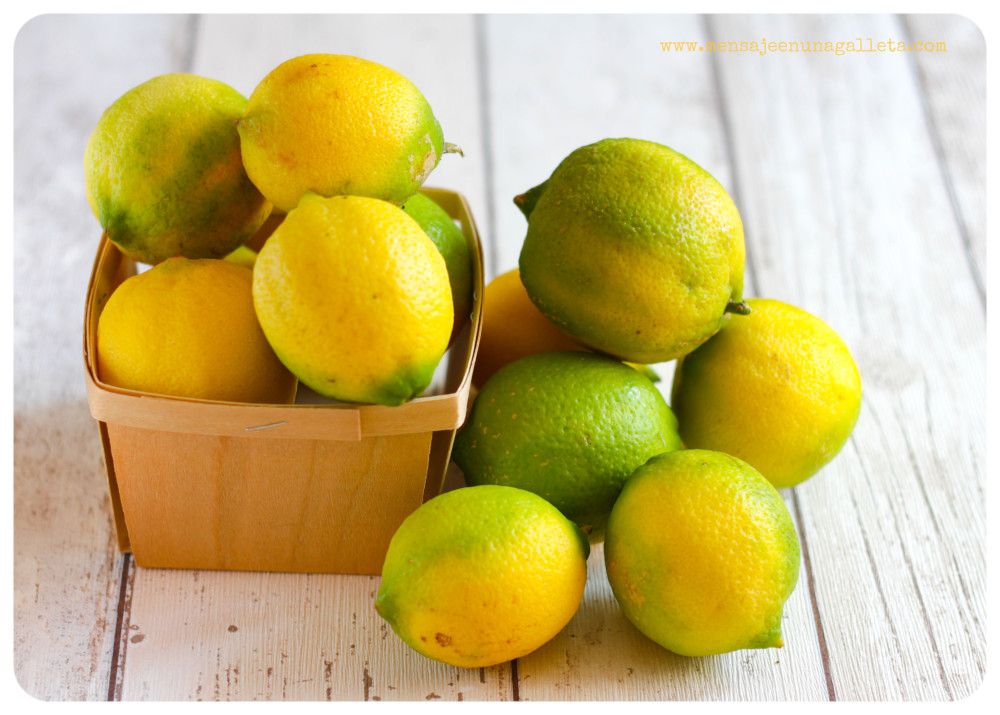
Hace unos días se plantó mi hermana en mi casa con una tonelada de limones, sin exagerar.
A few days ago, my sister showed up at home with a ton of lemons, without exaggeration.

muchoslimones

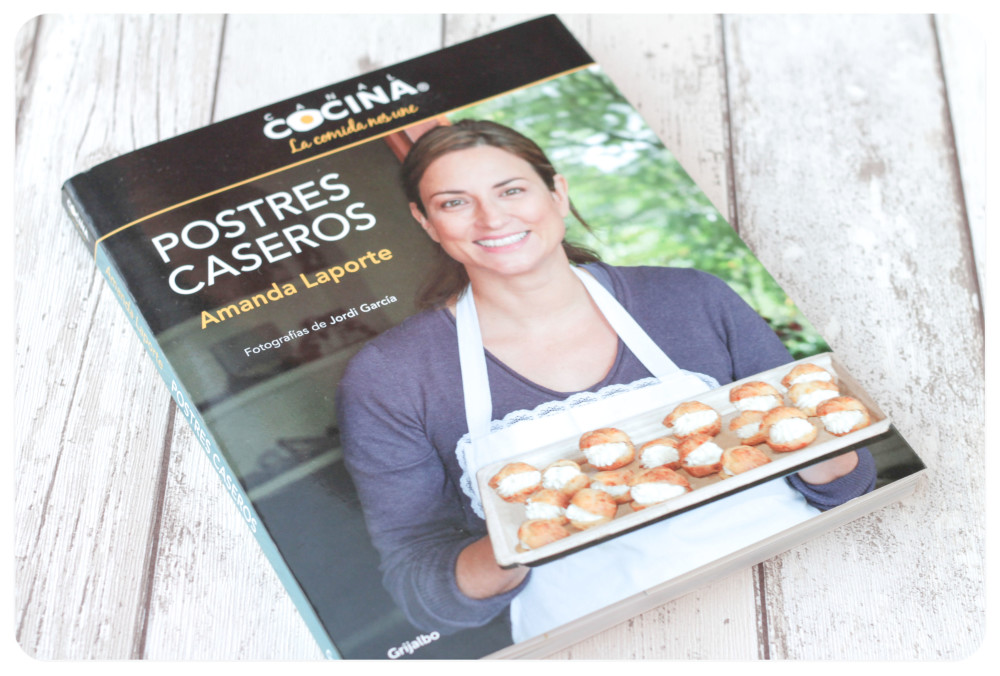
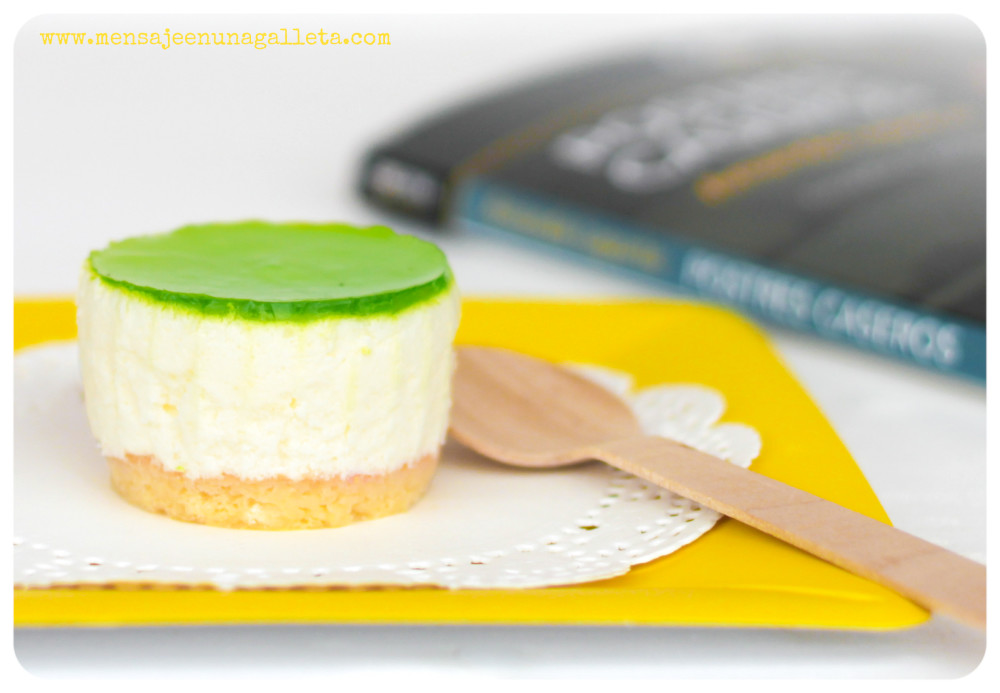
¡Gracias, qué bien me vienen!… Madre mía ¿y ahora qué hacía yo con tanto limón? Tenía muchas posibilidades: a rodajitas acompañando a la ansiada coca-cola fresquita del mediodía, exprimiéndolos encima del pescado a la plancha, en la pechuguita de pollo vuelta-y-vuelta, en una ensalada espartana… Las ideas para usarlos en las recetas de cocina salada -y menos calórica- se agotaban, ya sólo me quedaba pasarme al lado oscuro, al dulce, porque me seguía sobrando aún media tonelada de limones. Así que di el paso, abrí el libro de recetas de Postres Caseros de Amanda Laporte y me puse a hacer su receta de mousse de limón ¡no iba a dejar que se estropearan esos limones!

Thank you! Just what I wanted!… Oh my god, and what I was supposed to do with all those lemons? I had a lot of possibilities: to have them sliced with the cool and desired coke at midday, squeezed on top of the grilled fished, on the chicken breast rare done, on a Spartan salad…The ideas to used them in savoury recipes- therefore less caloric- became scarce, so I could only go into the dark side, the sweet one, because I still had half a ton of lemons. So I went ahead, opened the recipe book ‘Postres caseros’ by Amanda Laporte and started to make her lemon mousse recipe, I could not afford to spoil those lemons!

IMG_1423-2

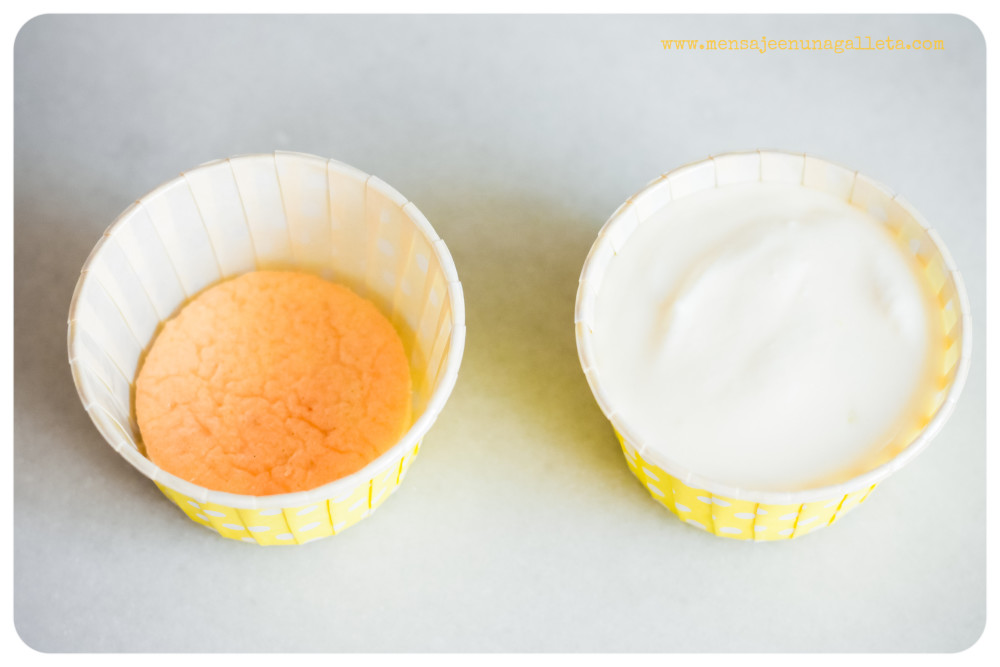
La receta está compuesta por tres capas: la base, que es un “falso” bizcocho, la propia mousse y una capa de gelatina.
The recipe has three layers: the base, which is a ‘false’ cake, the mousse itself and a jelly layer.

Vayamos con los ingredientes:

Para la mousse

5 hojas de gelatina (esto no engorda)
Ralladura de un limón (uno menos ¡bien!)
125 ml de zumo de limón (aquí se van otros cuantos)
2 claras de huevo (últimamente con el taller de macarons escasean)
350 ml de nata para montar (llegan las calorías)
100 gr de azúcar (de perdidos, al río)

Para la capa de gelatina que va en la parte superior
2 cucharadas de azúcar (¡qué más da!)
5 cucharadas de zumo de limón
La corteza de otro limón rallada
Colorante amarillo (se me fue la mano, sí), aunque también usé un verde eléctrico
2 hojas de gelatina

Let’s go with the ingredients:
For the mousse

5 jelly sheets (this is non fattening)
Lemon zest (one less, great!)
125 ml lemon juice (here we use some more)
2 egg whites (lately, with the macaroon workshop they are scarce)
350 ml whip cream (here are the calories)
100 gr sugar (in for a penny, in for a pound)

For the jelly layer on top

2 tbsp of sugar (we don’t care anymore!)
5 tbsp lemon juice
The zest of 1 lemon
Yellow food colouring (I went overboard with it, yes), I also used electric green.
2 jelly sheets

Vamos con la (super fácil) elaboración

Introducimos la gelatina en agua fría para que se hidrate durante unos 5 minutos. Mientras tanto, calentamos un poco del zumo de limón en un cazo. Escurrimos la gelatina y la mezclamos con el zumo caliente y luego con el resto del zumo para que se vaya enfriando.
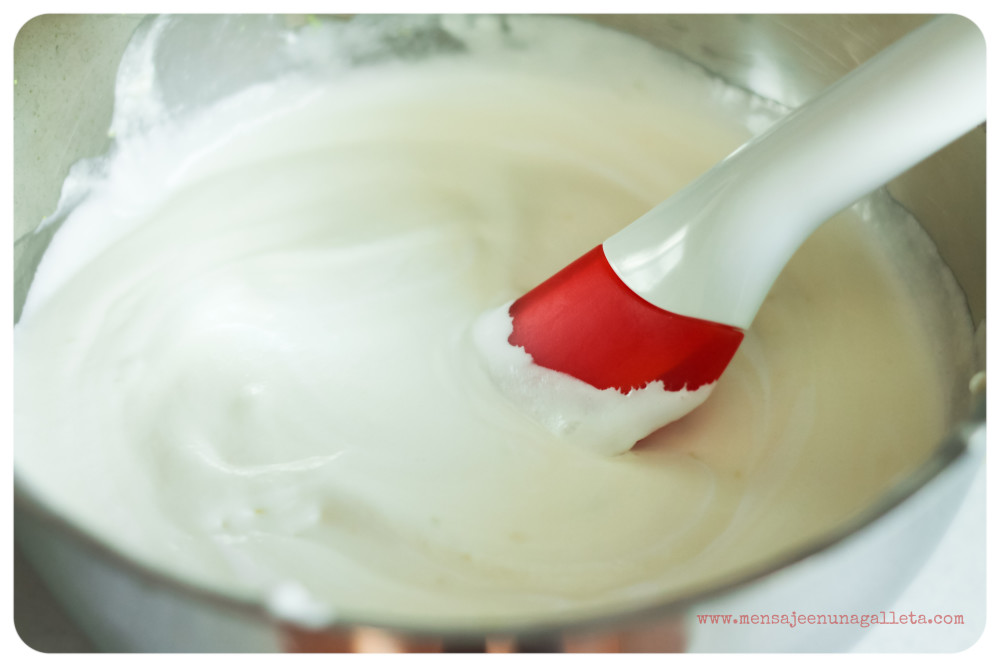
Por un lado montamos la nata con la mitad del azúcar y la mezclamos con el zumo y la ralladura del limón. Por otro, montamos las claras a punto de nieve, añadimos el resto del azúcar y terminamos de batir. Agregamos las claras montadas a la nata y removemos con una espátula con cuidado, no queremos perder esas valiosas burbujas de aire que van a dar a la mousse su ligereza (no nos engañemos, sigue engordando).

And now, the elaboration:

Introduce the jelly in cold water to hydrate for 5 minutes. In the meantime, heat a bit of the lemon juice in a saucepan. Drain the jelly and mix it with the warm juice, then add the rest of the juice so it starts to cool down.
Whip the cream with half of the sugar and mix it with the lemon juice and zest, then whisk the egg whites until you get stiff peaks, add the remaining sugar and finish whisking. Add the egg whites to the cream and stir carefully using a spatula; we do not want to lose those precious air bubbles which will give the mousse its lightness (let’s face it, it’s still fattening).

IMG_9451

Ahora cortamos unos círculos de la plancha de bizcocho, que ya tendremos lista a estas alturas, y los introducimos en unos moldecitos monos como estos que compramos en Vainilla y Caramelo (ya habréis buscado en su tienda el tesoro MEUG de esta semana ¿verdad?).

Now we cut some circles from the sheet of sponge cake which we’ll have ready by now, and introduce them in some cute moulds like these we bought in ‘Vainilla y Caramelo‘ (I assume you have already searched for the MEUG treasure hidden in their shop this week, right?)

rellenandovasitos

No son unos moldes cualquiera porque están plastificados por dentro, podemos echarle lo que queramos que el estampado seguirá inmaculado.
They are not just any moulds because they are laminated inside, so no matter what we pour in them, the pattern will remain intact.

vasitoplastificado

Con nuestros moldes rellenos nos dirigimos a la nevera y los dejamos ahí dentro un par de horitas para que la gelatina haga su función.
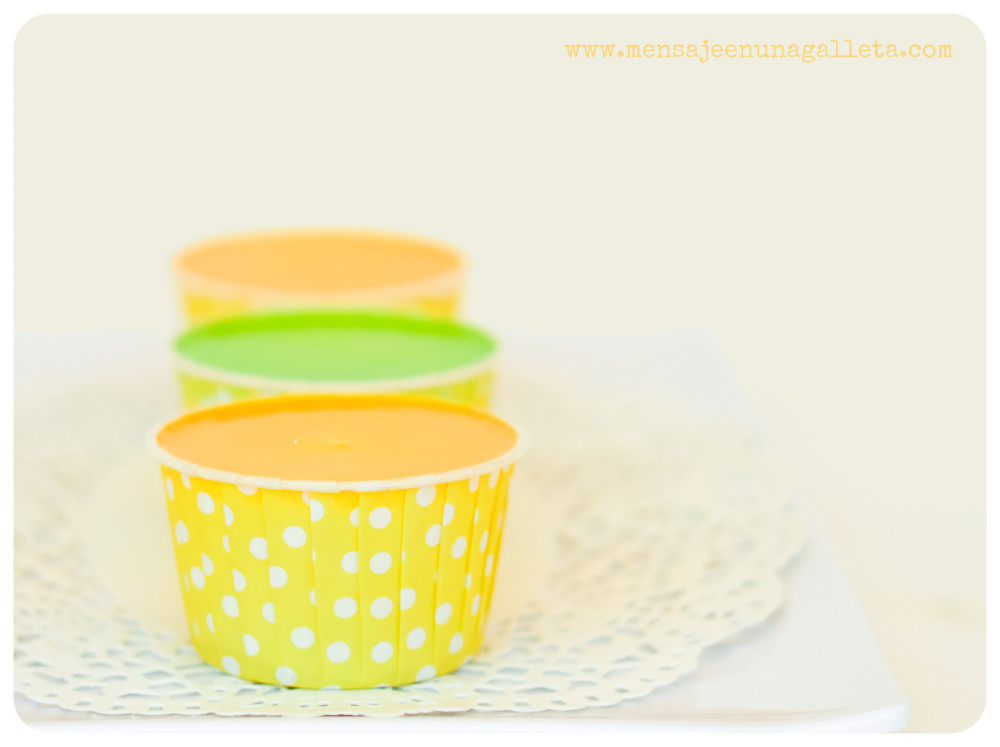
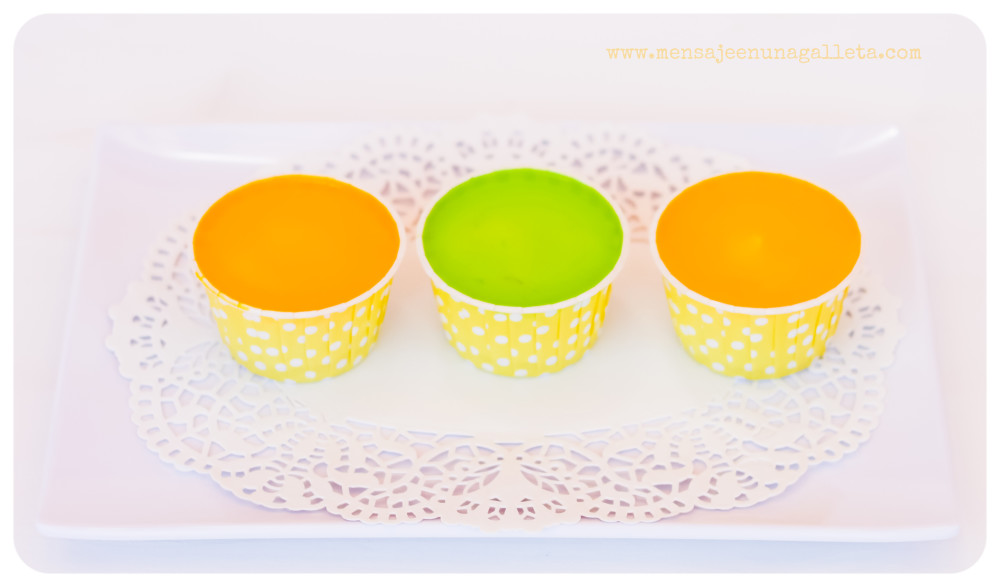
Llega el turno de la gelatina. Calentamos en un cazo el azúcar con las 5 cucharadas de zumo de limón, más 5 cucharadas de agua y la ralladura. Dejamos cocer un par de minutos, añadimos las 2 hojas de gelatina que nos quedaban y que también habremos tenido hidratando. En este punto dividimos la mezcla en dos, a una le añadiremos el colorante amarillo y a la otra, el verde. Cuando esté todo tibio, añadimos la mezcla a los vasitos de mousse. Metemos los vasitos de vuelta a la nevera para que cuaje la gelatina.
¡Precioso!

With our moulds already filled we take them to the fridge where we’ll leave them for a couple of hours so the jelly works its magic.
And it’s turn for the jelly. In a saucepan, heat the sugar with 5 tbsp of lemon juice, 5 tbsp of water and the lemon zest. Let it boil for a couple of minutes and add the 2 remaining jelly sheets, which we have also hydrated. At this stage we divide the mixture into two parts, adding yellow food colouring to one of them and green to the other. When everything is lukewarm we add the mixture to the mousse cups, and put them back in the fridge so the jelly can settle.
Beautiful!

IMG_9472

primerplanomoussse-2

Estefanía, la próxima vez me traes lechugas. Estefanía, next time, please bring me some lettuce.

Un beso/ Kisses,
Estíbaliz

I would like to thank Gloria once again, not only for her appreciated translations, but for her support, encouragement and friendship.