Sierra y Canadá – The cookie versionSierra y Canadá – The cookie version

sierraycanadamonton

La mayoría de mis amigas se niegan a escuchar la música que amablemente les sugiero, «Miriam, otro de tus grupos raros NO». Luego van a ver a Alejandro Fernández, porque digo yo que a oírlo, no irán.

No me rindo con facilidad, por eso este verano arrastré a Estíbaliz y a Belén a un concierto de los Mutantes, utilicé tres argumentos: privado, terraza, catering. Lo creáis o no, les gustó. Me vine arriba y en cuanto se despistaron teníamos las entradas y las reservas para el Alhambra Sound. “Por favor, haznos una lista en Spotify, por lo menos que nos sepamos alguna canción”. Un mes después no podían tuitear sin utilizar trozos de las letras de Marc. Ahora las tres somos #muyfanesdesidonie.

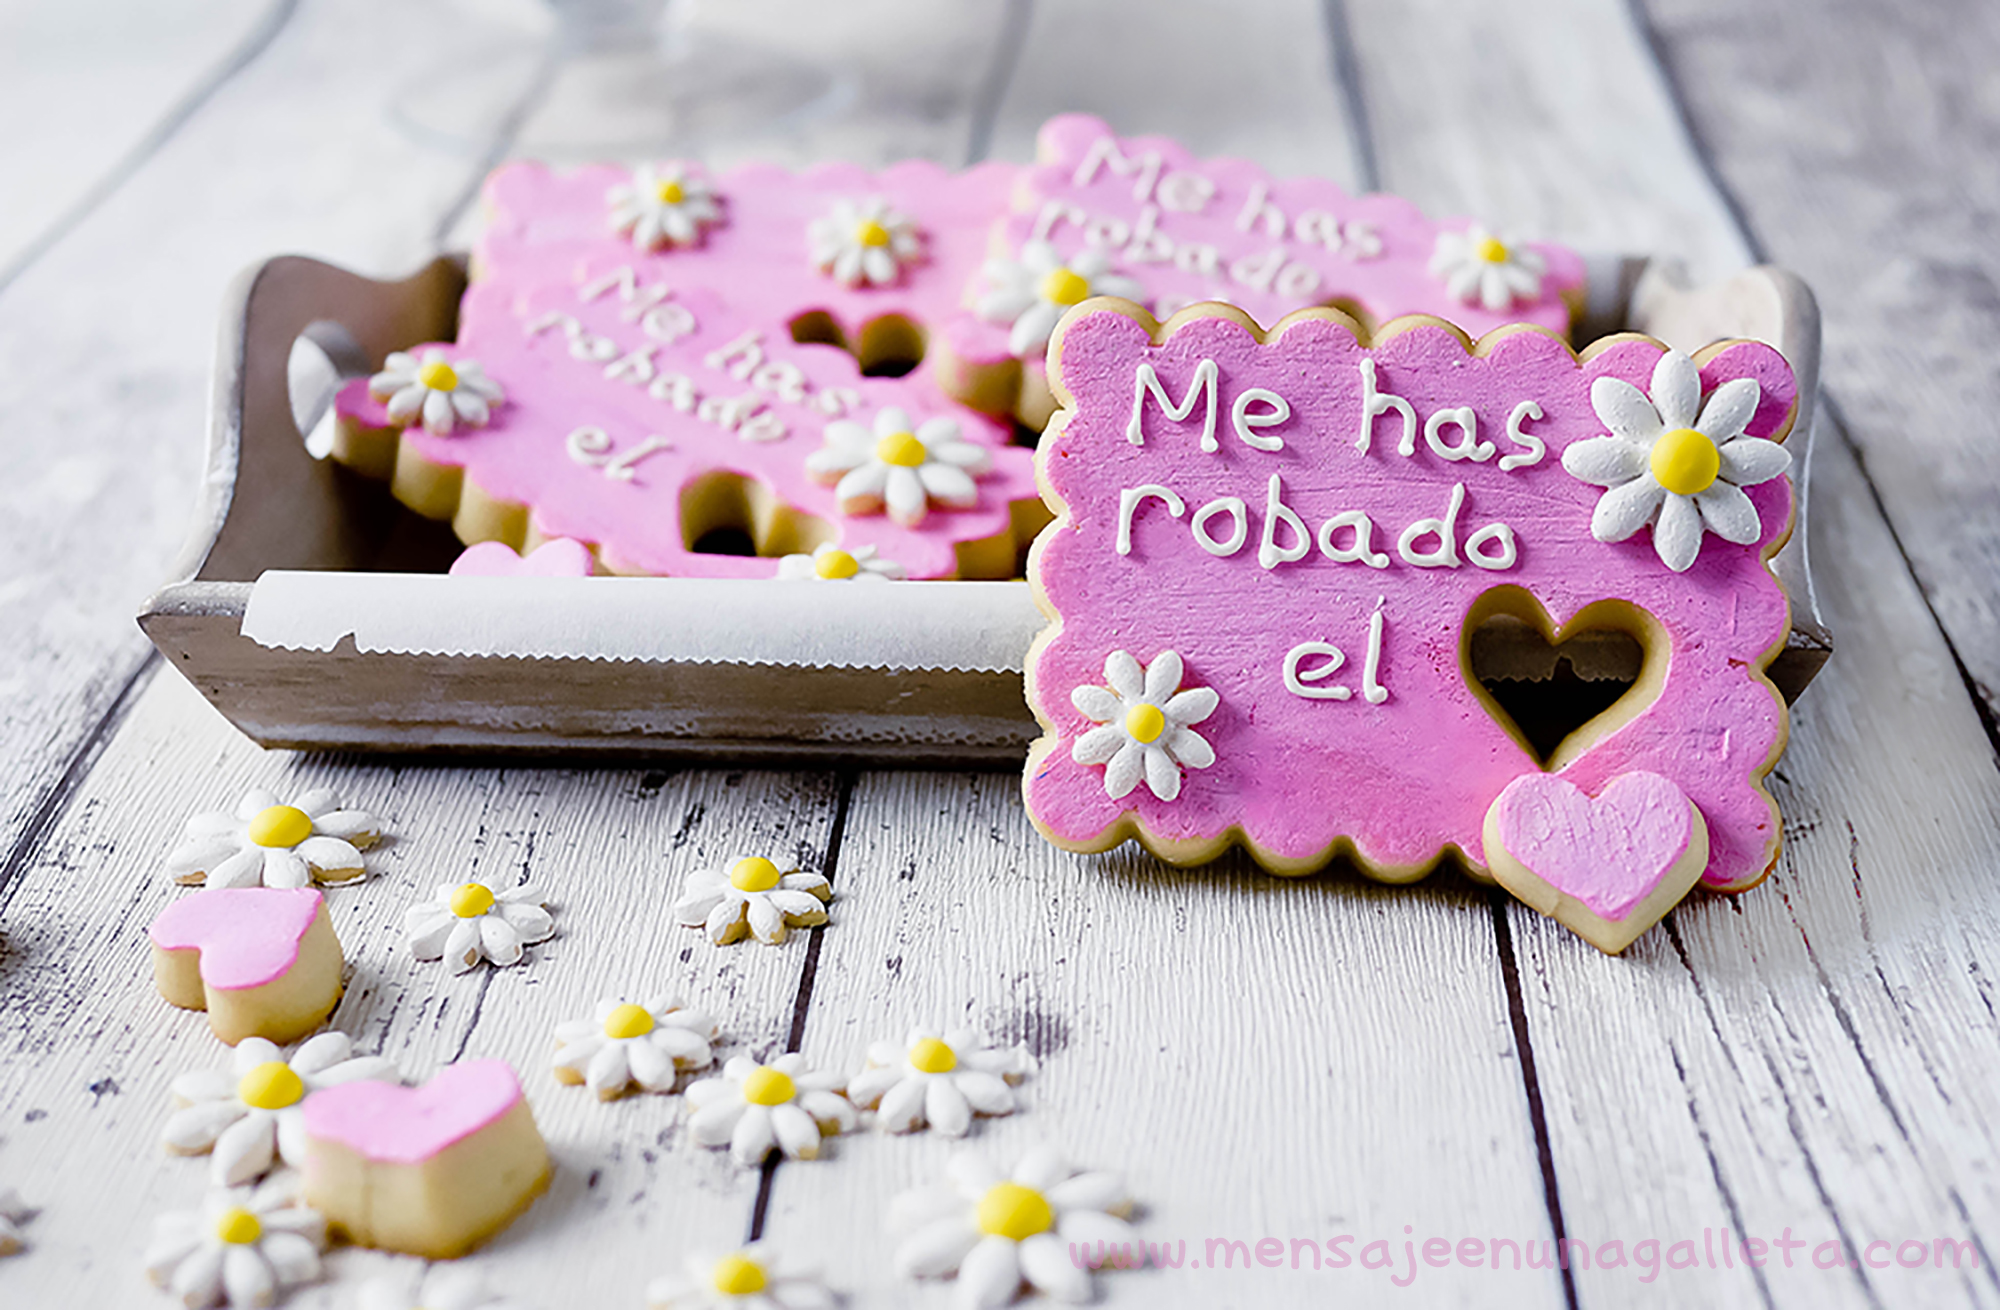
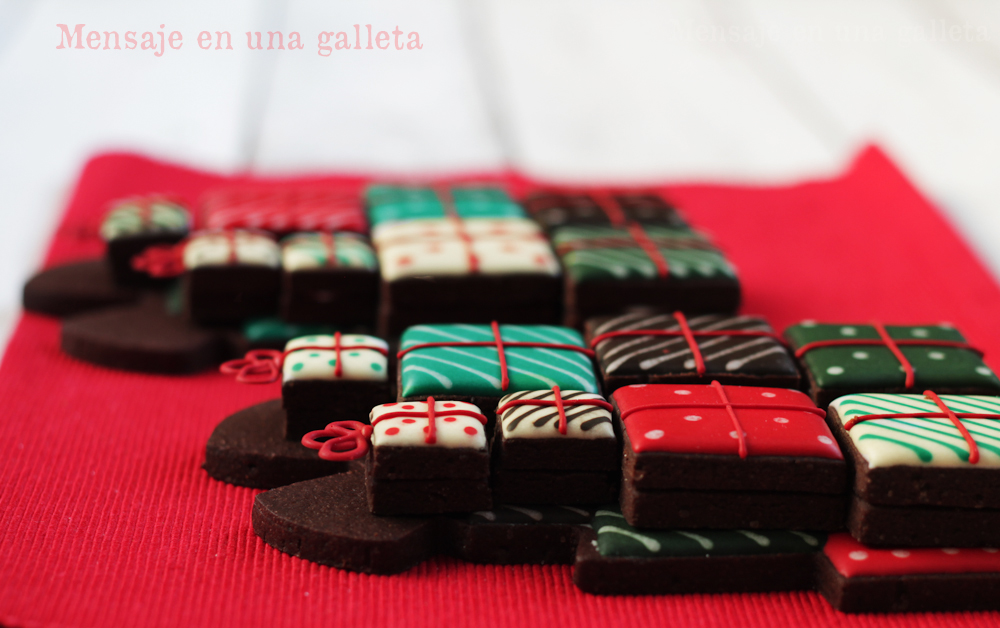
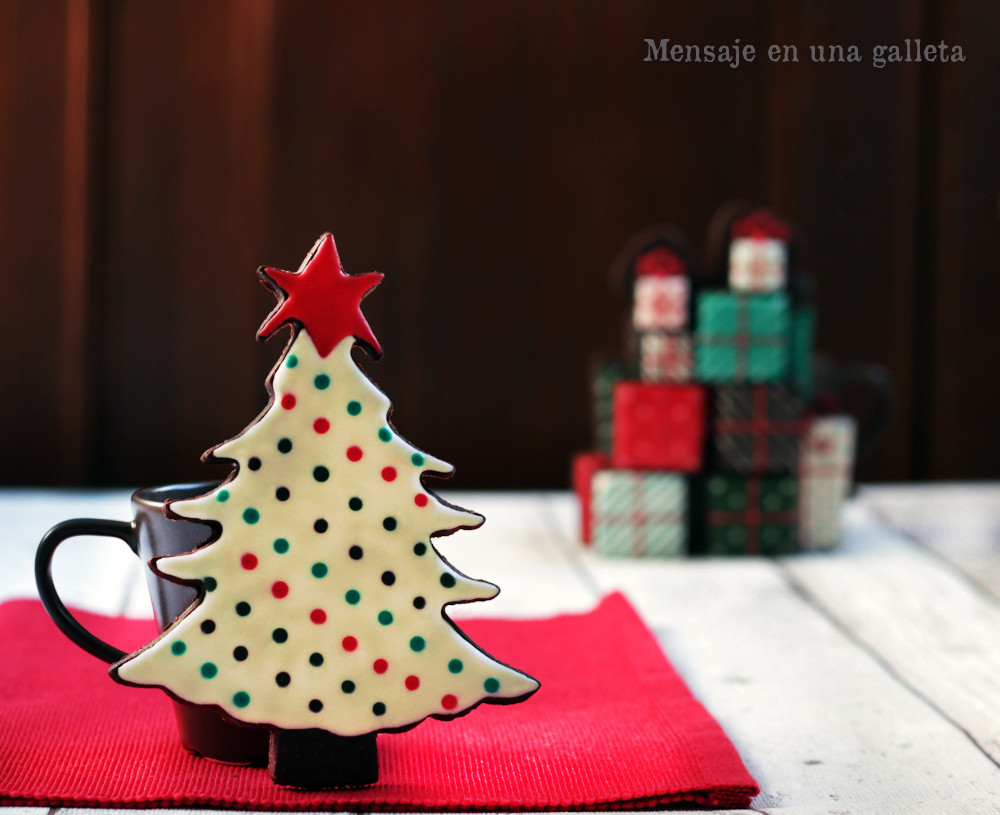
Sidonie está a punto de sacar nuevo disco, no creo que podáis adivinar cómo se llama. A Estíbaliz y a mí la espera se nos ha hecho larga, pero nos lo hemos pasado en grande con la promoción previa del disco en redes sociales, echadle un ojo a su Instagram: http://instagram.com/sidonie_. Esa taza pasando de mano en mano pedía a gritos galletas. Nos dispusimos a hacerlas con la esperanza secreta de que no llegaran a verlas, ¡qué vergüenza! El mensajero podía perderlas, un community manager goloso comérselas…

sierraycanadapedestal

Estaréis pensando que una cosa es que esta entrada vaya sin receta y otra que no os vaya a contar cómo hicimos las galletas. ¡Vámonos!

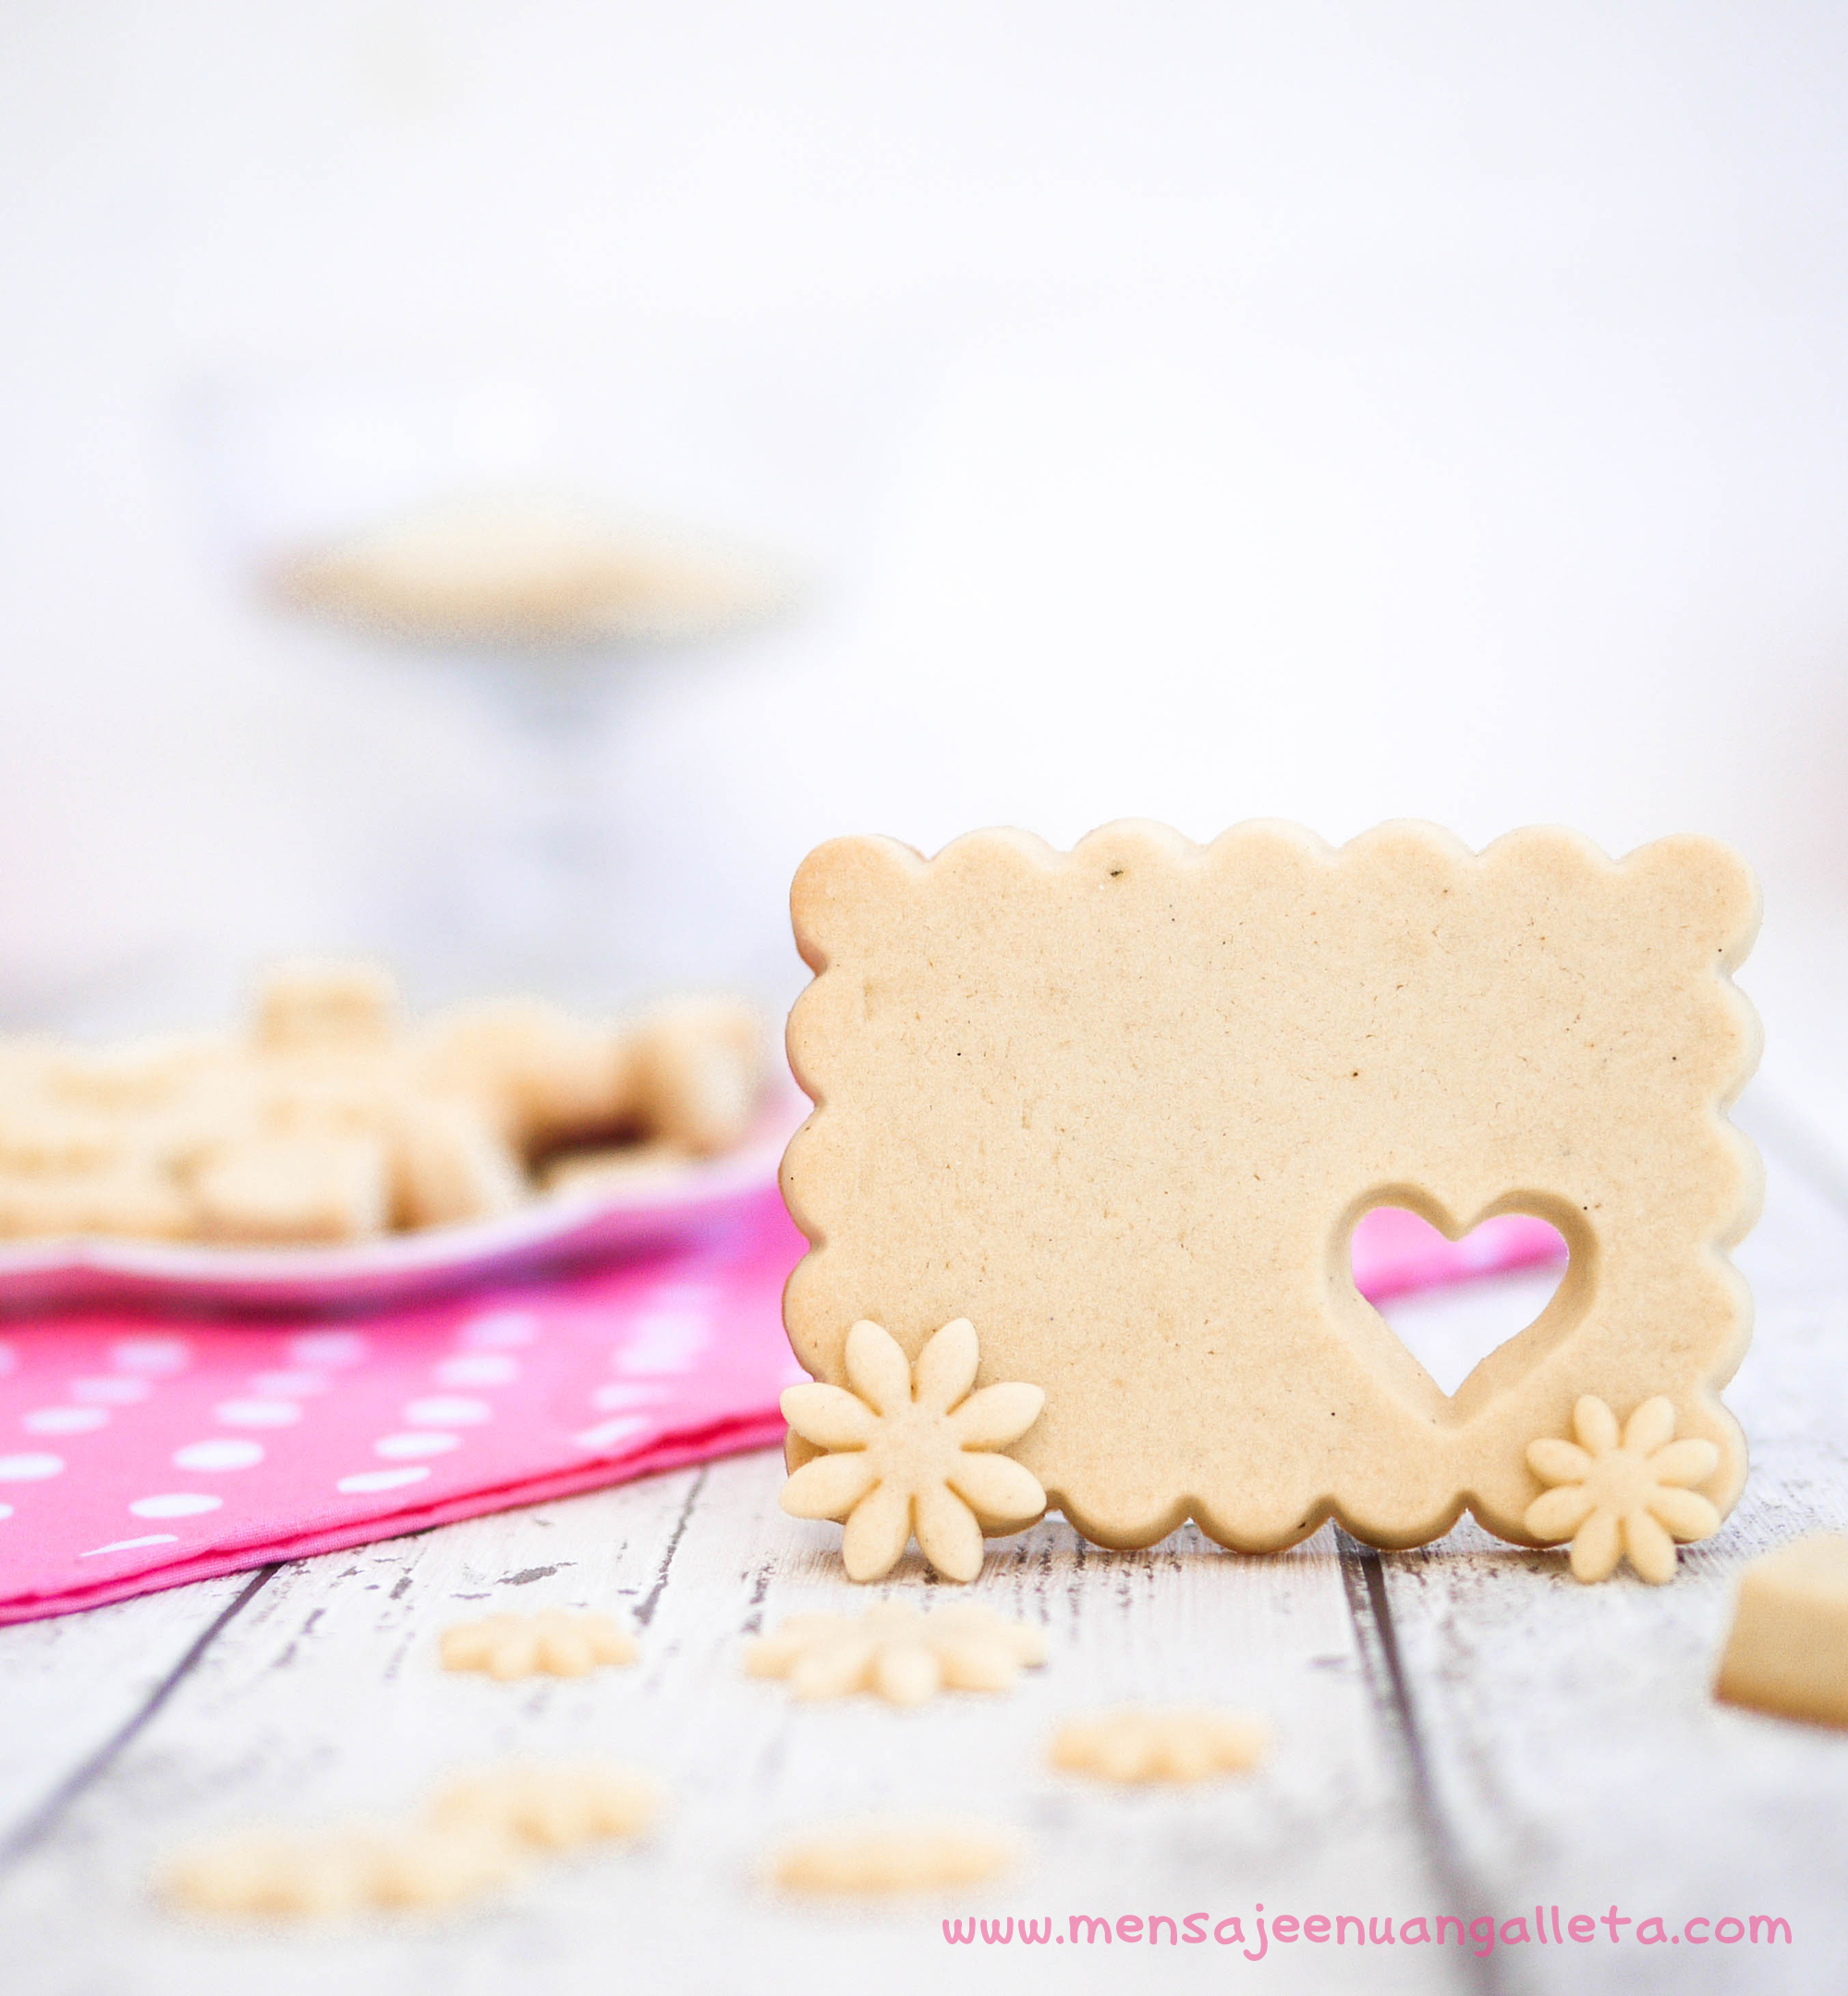
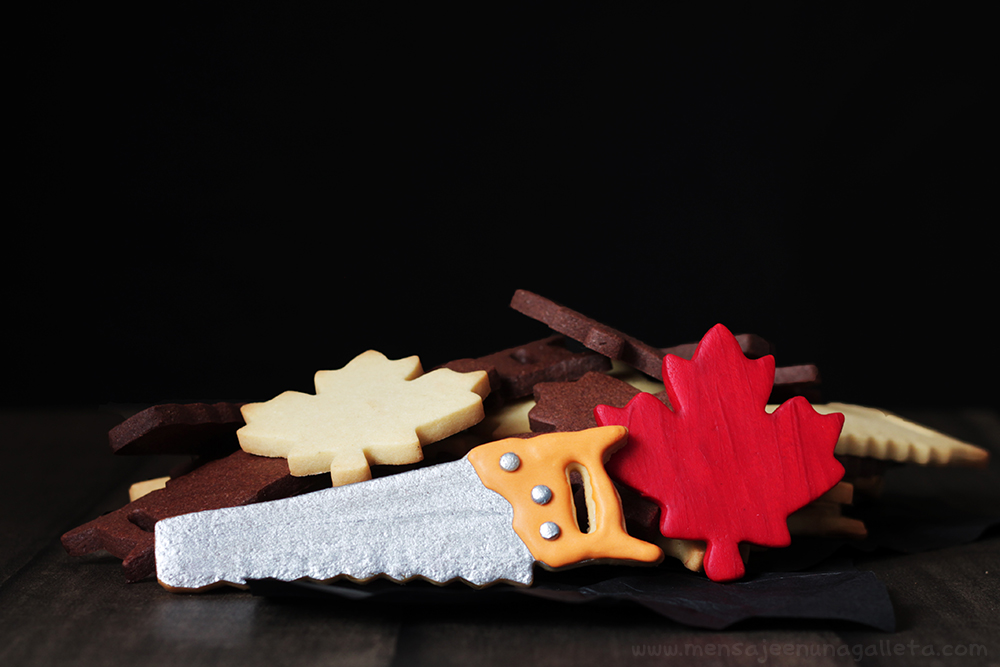
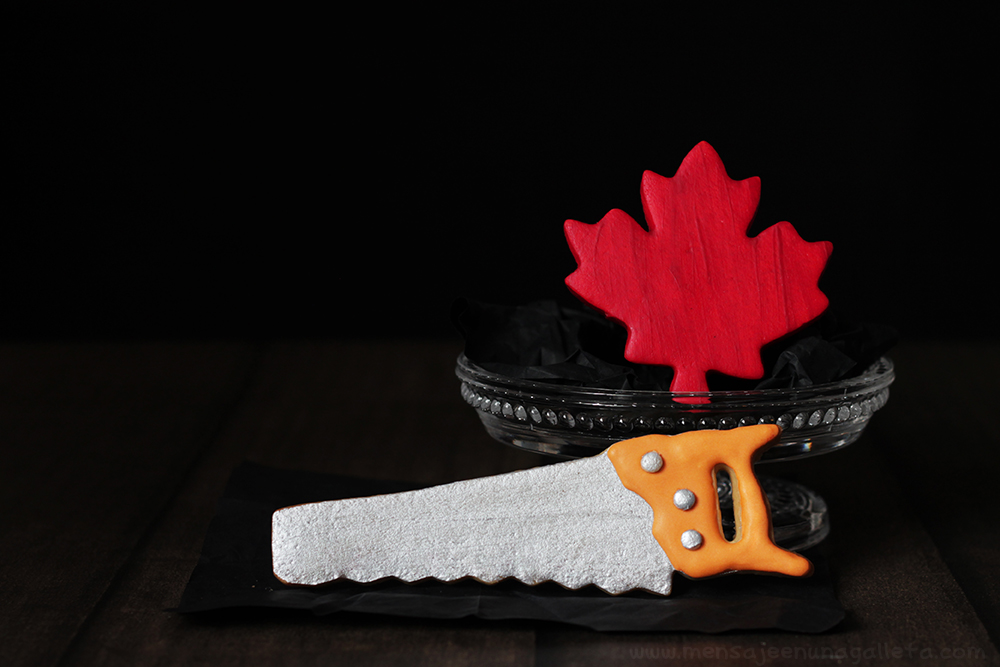
Empiezo por Sierra, que no es una galleta, sino cuatro y para la que necesitamos dos cortadores, uno de sierra y otro de letra I para la abertura del mango. La boquilla hace también funciones de cortador, ahora lo veréis.

cortadores

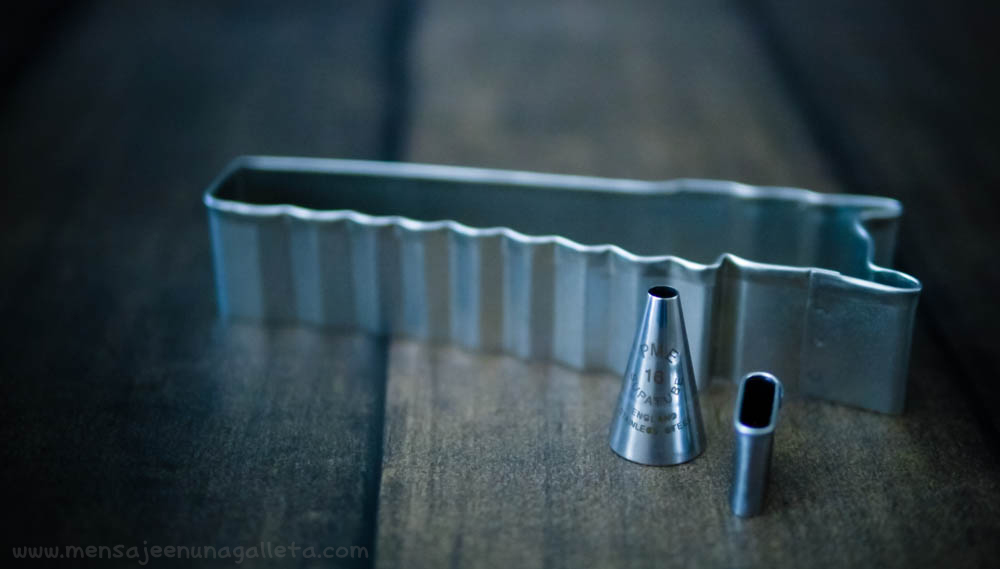
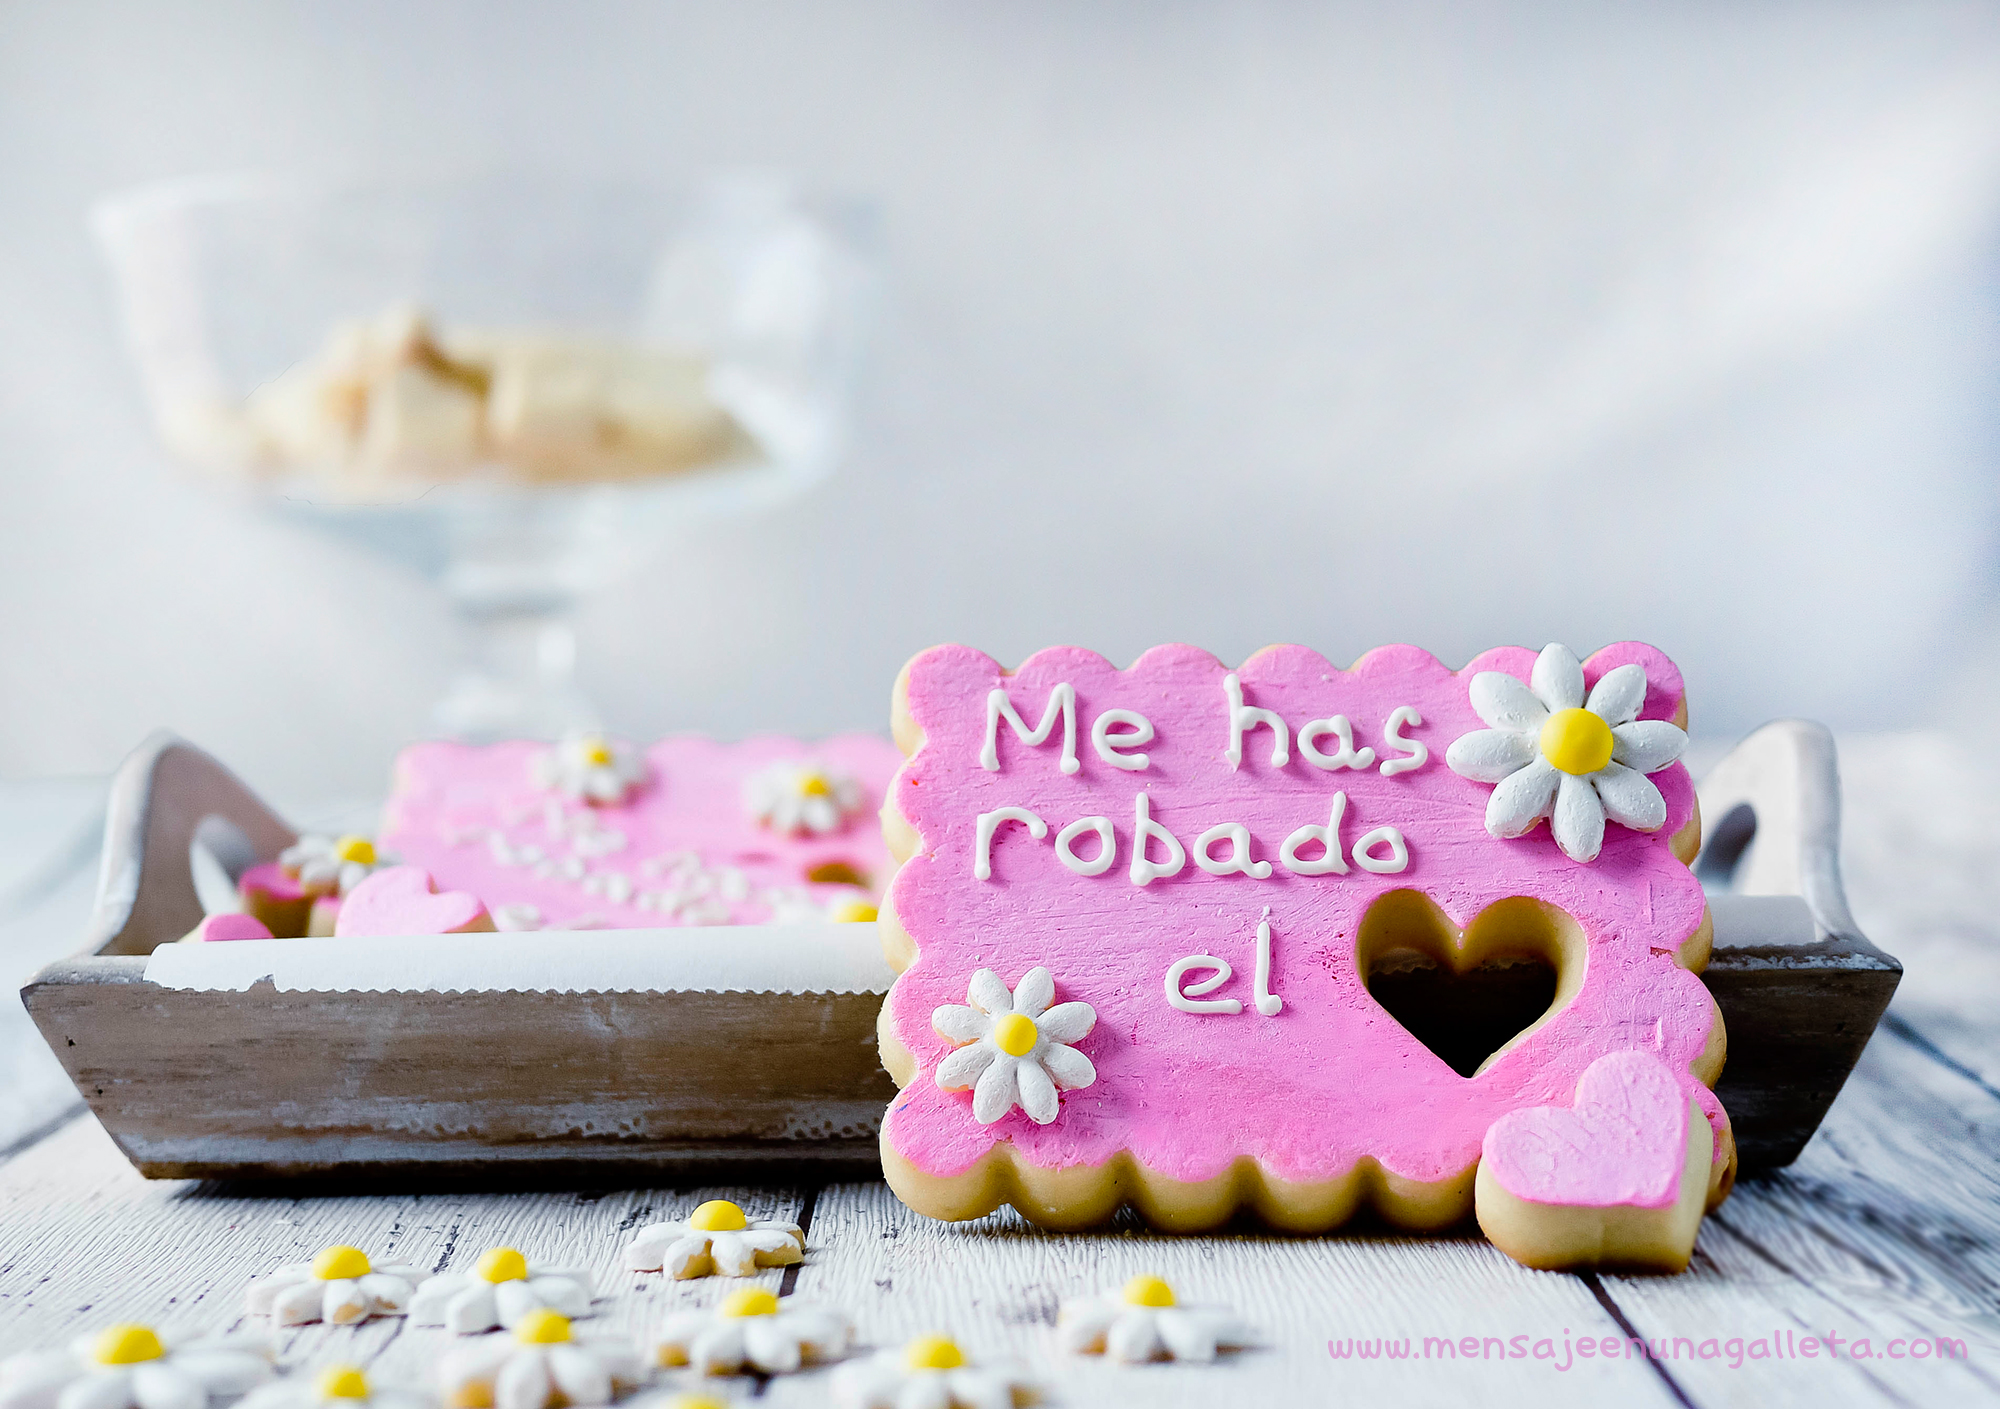
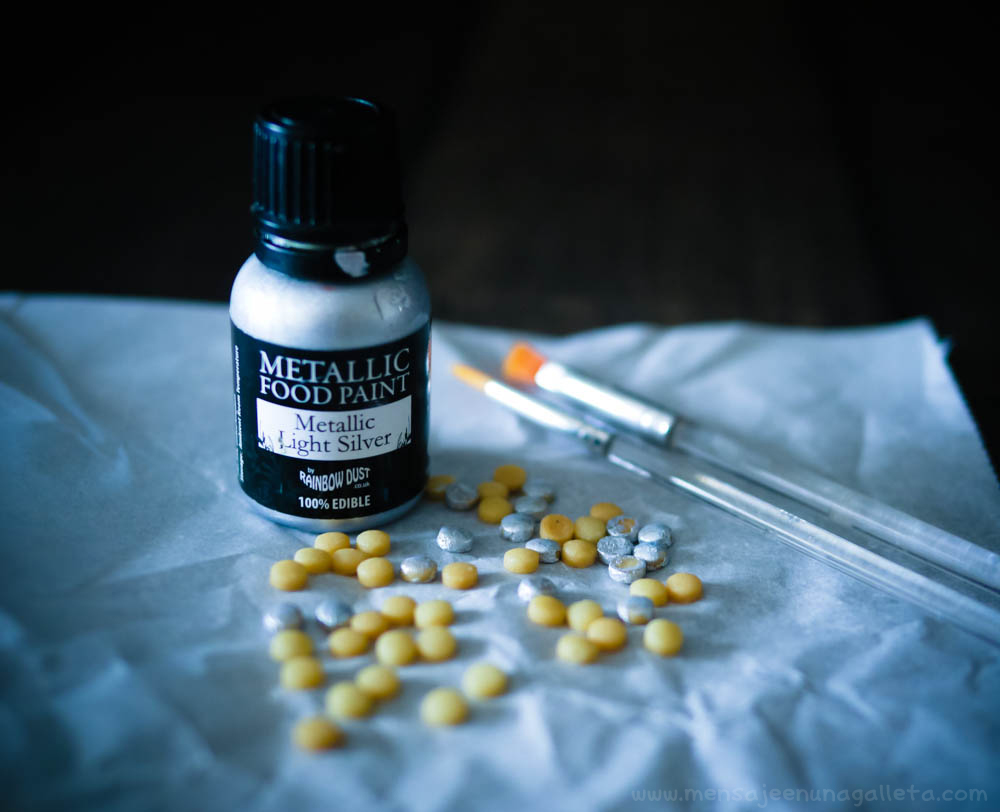
Sierra fue fácil de encontrar, apareció en una tienda de Barcelona, El Món de la Llar, que nos la hizo llegar con celeridad. En esta galleta usamos dos técnicas, galleta pintada en la hoja y galleta glaseada en el mango. Queríamos pintar la hoja de la sierra directamente sobre la galleta y no sobre glasa, para que el mango quedase elevado respecto a la hoja y conseguir mayor realismo. Queríamos además que brillase mucho y supiese bien. Tras varias catas a ciegas decidimos que las sierras que mejor sabían eran las pintadas con pintura metálica, mejor que con spray y además eran las que más brillaban.

Los tornillos son microgalletas que corté con la boquilla del 16 de pme, horneé y pinté una a una. Lo sé, es un acto de amor verdadero.

metalico

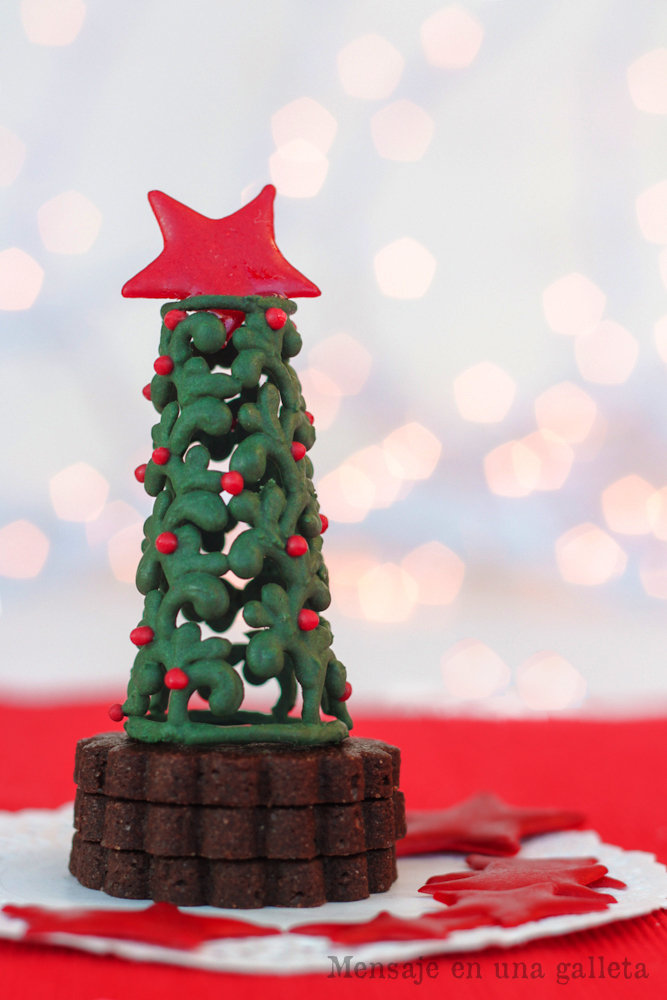
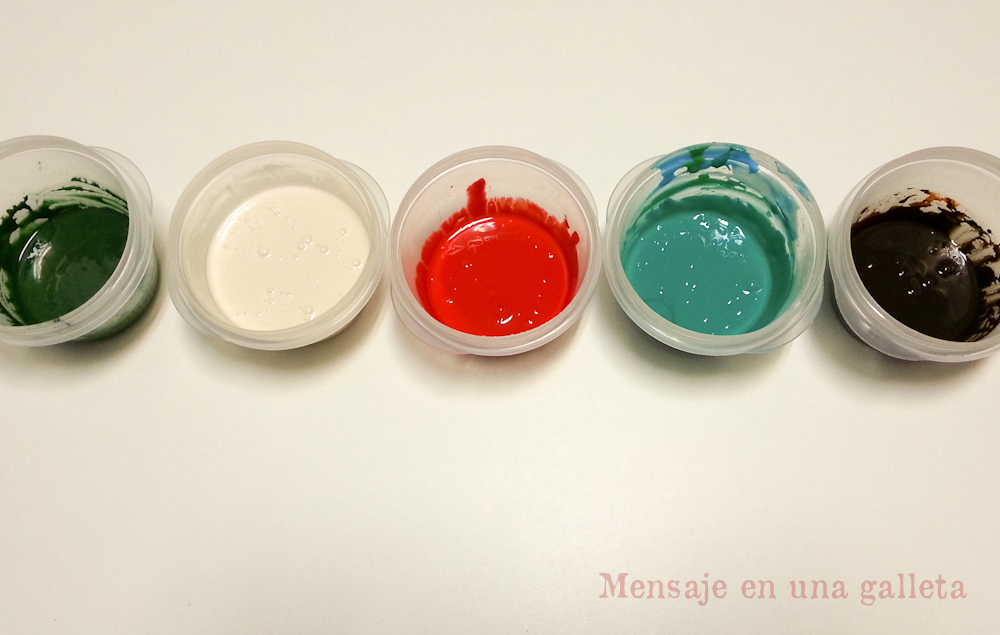
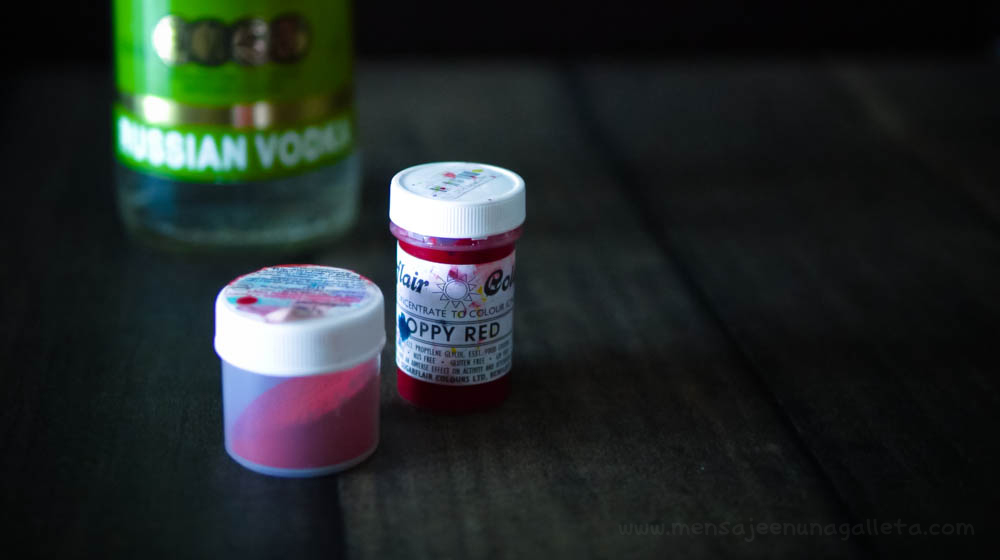
Buscamos a Canadá durante semanas, pero el candidato idóneo no aparecía. Gracias a Dios lo encontró Gloria en California, en este enlace lo podéis ver hasta en el Queen Mary: http://statigr.am/tag/galleteroyviajero. El diseño también se complicó, en las primeras versiones utilizamos masa coloreada, pero no nos decía nada. Así que probamos a pintarlo de rojo. ¡Misión imposible! Probamos Super red, Red red, Extra red, Poppy red, en cuanto mezclábamos los colorantes en gel con el colorante blanco en polvo para formar la pintura comestible, adquirían un tono rosa triste… Casi abandonamos, pero buscando el Christmas red para una última prueba apareció un colorante rojo en polvo que nos había enviado Esther de Mummy crafts y que habíamos olvidado: ¡Gracias Esther! Y mezclándolo con un poco de vodka y un poco de Poppy red: ¡La pintura roja perfecta!

colorantes

Y ahora que ya os lo he contado volvamos a Sidonie, escuchadlos, escuchadlo todo pero empezad por Costa Azul, es mi disco.

Un beso gordo, Miriam G.sierraycanadamonton

Most of my friends refuse to listen to the music that I nicely suggest to them; “Miriam, another one of those weird groups of yours please NO”. Then, they go to see Alejandro Fernández, and I when I say ‘see’ it’s because I seriously doubt they go just to listen to him.

I am not a quitter, and that is why this summer I dragged Estíbaliz and Belén to a concert of Los Niños Mutantes using three arguments: private, terrace, catering. Believe it or not, they liked it. Then, I felt uplifted and when they least expected it we already had the tickets and necessary bookings for the Alhambra Sound Festival. ‘A list on Spotify, please, at least we need to know a couple of songs’. A month later, they were unable to tweet without using Marc’s lyrics. Now, the three of us are #bigfans.

Sidonie is about to release a new record; I don’t think you can guess how it’s called. It’s been a long wait for Estíbaliz and me, but we have had a great time with the record’s previous promotion in the social media, take a look at their Instagram: http://instagram.com/sidonie_ . That mug passing from hand to hand was begging for cookies. We put our hands to it with the secret hope the group will never get to see them: how embarrassing! The courier could lose them; a community manager with a sweet tooth could eat them…

 sierraycanadapedestal

You will be thinking that one thing is that this blog post doesn’t have a recipe and a different one that we are not going to tell you how we made these cookies. Let’s go!

I will begin with Sierra, which is not a cookie, but four, and in order to make it we needed two cutters, a saw-shaped one and an ‘I’ letter for the closed handle. The tip is also a cutter, you will see it now.

cortadores

Sierra was easy to find, it appeared on a shop in Barcelona, El Món de la Llar, which sent it to us really fast. We used two different techniques with this cookie, the saw blade was painted and the handle was iced. We wanted to have the saw blade painted and not iced so the cookie would have two levels and more realism. We also wanted it to shine a lot and taste nice. After several blind tastings we decided that the blades that tasted better were the ones painted with metallic colourings, not spray, and they were also the shinier.

The screws are micro cookies cut with a PME #16 tip that I baked and painted one by one. I know, it was a truly act of love.

metalico

We searched for Canada for weeks, but we could not find the right candidate. Thank God Gloria found it in California, in this link you can see it even in the Queen Mary:  http://statigr.am/tag/galleteroyviajero. The design got complicated too, for our first tests we used colored dough, but it said nothing to us. We tried to paint it in red. Mission impossible! We tried Super Red, Red Red, Extra Red, Poppy Red, in the moment we mixed the gel food colourings with white powdered food coloring to create an edible paint, they turned into sad pink shades…We almost gave up, but looking for Christmas Red for a final try, we found a red powdered food coloring that Esther from Mummy Crafts sent us and which we had totally forgotten about: thank you Esther! And mixing it with a bit of vodka and a bit of Poppy Red: the perfect red paint!

colorantes

And now that I’ve told you about the cookies, let’s go back to Sidonie, listen to all their records, but please start with Costa Azul, it’s my favourite record.

A big fat kiss,Miriam G.

Me has robado el corazón.You’ve stolen my heart

corazonrobado1

Se acerca San Valentín, digamos que no le tengo mucha fe a este santo.  Creo más en San Patricio. Ya lo sabéis, no me compréis bombones, ni me escribáis bonitas frases en una tarjeta, invitadme a cerveza.

Y dicho esto, pasemos a las galletas. Como he repetido en nuestras redes sociales, espero que no hasta el aburrimiento, están inspiradas en una canción que comienza:
“Es el día de la cita te he traído margaritas, del jardín de mi casero: ¡Te quiero!
En mi garganta – EL incendio, 2009 – Sidonie.

El primer paso es hornear, y la afirmación no es baladí, fijaos en las margaritas, también son de galleta, las pinté mal a propósito para que se notase. Así que no podemos empezar por los transfers de glasa, o lo que sería mucho peor por las florecitas de fondant, porque estas galletas, no llevan.

sindecorar

Tenemos nuestras crujientes galletas recién salidas del horno ¿qué hacemos? Esperamos hasta que se enfríen. Lo sé. No es muy emocionante, pero lo que viene a continuación sí: ¡Pintar directamente sobre las galletas! ¿Qué necesitamos?

  • Ginebra, vodka o cualquier otra bebida transparente de alta graduación, y no me digas que no tienes,  que te he visto tomando gintonics en Instagram.
  • Colorante blanco en polvo, usé Sugarflair.
  • Colorante en pasta o gel,  utilicé deep pink de Americolor

Mezclamos cantidades comedidas de los tres ingredientes, empezando con poco blanco y añadiendo más si necesitamos un tono más claro, removemos hasta que no queden grumos, cogemos un pincel de uso alimentario, y a pintar.
Esta “pintura” seca muy rápido, una hora en mi caso: sin calefacción. Como sabéis, ese invento todavía no ha llegado a Málaga, y con bastante humedad relativa.

La pintura para las margaritas solo lleva ginebra y colorante blanco en polvo. Si necesitaseis un acabado menos rústico, algo más plastificado, sólo tenéis que sustituir la ginebra por el spray clear de Pme, que sabe un poco peor.

corazonrobado2

Esta técnica tiene tres  grandes ventajas, es muy rápida, muy fácil pero, por encima de todo, no aporta nada de sabor a las galletas; las que véis en la foto tienen el delicioso sabor que les aportó el chorreón de vainilla bourbon que les eché. Ya no mido la vainilla, soy una tía generosa, vuelco el bote y dejo que caiga.

¡Animaros! Y por favor sentiros libres de usar nuestro muro de facebook para enseñarnos las galletas que decoréis con esta técnica.

Un beso, Miriam G.corazonrobado1

Valentine’s Day is getting closer; let’s say that I’m not very fond of this saint. I believe more in St. Patrick. So now you know, do not buy me chocolates or write me cute lines on a card, buy me a beer instead. And having said this, let’s go with the cookies. As I have repeatedly said in all our social networks, hopefully not till boredom, they are inspired by a song whose first lyrics are:

“Es el día de la cita te he traído margaritas, del jardín de mi casero: ¡Te quiero!
En mi garganta – EL incendio, 2009 – Sidonie.

First step is to bake them, and this is not unimportant, take a good look at the daisies, they are cookies too, badly painted on purpose so you could notice it. So we can’t start with the royal icing transfers, or what could be worse, fondant flowers, because these cookies don’t have any of those things.

sindecorar

We have our crunchy cookies freshly baked, what do we do now? Wait until they cool down. I know, it’s not very exciting, but the next step is: to paint directly on the cookies!
What do we need?

  • Gin, vodka or any other transparent liquor, and do not tell me you don’t have any, because I saw you having gintonics on Instagram.
  • White powdered food coloring, I used Sugarflair.
  • Gel or paste coloring, I used Deep Pink from Americolor.

corazonrobado2

We mix reasonable amounts of the three ingredients, starting with the white powder, and adding more if we need a lighter shade, we stir them until there are no lumps at all, then take a safe food brush, and start painting.
This ‘paint’ dries very fast, an hour in my case: no heating (as you know, that invention has not reached Málaga yet) and with a lot of relative humidity.

The paint for the daisies consists only in gin and white powdered food coloring. If you need a less rustic finish, something more plasticky, you just have to substitute gin for the PME clear spray, which tastes a little worse. This technique has three big advantages: it is very fast, very easy but most of all, it doesn’t add any flavor to the cookies: the ones you see in the pictures have the delicious taste of the generous amount of vanilla bourbon that I used. I never measure vanilla anymore; I am a lavish girl, just flip the jar and let it run.

Go for these! And please feel free to use our Facebook wall to show us the cookies you decorate using this technique.

Love,
Miriam G.

Arbolito de Navidad con glasa, solo con glasa.Christmas tree made with royal icing, only royal icing

arbolalzado2

Antes de empezar el post quiero hacer una advertencia: LAS PERSONAS QUE PADEZCAN DEL CORAZÓN, DEBEN ABSTENERSE DE HACER ESTE ÁRBOL. Durante la realización del mismo se producen episodios de mucho estrés y llantinas, y no todos los corazones pueden soportar tal carga emocional. Efectivamente, lo pasé fatal.

Ahora ya puedo continuar con el post. Si estáis decididos a hacerlo tendréis que agenciaros los siguientes materiales:

  • Cucuruchos de helado, como ya os habréis figurado.
  • Papel de horno o bolsas para galletas de tamaño suficiente como para cubrir el cucurucho
  • Glasa madre con 65 ml de agua, en vez de los 70 para que, al añadirle el colorante, siga siendo espesa (vamos a trabajar con la fuerza de la gravedad en nuestra contra y no queremos que el diseño termine siendo un churro)
  • Boquilla del 4, para que las decoraciones sean más robustas
  • Una peana de galletas para que el árbol luzca como se merece, incluso encima de unos macarons también tiene que quedar precioso
  • Sirope claro de maíz para pegar la estrella

Empezamos recortando los cucuruchos, los que yo conseguí no tenían el borde igualado así que los corté, primero con un cuchillo de sierra y luego con otro de borde liso para terminar de pulirlos. Esmeraos en esta parte porque un cucurucho «cojo» se tumba fácilmente.

Después recortamos el papel de horno (o la bolsa de galletas) y envolvemos con él el cucurucho pegándolo al principio y al final con esa glasa que ya tendremos lista. Y ya podemos comenzar a decorar.

Collagecucuruchos

No cometáis el mismo fallo que yo y os entusiasméis decorando el cono hasta abajo porque luego no hay quien lo maneje y se pasa muy mal intentando no tocar ninguna de las decoraciones. Por cierto, intentad que queden pegadas unas con otras para darle más solidez al árbol.

Sigamos. Al día siguiente ya sabía que los arbolitos estaban secos, pero fui dilatando el tema del despegue (y no me refiero a aviones) buscándome otras tareas caseras para no «enfrentarme» a ellos. Cuando ya no tenía más excusas me atreví a sacar el cucurucho de helado, eso estaba chupado. Ahora llegaba lo verdaderamente estresante: despegar el papel de horno, con mucho cuidado, ya os lo habréis imaginado. Pues a pesar de todo el cuidado del mundo, aquello terminó en tragedia:

desastre

No pasaba nada, tenía todavía dos oportunidades más, que terminaron siendo una sola ¡qué estrés! Pero mirad por dónde las musas vinieron a visitarme y se me ocurrió ayudarme de un palo de brocheta para despegarlo todo.

brocheta

Fui introduciendo el palo entre la glasa y el papel y aplastándolo contra el eje del cono, suavemente pero pulso tembloroso… Y aquí es donde viene la llantina porque no podía creerlo ¡se había despegado entero! ¡y sin romperse! ¡qué alivio! Menos mal que era la hora de la siesta y nadie me vio ¡lo había pasado tan mal!

Ahora ya todo era cuesta abajo, le pegué la estrella (un transfer de glasa) con un poco de sirope de maíz y di por cumplida la misión ¡Qué alegría!

arbolplanta arbolpicado

Un beso,

Estíbaliz

P.D.: Muchas gracias, Gloria. No la dejamos descansar ni en Navidades

arbolalzado2

Before I start I want to add a word of caution: people suffering from heart disease must refrain from making this tree. During its elaboration you may sob, suffer stress episodes and not every heart can cope with such emotional burden. Yes, I had a rough time.

Now I can keep writing the post. If you are determined to make this tree you will need the following materials:

  • Ice cream cones, as you may have imagined.
  • Parchment paper or cookie bags big enough to cover the cones
  • Royal icing made using 65 ml of water instead do the usual 70, so when we add the food colouring it’s still thick (we are going to work with gravity against us and we do not want our design to end up being a disaster)
  • Tip #4 so the decorations are more robust
  • A  base of cookies so the tree looks as it deserves to do so, even on top of some macarons it may look fantastic
  • Corn syrup to glue the star

We start by cutting the cones, the ones I got didn’t have even edges so I cut them, first with a serrated knife and then with a blunt one to make them smoother.

Then we cut the paper (or the cookie bag) and wrap the cone with it, using some RI to glue it. Now we can start decorating.

Collagecucuruchos

Do not make my very same mistake and get too excited decorating the cone to the bottom, as later on there will be no way for you to manipulate it and it’s really stressful trying not to touch any decoration. And speaking of decorations, try to glue them together so the tree gets more solid.

Let’s continue. Next day I knew the trees were dry, but I delayed the take off moment (and I’m not talking about airplanes here) looking for some other home errands so I didn’t have to ‘face’ those trees. When I ran out of excuses, I dared to remove the cone. That was easy. Now he next step was tricky: taking the parchment paper off. Well, in spite of me being extremely careful, it ended up being a tragedy.

desastre

Ok, it was fine, I still had two more opportunities, which turned into just one. How stressful! But just like that, muses came to visit me and I thought about using the help of a skewer to remove the paper.

brocheta

I introduced the skewer between the RI and the paper and pushed it against the cone’s axe, very softly and with a trembling pulse…and here is where the sobbing appears, I couldn’t believe it! It came off completely and without breaking! What a relief! Thank God it was siesta time and no one saw me, I’d had such a hard time!

Now it was all down the hill, I glued the star (a royal icing transfer) with a bit of corn syrup and then it was mission accomplished.

arbolplanta arbolpicado

Love,

Estíbaliz

P.S.: Thank you very much, Gloria We don’t even let her rest on her holidays

Galletas para regalarCookies to give

regalosprimerplano

O cómo hacer una montaña de galletas y que parezcan regalitos. Muy fácil. Lo primero de todo es conseguir el cortador con forma de torre de regalos (este tan gigantesco nos lo regaló Bea de www.enjuliana.com) y si no, pues cortáis una galleta rectangular del tamaño que más os guste, que también hace el apaño. También tendréis que cortar cuadrados grandes y pequeños. Una vez horneado todo, vais pegando con un poco de glasa los cuadrados hasta conseguir el grosor que queréis para los regalos, podéis unir dos o tres o ninguno.

Ahora se me planteaban nuevos dilemas: ¿pegarlo todo y decorar después? o ¿decorar todo y pegar después? Solo tenía que preguntar a Miriam: decorar todo y pegar después. Sí, muuuucho más fácil.

Estaba muy entusiasmada con la idea de cubrir todos los cuadrados con glasa y decorarlos con wet on wet para darle más «realismo». Pero no fue una buena idea porque la glasa de los lados arrastró sin piedad las decoraciones y terminó siendo un desastre. Estáis advertidos. Otra duda despejada: las decoraciones wet on wet iban a ser solo por arriba. La cosa iba poniéndose más fácil por momentos.

Mientras tenía todos los cuadrados cubiertos de glasa secándose plácidamente, me dediqué a decorar con glasa lo que iba a ser el fondo para los regalos.

Pasoapasoregalos

Por cierto, no os he dicho que me enamoraré de la paleta de colores de Navidad vintage que nos enseñó Sonia en su curso de Photoshop e intenté reproducirlos en glasa, con más o menos acierto.

Coloresvintage

Y mientras se secaba todo, me dediqué a hacer los transfers para los lazos. Cuando los tuve secos los pegué con glasa del mismo color a las galletas de arriba, acomodados sobre unas pinzas para bolsas de Ikea para que se «soldara» el invento.

regalosperfil

Y mirad lo mono que me quedó el arbolito a juego:

arbolprimerplano

Un beso,

Estíbaliz

P.D.: Muchas gracias, Gloriaregalosprimerplano

Or how to make a mountain of cookies that look like little presents. Very easy. First we need to get a hold of a cutter in the shape of a tower of presents (this giant one was a pressie from Bea de www.enjuliana.com). If you can’t, another option is to make a rectangular cookie of the size you need. You also have to cut big an small square cookies. Once everything has been baked, you start by glueing the squares with a bit of royal icing until you get the desired thickness. You can glue two, or three, or none.

Then I had two new dilemmas: should I glue it all and decorate, or decorate first and then glue? I just had to ask Miriam: first I had to decorate and then glue. Yes, sooooo much easier that way.

I was very excited about the idea of covering all the squares with royal icing and decorating them using the wet on wet technique to give it more realism. But it wasn’t a good idea because the icing from the sides ruined the decorations and it all ended up being a real mess. Now you’re warned. Another doubt that was cleared: wet on wet decorations would only go on top. Things were getting easier by the minute.

While I had all my squares covered in royal icing and drying, I started to decorate the background for the cookie presents, also using royal icing.

Pasoapasoregalos

By the way, I haven’t told you that I felt in love with the vintage Christmas palette color that Sonia showed us in her Photoshop course and I tried to reproduce them in RI, with more or less success.

Coloresvintage

And while everything was drying, I made the transfers for the bows. When they were dry, I glued them to the cookies from above with RI in the same color, letting them rest on some bag pins from Ikea so they could ‘weld’ properly.

regalosperfil

And look how pretty was the tree that I made matching the cookies:

arbolprimerplano


Love,

Estíbaliz

P.S.: Thank you very much, Gloria