Feliz NavidadMerry Christmas

Estrellas1Hoy no hay receta: ¡Horror! Pero para compensaros os traigo el truco definitivo de una superficie tan lisa que casi brilla para vuestras galletas. Y además una nueva utilidad para esos cortadores de estrellas que comprasteis pensando hacer todos los años un árbol y que todavía siguen en su plástico. (Efectivamente Marta Blanco Ballesta, tú eres la excepción que confirma esa regla.)

estrellas2

Os puedo asegurar que la cara de sorpresa del destinatario al recibir este móvil de galleta está asegurada: “¿Pero esto son galletas”. Respuesta: “¡Sí! De jengibre
Vamos a lo que nos ocupa, en la siguiente foto aparecen los cortadores que he utilizado. El 10, 7, 6,3 y 2. Siendo el número 10 la estrella más grande y el 1 la más pequeña.

estrellascorte

Os aconsejo cortar en frio, volver a enfriar sin quitar los cortadores de su posición, y con la masa muy fría dejar las galletas como aparecen en la segunda imagen. Yo las hice de 3mm de grosor y necesitaron 12 minutos de horno.

Prestad atención a las siguientes dos fotos, son las mismas galletas, en la primera se ven las galletas recién sacadas del horno, y en la segunda son esas mismas galletas a los 10 minutos: ¡Magia!

pompitas
Si no me creéis fijaros en la marca de la izquierda de la galleta central, o la marca de la derecha de la galleta grande. ¡Son las mismas! ¿Cómo es posible? Pues sintiendo decepcionaros, en esta ocasión la respuesta no es chocolate, es bandeja caliente:

bandejas

Mientras horneamos las galletas, aprovechamos y calentamos una bandeja extra. Sacamos las galletas del horno y rápidamente colocamos la bandeja sobre ellas. La levantamos a los diez minutos y… ¡Galletas extralisas!

pintadas

La decoración es muy sencilla, pintamos directamente la galleta más grande y la más pequeña con la mezcla dorada de las coronas. Y la del centro con una mezcla del mismo spray y purpurina, dando toquecitos suaves con el pincel.

Los agujeritos están hechos con la parte de atrás de una brocheta.

estrellas3

Sabéis que os queremos, y nos gusta recordaroslo, incluso en Navidad:

Estrellas1

There’s no recipe today, what a tragedy! But to compensate I will show you the definitive trick in order to obtain a cookie surface so smooth that it almost shines. And I have a new use for those star cutters you bought one day thinking about making a Christmas tree every year since then, and which are still wrapped in plastic (Marta Blanco Ballesta, yes, you are the exception to the rule).

estrellas2

I can assure you that the shocked face of the recipient of this cookie mobile is guaranteed: ‘are these cookies, seriously?’. Answer: ‘Yes! Ginger cookies’.

Let’s go for what’s really important. In the next pictures you can see the cutters I’ve used. 10, 7, 6.3 and 2. Being 10 the biggest star and 1 the smallest.

estrellascorte

I recommend you to cut the cookies with the dough very cold, put them back in the fridge without taking the cutters off, exactly as they appear in the first image. Mine are 3mm thick and took 12 minutes to bake.

Pay attention to the next two pictures, they are the same cookies. In the first one you can see them as they came out of the oven. In the second one, what you see are exactly the same cookies 10 minutes later. Magic!

pompitas
If you don’t believe me pay attention to the mark on the left of the central cookie, or to the mark on the right of the biggest cookie. They are exactly the same cookies. How is it possible? I’m sorry to disappoint you but this time the answer is not chocolate, it’s a hot tray:

bandejas

While we bake the cookies, we also heat an extra tray. When we take the cookies out of the oven, immediately we place the hot tray on top of them. We lift it after 10 minutes and…Super smooth cookies!

The tiny holes are made using the back part of a skewer.

The decoration is very easy, we paint the biggest cookie directly and the smallest one with the golden mix I used for the crowns. The star in the middle was painted with the same mixture of spray and glitter, applied in soft brushstrokes

estrellas3

You know we love you, and we like to remind you that we do, even at Christmas time:

Mosaico de galletasCookies mosaic

arbolrosa

Trabajito de chinos, efectivamente. Ahora que he tenido un poco de tiempo libre he conseguido quitarme ese “runrún” que tenía metido en la cabeza desde hace más de un año: hacer un mosaico en una galleta. La opción de usar teselas de glasa no valía porque todos sabemos que la glasa, cuando se seca, tiene los bordes redondeados, así que la alternativa era hacerlo con galletas pequeñitas que, horneadas como Dios manda, sí que tienen los bordes rectos. Así que Miriam, que tiene más paciencia que yo, me horneó millones de “microscópicas” galletas de millones de colores.

mas-de-mil (1)

Cosa que le agradecí mucho, y le hubiera estado aún más agradecida si me las hubiera dado separadas por colores jajaja… Menos mal que me busqué a un par de ayudantes que estuvieron un rato entretenidos clasificando y comiendo galletitas de colores.

ayudantes

Las alternativas eran dos: echar toda la glasa e ir incrustando las “teselas”, pero no iba a quedar como un mosaico de “verdad”. O bien usar la propia técnica para hacer mosaicos, poner las teselas y luego el “lecheado”, con la diferencia de que aquí no se podían cubrir las piezas como se hace con el cemento blanco, sino que había que ir sorteándolas por razones obvias. Así que pegué con glasa una a una las piezas al galletón rectangular (de 18 x 12 cms, que también me había horneado Miriam), ayudándome de unas pinzas porque cada una medía 5 mm de lado, dejando unos 2 mm de espacio entre galleta y galleta.

galletaspegadas

Ahora llegaba la hora de la verdad, el relleno. Lo más cómodo era usar glasa líquida que queda tan tentadoramente lisa ¿a que sí? Pues no. En mi fuero interno sabía que aquello no podía ser tan fácil. Lo que sospechaba, en las pruebas previas el “efecto crack” hizo estragos en las intersecciones de las líneas de glasa: mucho volumen para una glasa tan líquida. Pero no me dejé llevar por el pánico, solo tenía que aplicar nuestra exclusiva técnica para crear volúmenes: echar primero una capa de glasa muy densa y encima otra más líquida para que quedara todo liso pero con buenos “cimientos”.

rellenandomosaico

Ya solo me quedaba echar la glasa más líquida e ir puliendo esquinas y recovecos a la vez, todo a velocidad supersónica porque la glasa se secaba a la velocidad del rayo.

arbolverde

Si no nos “vemos” antes, os deseo una muy feliz Navidad y muchas cosas buenas para el año que viene.

Un beso,
Estíbaliz

P.D. Muchísimas gracias, Gloria.

arbolrosa

Hard job, a very hard job indeed. I’ve had a little bit of free time lately and I could finally focus on that idea I had on my mind for more than a year: to make a mosaic on a cookie. The option of using royal icing tiles was not valid because we all now that RI, when it dries, has rounded edges, so the alternative was to make it with tiny cookies which, properly baked, have straight ones. Then Miriam, who has a lot more patience than me, baked millions of microscopic cookies of zillion colors for me.

mas-de-mil (1)

This is something I truly appreciated, and I would have been even more grateful if she had given them to me separated by colors jajaja… Good thing that I found a couple of assistants who were really entertained for a while classifying and eating colored cookies.

ayudantes

I had two choices: to pour all the RI on the cookie and start embedding the ‘tiles’, but then it would not look like a ‘real’ mosaic, or to use the actual mosaic technique, placing the tiles and then pouring the RI, with the only difference that in this case, we could not cover the pieces as you do with white cement, and we had to avoid them for obvious reasons. Then, one by one and using a bit of RI, I glued the tiny pieces to the big rectangular cookie (18x 12 cms, also baked by Miriam) with the help of some tweezers, as each of them had a size of 3 mm separated by spaces of 2 mm between every cookie.

galletaspegadas

Then, the moment of truth: the flooding. The easiest thing was to use thin RI, which makes a tempting smooth surface, doesn’t it? But deep inside I knew that it would never be that easy. As I suspected, during my previous tests, the ‘crack effect’ caused havoc in the intersections of the RI lines: it was a lot of volume for such a liquid icing. But I did not panic, I just had to use our exclusive technique to create volumes: first I added a layer of very thick RI and then on top of it, another one using thinner RI, so everything looked smooth and with the right foundations.

rellenandomosaico

Then I just had to add the really thin RI layer and start polishing corners and holes at the same time, everything at supersonic speed because RI was drying with lightning speed.

arbolverde

If we don’t ‘see each other’ before the holidays, I wish you a very happy Christmas and a lot of good things in the New Year.

Love,
Estíbaliz

P.S.: Thank you, very very very much, Gloria

Galletas de chocolate, la receta definitiva y un dorado que brilla mucho y mancha nada.Chocolate cookies, the definitive recipe and a golden color that shines a lot and doesn’t stain at all

princesas1
Hace dos años adapté una receta buenísima. Quité un ingrediente, añadí otro, ajusté los demás y por supuesto cuando la publiqué cité a la autora. La receta se extendió como la pólvora y me alegré muchísimo, porque eran unas galletas tan irresistibles que la población española al completo engordó haciéndome parecer a mí más delgada. Me alegré a pesar de venir de una familia en la que las recetas se guardan con celo, ¡soy la oveja negra! Lo que me gustó un poco menos fue que unas pocas personas copiaron mi receta exacta punto por punto, coma por coma, falta de ortografía por falta de ortografía y citaron como fuente a Georganne y ni una palabra de Mensaje en una galleta. Y no es que pretenda que el ciberespacio haga lo mismo que yo, cada cual es libre de mostrar u ocultar el camino por el que llega la inspiración, pero si nombras una receta original y se la ofreces a tus lectores totalmente transformada quizá alguien puede pensar que eres tú el que se ha pasado tardes enteras con la nariz pegada al horno.
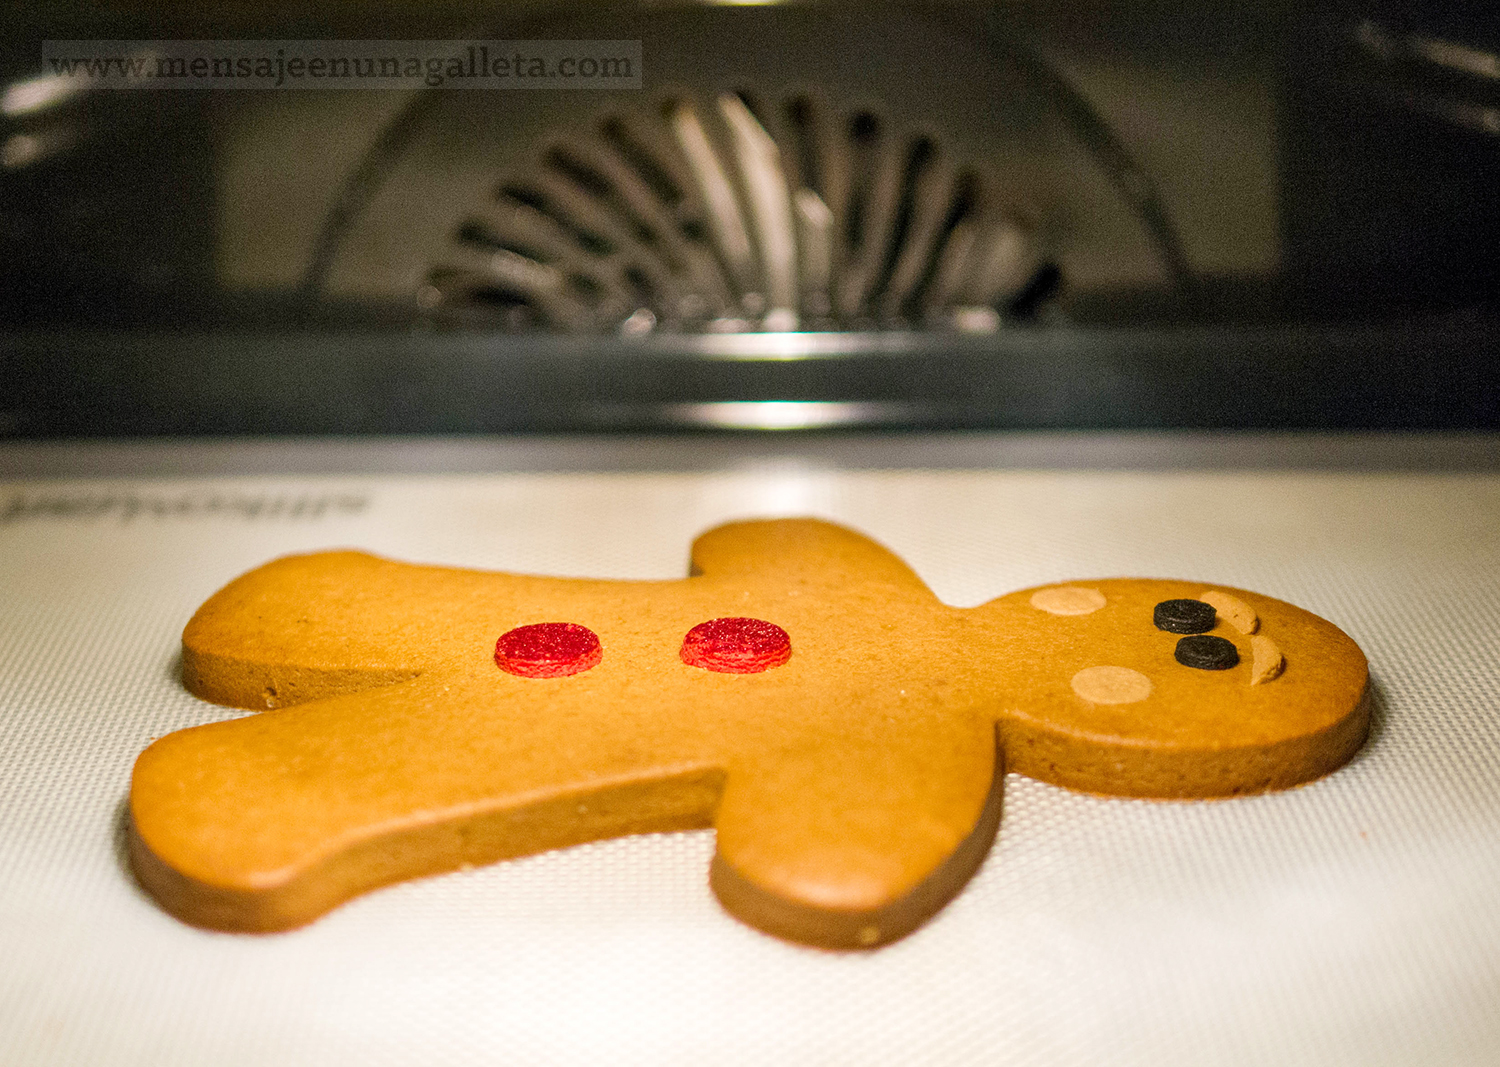
Aquella receta una vez publicada no dejó de transformarse en mi cocina, más oscura, menos dulce, más aromática. Hace un par de meses dejó de hacerlo, se negó a seguir cambiando. Así que he tenido que ponerle nombre: “Receta definitiva de galletas de chocolate”. Y es definitiva porque sirve para que el chico que te gusta se enamore perdidamente de ti, o y esto es casi peor, para que se te llene la casa de vecinas cada vez que el aroma se escapa por el rellano.

Ingredientes

– 275 gramos de azúcar integral de caña de extraordinaria calidad (*) molido muy fino.

– 250 gramos de mantequilla, la barra entera, lo cual es cómodo.

– Vainilla, toda la que puedas pagar, yo le estoy poniendo una cucharada, 15 ml, de buena vainilla en pasta variedad Bourbon.

– ½ cucharita de sal, no es opcional.

– 85 gramos de cacao puro en polvo Valor.

– 2 huevos ecológicos pequeños, si no son ecológicos, tienen que seguir siendo pequeños.

– Harina 450 gramos

(*) Después de que en un par de ocasiones me diesen gato por liebre con el azúcar moscabado, ahora compro el azúcar en el supermercado del corte inglés, uno que viene en bolsa de plástico y pone azúcar integral moreno de caña, de la marca Special line, no pone moscabado. Pero como os decía he comprado otros etiquetados como tal y que no lo eran, que se secaban, y se ponían como una piedra, porque eran azúcar refinado teñido con melaza. Y esta receta necesita azúcar “salvaje”, lo menos procesado posible. El azúcar refinado no tiene sabor, este sí, fuerte, denso y un poco amargo.

Yo lo muelo con la thermomix, y confieso que para una superficie completamente lisa debería molerlo más, pero me encanta el punto crujiente que le dan los granitos que se salvan.

¿Puedo usar azúcar blanquilla molida? ¿Puedo ponerles azúcar glasé? Por supuesto, saldrán estupendas también, solo perderán el punto extra de sabor que les aporta este tipo de azúcar.

princesas3

Elaboración

Muelo el azúcar, le añado la mantequilla en cuadraditos, ni siquiera hace falta que esté a temperatura ambiente, mezclo, añado los huevos, la vainilla y la sal, mezclo, añado el cacao mezclo. Destapo la thermomix, meto la nariz y me contengo para no comerme la mezcla a cucharadas, añado la mitad de la harina, mezclo, la otra mitad, mezclo.
Pongo la masa sobre un tapete enharinado y amaso y amaso. Cuando la masa cambia de textura y deja de ser pegajosa, la extiendo dándole palmaditas hasta alcanzar más o menos el doble del grosor al que la voy a estirar, la enfrío hasta que se endurece.

La estiro con el rodillo cuando está muy dura, por dos razones:

  • Razón número 1: para conseguir que la superficie de las galletas quede lisa.
  • Razón número 2: para no tener que pisar el gimnasio y que aun así en la piscina alguna vecina me pregunte si me he operado.

Volvemos a enfriar y cortamos las galletas. Horneamos a 180 grados siempre sin aire, los minutos de horno dependen del tamaño de las gallletas, y de tu gusto. Haz pruebas, esta masa se puede comer cruda o carbonizada y esta rica siempre.

Nota: La masa cruda también engorda.

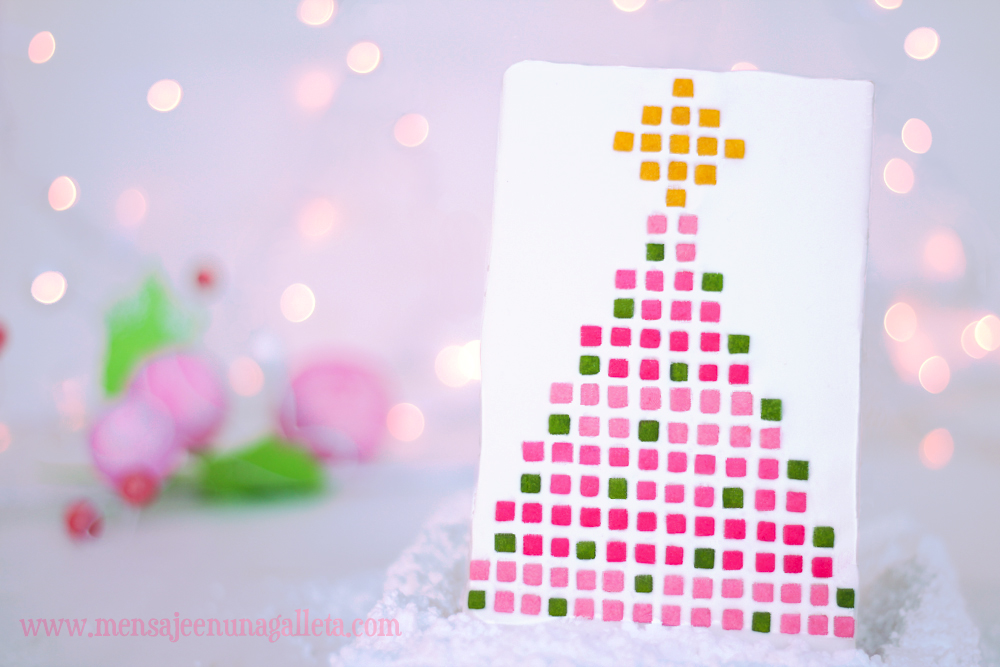
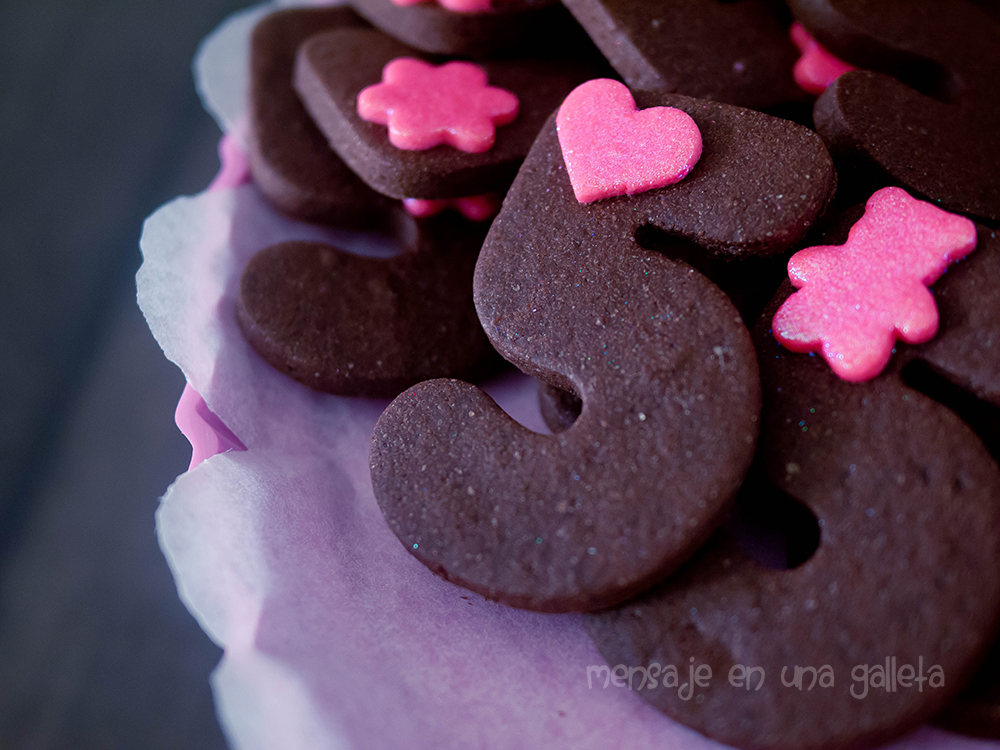
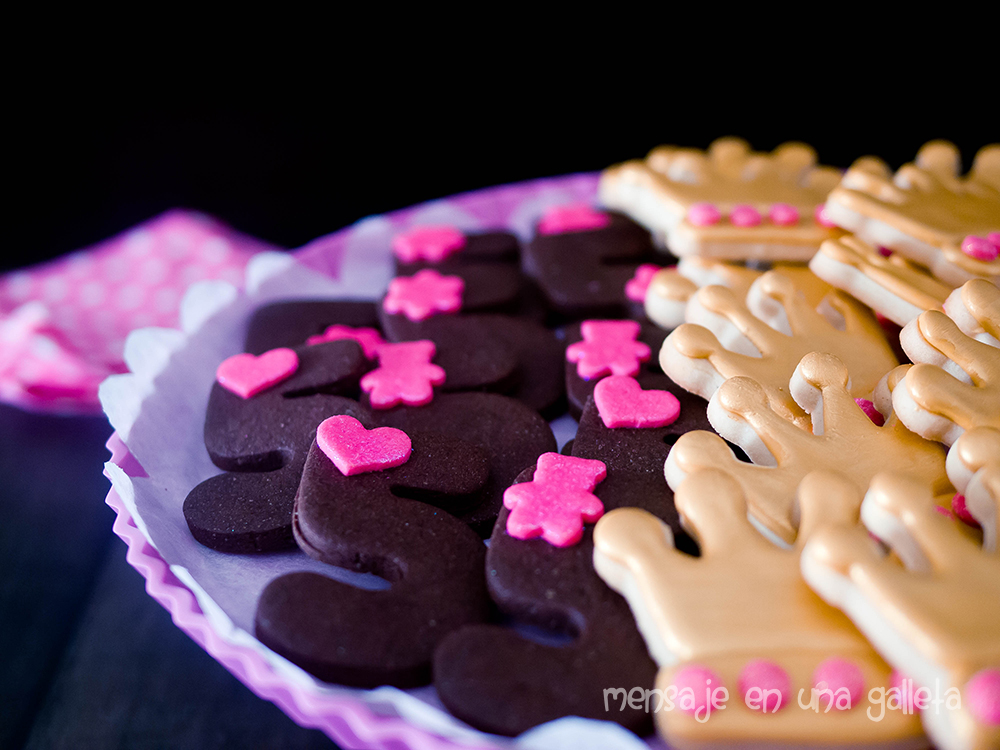
Las figuritas son de masa de vainilla coloreada cubierta de purpurina rosa y las horneé encima de los cinco para que se pegasen.

Redoble de tambores, por fin llegó el momento de desvelar el secreto del dorado. Sabéis que a falta de rock’n’roll mi estilo como decoradora es pop, colores brillantes y luminosos, diseños geométricos. Y podéis buscar en mi pasado, no encontraréis ningún dorado. He preferido aclarar este punto antes de continuar.

princesas4

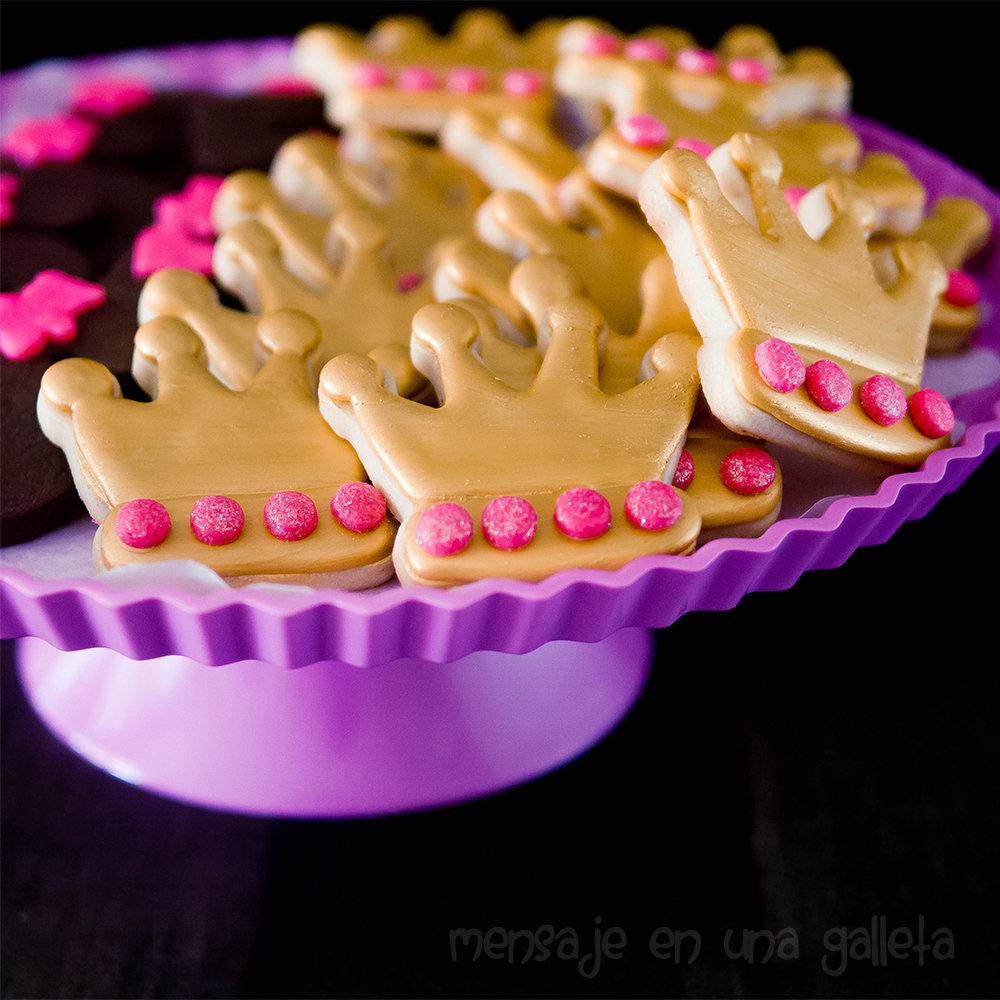
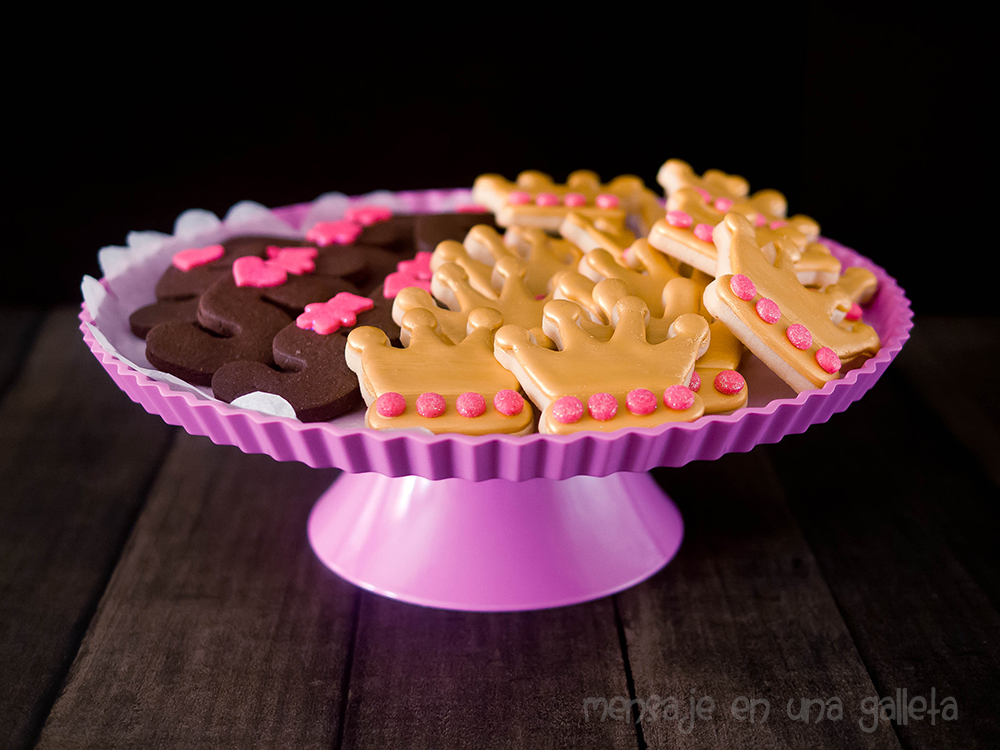
El pasado miércoles mi hija pequeña cumplía 5 años y lo celebrábamos en Princelandia, local elegido a su gusto y que terminó siendo del mío, por las instalaciones, el trato inmejorable y la cara de felicidad con el que todas las niñas lo abandonaron. Pues bien María quería ese día regalarle galletas a sus amigas, entre las dos decidimos hacer un 5 por sus años y una corona por Princelandia. Mi idea original es que tanto los cincos como coronas fueses de chocolate con detalles de purpurina rosa, pero María se escandalizó: “¿Mamá coronas de chocolate? ¿Dónde has visto tú coronas de chocolate?” Intenté librarme y le pregunté: “¿Entonces les ponemos glasa rosa?” Me miró con ojos enfurecidos: “Mamá las coronas de las princesas son de oro”. De esta forma comenzó la búsqueda de la piedra filosofal, literalmente, la transmutación de las galletas de oro. Con la dificultad añadida de que era sábado por la noche.

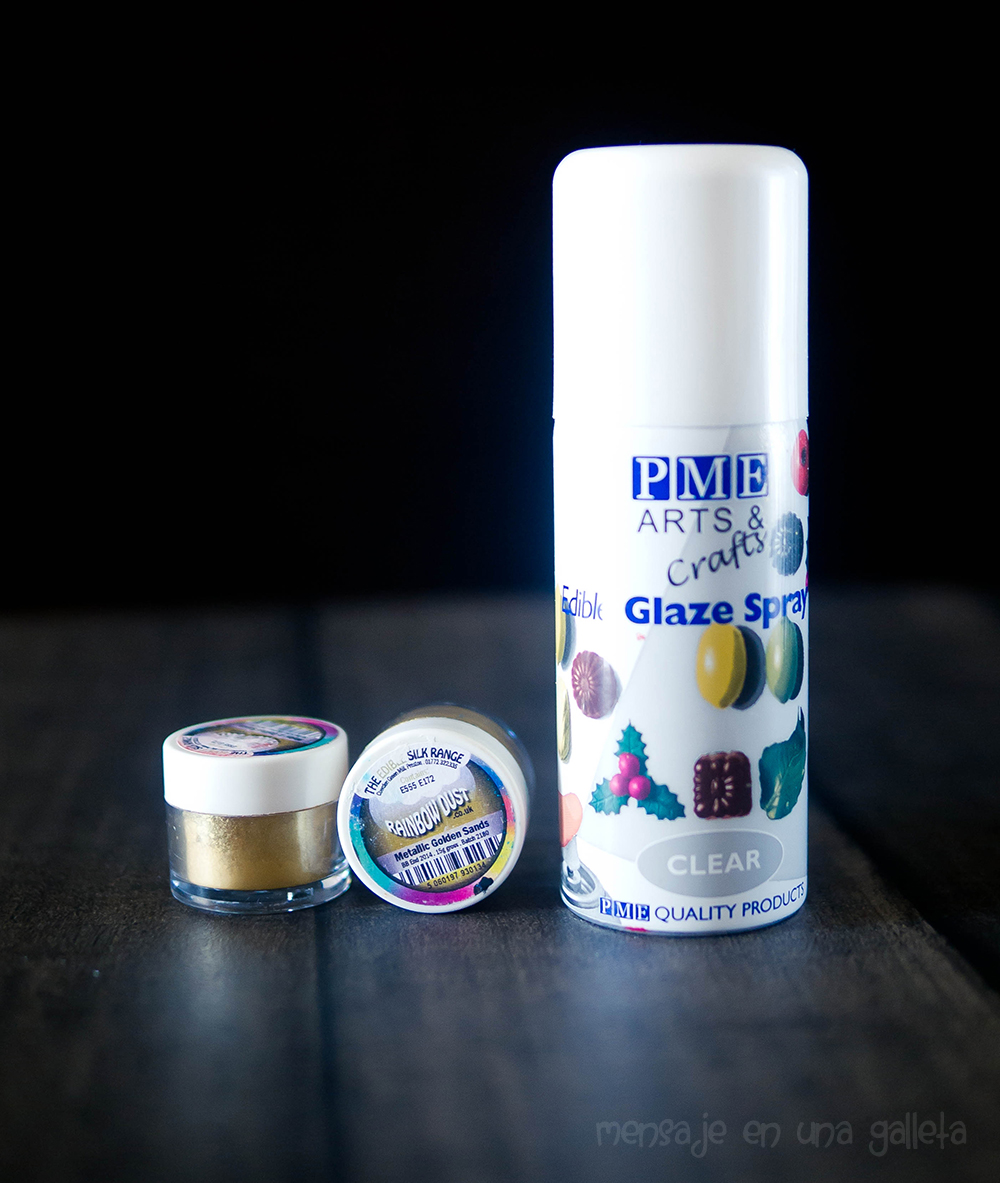
Lo único que tenía comestible y dorado en mi casa era Metallic Golden Sands de Rainbow Dust, esos polvitos dorados que compramos todas y que después no sabemos cómo usar. Necesitaba mezclarlo con algo antes de aplicarlos. Quería que las coronas brillasen, mucho, que no presentasen el aspecto rugoso típico de los dorados en las galletas, y por si fuera poco no manchasen las bolsitas de celofán en las que las iba a empaquetar. Revisé todo lo publicado por Haniela’s y Sweetambs, y lo más parecido al oro pasaba por el alcohol, y llamadme excéntrica, pero por mucho que se evapore, añadir vodka de alta graduación a algo que van a comer niñas de 5 años, no me pareció una opción.
Ya lo sabéis, encontré la manera. Dentro vídeo:

La solución es sencillísima. El spray CLEAR de PME que usamos cuando queremos que la glasa brille, es el “disolvente” ideal. Para fabricar pintura dorada pulverizamos el spray cuatro o cinco veces sobre en un cuenco de cristal, obtenemos un poquito de líquido a este líquido le añadimos los polvitos dorados y removemos, enseguida tendremos la mezcla preparada para aplicar con un pincel. Cunde muchísimo, nosotras pintamos 25 coronas con casi nada. Vamos añadiendo más dorado o más spray según lo necesitemos. Una advertencia la primera vez es muy importe pulverizar sobre el cuenco vacío, porque si lo haces sobre el polvo dorado la expresión ”intenso fulgor” se quedará corta para describir como brilla tu cara.

Otra ventaja: Se seca inmediatamente.

sprayarenas

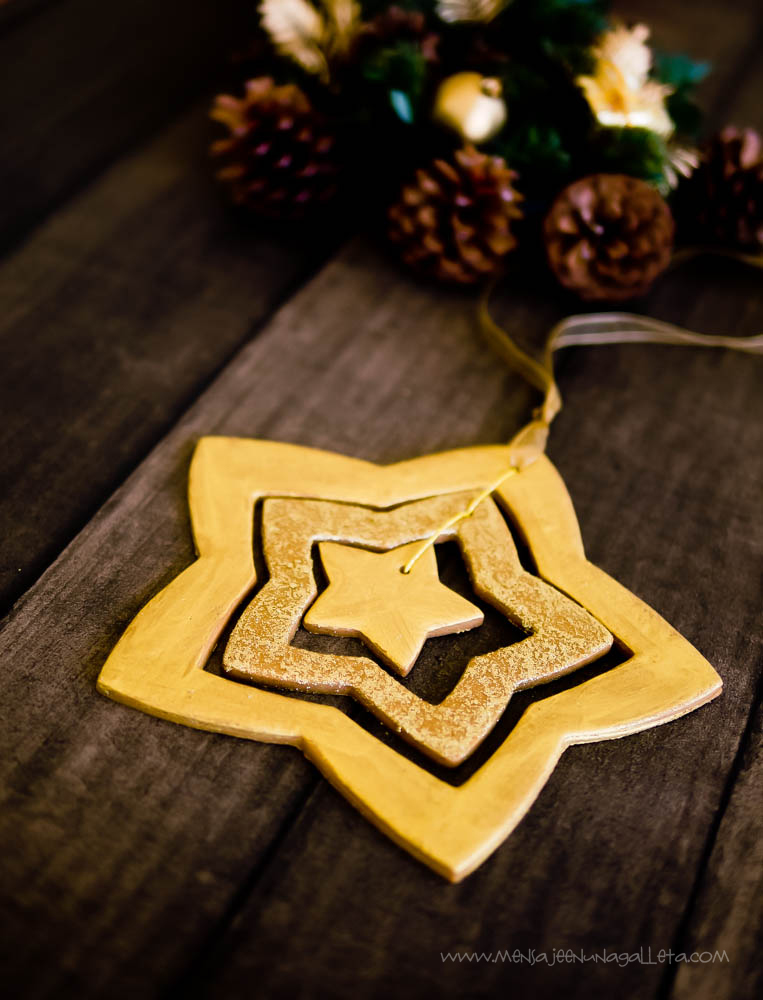
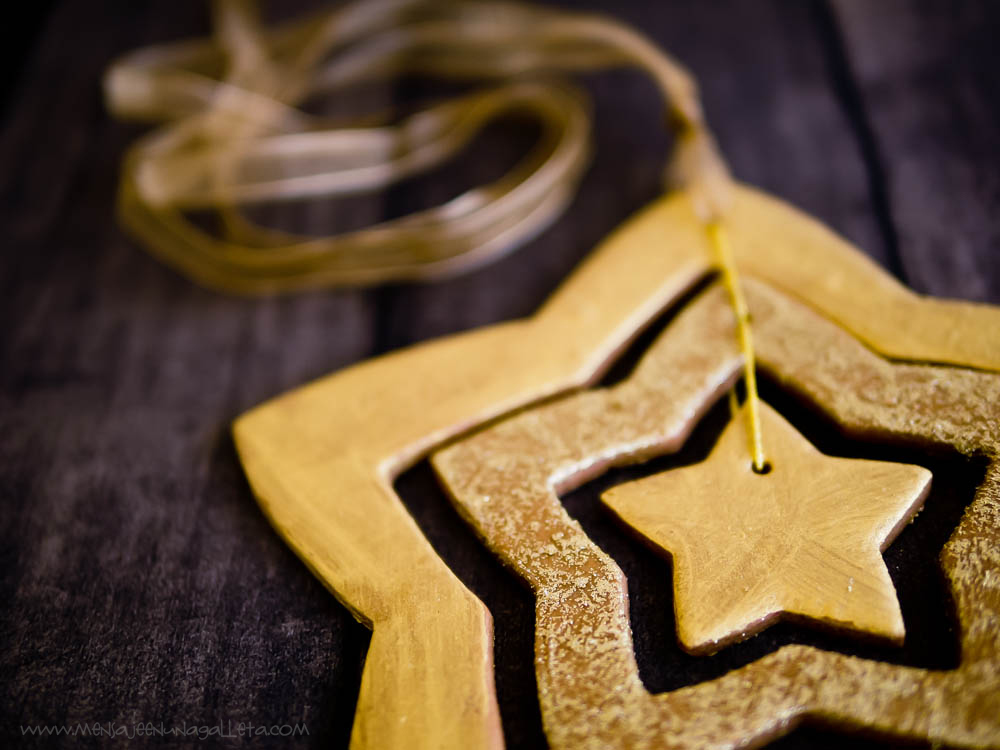
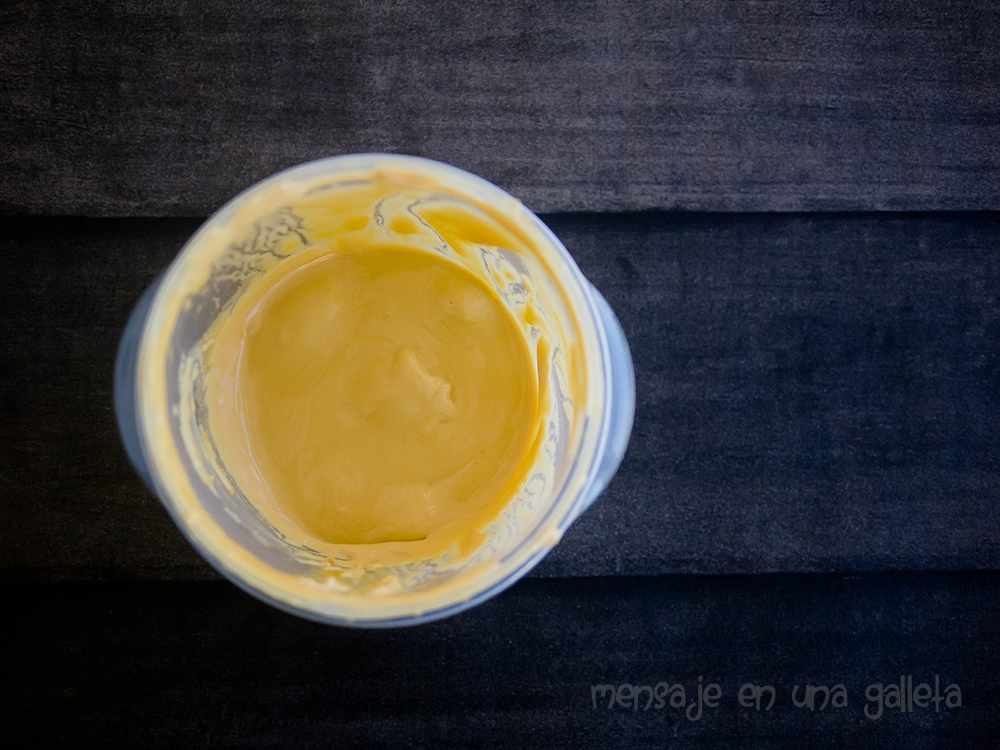
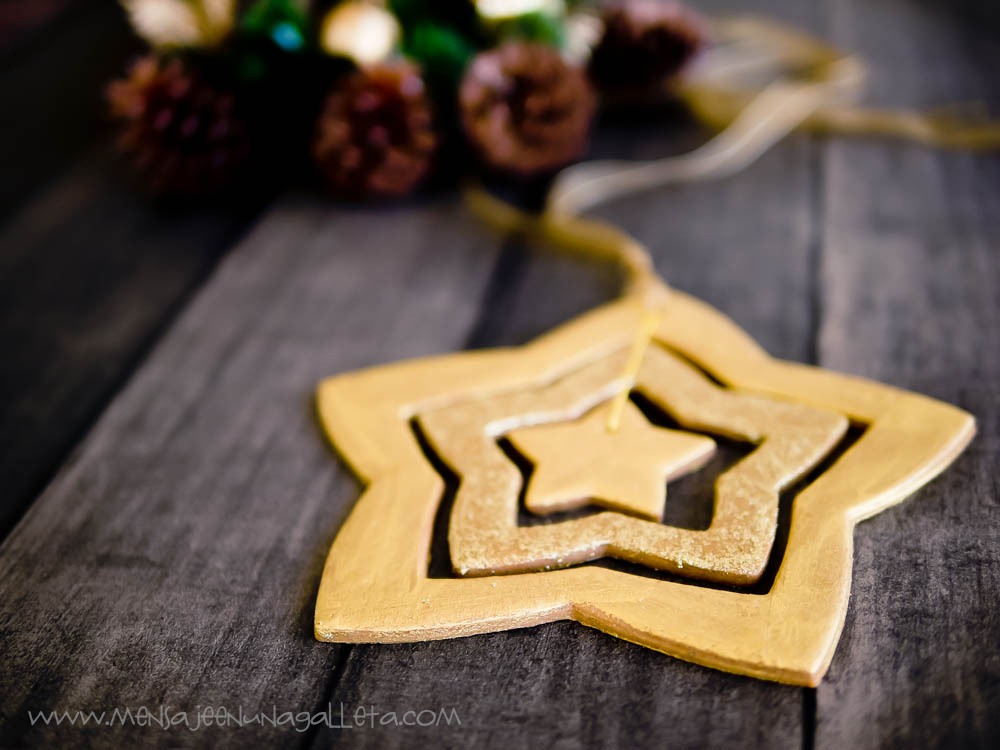
Es recomendable usar una glasa teñida de un color con vocación de dorado, yo utilicé marrón, amarillo e ivory para conseguir este tono:

glasadorada

Como siempre muchísimas gracias a la Reynolds por hacerme sonar tan bien en inglés.

Una última foto:

princesas2

Un beso gordo, Miriam G.

princesas1

Two years ago I adapted a very good recipe. I left an ingredient here, I add another one, I adjusted the rest, and of course, when I posted it, I cited the author. That recipe spread quickly and I was very happy about it, because those cookies were so irresistible that the whole Spanish population gained weight, making me look thinner. I was happy even though I come from a family where recipes are kept very secretly. I’m the black sheep!. What I didn’t like so much was that some people copied my recipe exactly like I wrote it, point-by-point, comma-by-comma, spelling mistakes included and cited Georganne as the source. Not a word about Mensaje en una galleta. It’s not that I want the cyber space to do the same I do; everybody is free to show or hide the road through which they get their inspiration from, but if in a post you mention an original recipe which you offer to your readers completely modified, maybe someone may think that it’s you the one who spent several afternoons with your nose stuck to the oven window.

Once that recipe was posted, it kept changing in my kitchen, darker, not so sweet, more aromatic. A couple of months ago, it refused to change anymore, so I had to give it a name: ‘The definitive chocolate cookies recipe’. And it is definitive, the final recipe, because you can use it to make the boy you like fall desperately in love with you, or (this is even worse), to get your house full of neighbors when the smell from your house reaches the stair landing.

Ingredients:

– 275 grams of an extraordinary quality whole can sugar (*) finely ground.

– 250 grams of butter, the whole stick, which is convenient.

– Vanilla, all that you can pay. I am using a tablespoon, 15 ml, of a good Bourbon vanilla paste.

– ½ teaspoon of salt. Not optional.

-85 grams of Valor pure cocoa powder.

– 2 organic eggs, size S, if they are not organic, they still need to be small.

– 450 grams of flour

After having had the wool pulled over my eyes with Muscovado sugar, now I buy the sugar in the supermarket of El Corte Inglés, it comes in a plastic back where it says ‘whole cane sugar’. The brand is Special Line. You can’t read Muscovado anywhere. But as I said, I have bought some other labeled as such and they were not, the sugar got dry, hard as a stone because it was refined sugar dyed with molasses. Refined sugar is tasteless, whole cane sugar has a strong and dense flavor, a bit bitter.

I grind the sugar using the Thermomix and I confess that in order to get a complete smooth surface in our cookies I should grind it more, but I do love the crunchy touch of the tiny grains that miss the grinder.

Can I use ground white sugar? Icing sugar? Of course, you will get great cookies too, they will only miss the extra taste of this specific type of sugar.

princesas3

Elaboration:

I will tell you how I prepare them: I grind the sugar, add the butter in dices, it doesn’t even need to be at room temperature. Mix, add the eggs, vanilla and salt. Mix again, add the cocoa. Mix. I open the Thermomix, stick my nose in it and I refrain myself from eating the mixture by the spoonful. Add half of the flour, mix, and add the other half. Mix again.

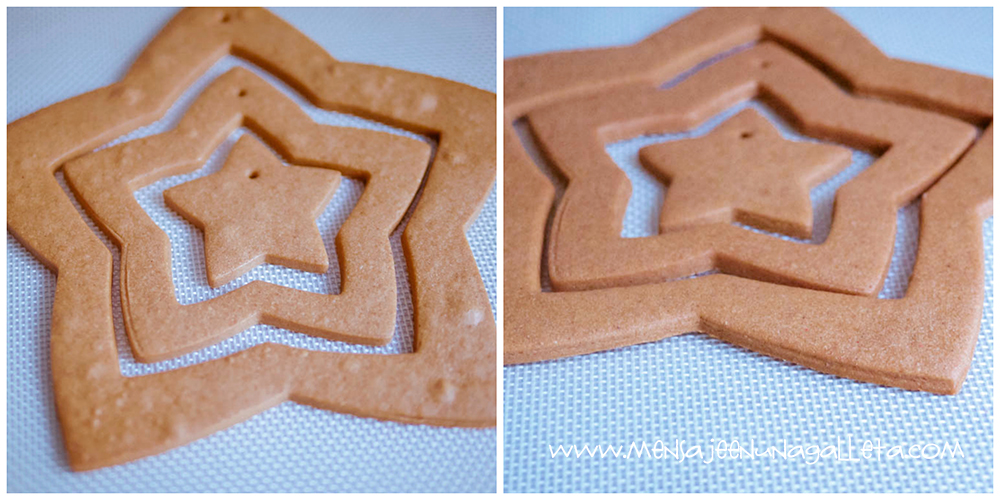
I put the dough on a floured surface and knead and knead. When the dough changes its texture and stops being sticky, I extend it patting it until I get more or less double the thickness I will want for my cookies. Then I cool it until it hardens. I roll it out when it is very hard for two reasons:

  • Reason 1: in order to get cookies with a smooth surface.
  • Reason 2: so I do not need to go to a gym and even then, have some neighbor asking me in the swimming pool if I have had any surgery at all.

After rolling out our dough, we cool it again and then cut the cookies. Bake at 180ºC, no fan, the minutes in the oven depend on the cookie size, and on your personal preferences. Test, this dough can be eaten raw or even burnt. It’s always nice.
Note: raw dough also does fatten.

The little figures are made with colored vanilla dough covered in pink glitter and baked on top of the ‘fives’ so they stick to each other.
Drum rolls, the moment for unveiling the secret of the golden color has come. You know that in the absence of rock’n’roll, my style as a decorator is pop, brilliant and shiny colors, geometric designs. And you can search in the depths of my past, you will not find any golden color. I have decided to make this point very clear from the start, before continuing.

princesas4

Last Wednesday my youngest daughter turned 5 and we celebrated it in Princelandia, a place of her liking and which ended up also being of mine, because of the premises, the unbeateable service and the faces of happiness of all the girls when they left it. María wanted to give some cookies to her friends on that day, so between the two of us we decided to make a 5 for her age and a crown for celebrating her birthday in Princelandia. Mi original idea was to make both the 5s and the crowns as chocolate cookies with pink glitter details, but María was scandalized: ‘Mom, chocolate crowns? Where have you seen chocolate crowns?’ I tried to avoid her and asked her: ‘should we put some pink royal icing then?’. She looked at me, her eyes enraged: ‘Mom, princesses’ crowns are golden’. This way the search for the philosopher’s stone began, to be more precise, the transmutation of the golden cookies. With the added difficulty that it was Saturday night.

The only golden and edible thing I had around the house was Metallic Golden Sands from Rainbow Dust, that golden dust we all buy and later on we do not know how to use. I needed to mix it with something else before applying it. I wanted the crowns to shine, a lot, I didn’t want them to have the typical rough look of the usual golden cookies, and I also wanted them not to stain the cello bags I was going to package them in. I revised everything that Haniela’s and Sweetambs had published about it and the closest thing to golden color involved alcohol, and you can call me eccentric, but no matter how much it evaporates, to add high graduation vodka to something that a group of 5 years old girls is going to eat, didn’t seem like an option to me.

Now you know. I found the way. Video.

The solution is extremely easy. The PME spray that we use when we want our royal icing to shine is the ideal ‘solvent’. To make golden paint we spray that product four or five times on a glass bowl, so we obtain a bit of liquid, then we add to it some of the golden dust and stir. In no time we will get our mixture ready to apply with a brush. It goes a long way; we painted 25 crowns with almost nothing. We just have to add more spray or dust according to our needs. Just a little warning: the first time is very important to spray on an empty bowl, if you do it on the golden dust, the expression ‘intense glow’ will fall short to describe how your face will shine.

Another advantage: it dries immediately.

sprayarenas

We recommend to use a royal icing already dyed in a color close to gold, I used brown, yellow and ivory in order to get this shade:

glasadorada

As usual, thanks Reynolds for making me sound so well in English.

And one last picture:

princesas2

A big fat kiss, Miriam G.
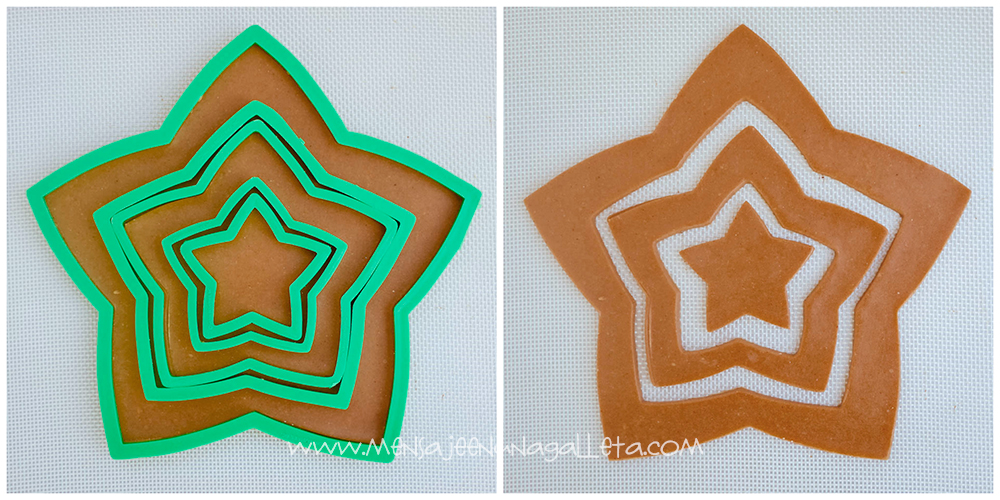
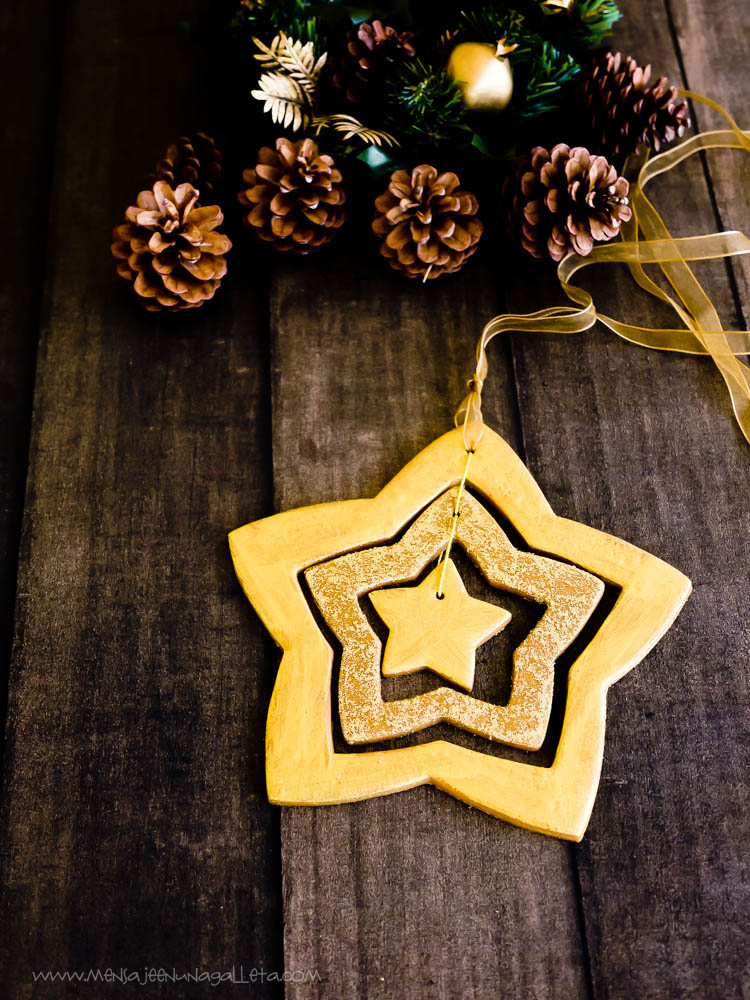
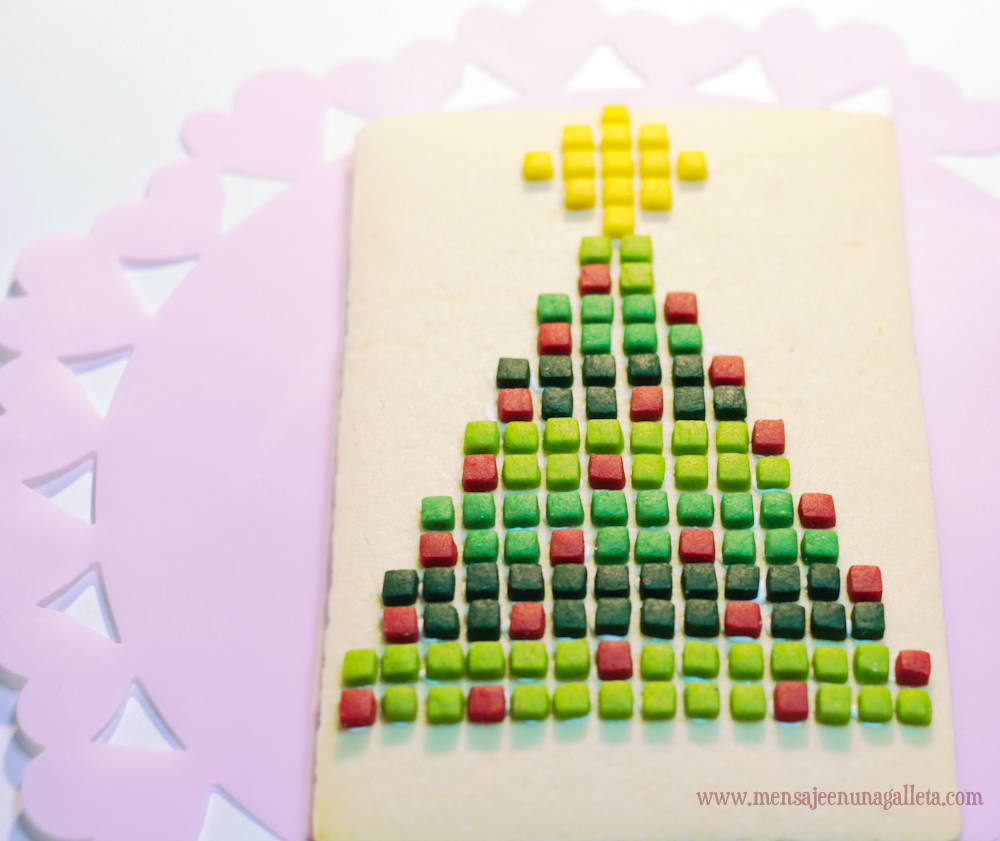
Galletas de jengibre para decorar, la receta definitiva. Gingerbread cookies to decorate. The definitive recipe.

genjibrecandela

A la pregunta ¿Existe un cortador de hombrecillo de jengibre tan grande? La respuesta es sí, lo venden Alemania, y una buena amiga me lo ha mandado, ¡gracias Lola! Es estupendo.

El gusto español, y por gusto me refiero al sentido, es delicado. Al español medio, una cantidad moderada de picante le pica una barbaridad, y una cantidad razonable lo lleva a urgencias. Lo mismo ocurre con las especias, si lleva alguna, ya lleva muchas, y si lleva muchas solo por el olor rechaza el plato. No es mi caso, mastico los chiles, y abuso de las especias cuando cocino, pese a esto, las galletas de jengibre me gustan suaves, quizá porque el jengibre no me gusta nada. He estado a punto de no echarle, pero me pareció complicado “vender” la receta definitiva de galletas de jengibre, sin jengibre. Pero no importa, si te gusta con mucho jengibre échale más, o si quieres añádale cayena, yo no le puse por las niñas, cambiará el sabor, pero no la textura, ni facilidad con la que se corta y se trabaja con esta masa.

Ingredientes:

– 100 gramos de azúcar moscabado, lo sé, me he enamorado, se lo pongo a todo. Pero si no tienes puedes ponerle azúcar moreno, cuanto menos refinado mejor.

– 75 gramos de miel de caña. Yo he usado una malagueña facilísima de encontrar, al menos aquí.

– 200 gramos de mantequilla a temperatura ambiente.

– 1 huevo pequeño.

– 400 gramos de harina, más la que admita.

– 1 cucharadita de nuez moscada en polvo.

– 1 cucharadita de jengibre en polvo.

– 1 cucharadita y media de pimienta rosa (o una de pimienta negra).

– 2 cucharaditas de canela.

Preparación:

Ponemos en la thermomix o en un molinillo el azúcar y las especias, bolitas de pimienta rosa incluidas, y molemos hasta obtener un polvo fino. Añadimos la mantequilla y mezclamos bien. Añadimos el miel de caña y el huevo y batimos hasta tener una pasta uniforme, añadimos los 400 gramos de harina en dos veces y mezclamos muy bien. Ponemos la masa sobre un tapete enharinado y vamos añadiendo poco a poco la harina que nos pida, cuando no nos pida más amasamos un poco y aplanamos con la mano hasta obtener una altura que sea más o menos el doble de la que queramos para las galletas, enfriamos un rato en el frigorífico y estiramos. Estirar la masa fría nos garantiza una superficie lisa. Volvemos a enfriar y cortamos y horneamos.

horno

Truco para hornear megagalletas: Hornear 10 minutos a 180 grados o hasta que la masa se vuelva mate, bajar la temperatura a 150 grados y hornear otro buen rato, 15 minutos en mi caso. Apagar el horno y dejar la galleta dentro todo lo que podamos.

Y ahora vamos con la decoración. Lo blanco es glasa, todo lo demás es masa. Y casi toda la masa de decoración va al horno junto con el hombre de jengibre porque así se pega:

detalles

– Los ojos son de masa de chocolate coloreada de negro, la preferida de mis hijas, se los arrancaron y se los comieron lo primero

– Cejas son de masa de jengibre con un pelín de colorante blanco.

– Coloretes, de masa de jengibre también, muy muy finos, de menos de 1 mm. Os cuento cómo lo hago, cojo el rodillo blanco de fondant sin ninguna anilla, estiro la masa finísima y marco el círculo, enfrío y, muy frío, saco el círculo y lo coloco sobre el muñeco. Nota, tengo las manos heladas, eso ayuda.

– Botones, son de masa de vainilla roja, con purpurina. Y sí, la purpurina se puede hornear. Se estira la masa roja y se extiende sobre ella purpurina roja, después se corta.

Transfer de masa pegado con glasa al muñeco:

– Acebo, masa de vainilla coloreada. Las hojas las he cortado con un cortador con expulsor. No existe esa cosa… ¿Cómo se llama? ¿Cortadores de fondant? Solo es que algunas galletas son grandes y otras más pequeñas. Las bolitas rojas también son de masa, si las horneas juntas se pegan.

Y por fin la glasa, para boca, brazos, piernas y pupilas.

genjibremaria

Por favor, cuando probéis la receta contadme qué os ha parecido.

Un beso, Miriam G.

(¡Muchísimas gracias Gloria!)

genjibrecandela

The question: is there a gingerbread man cookie cutter that big? The answer is yes, they sell it in Germany, and a good friend has sent it to me. Thanks Lola! It’s great!

Spanish taste, and by taste I mean the sense, is delicate. For the average Spaniard, a moderate amount of spice tastes super spicy, and a reasonable amount of it, takes him to the E.R. immediately. The same happens with spices themselves, if you add some, they seem to be too many, and if you add a lot of them, just the smell makes you reject the dish. It’s not my case, I chew chili peppers, and I abuse them when I cook. In spite of this, I like my gingerbread cookies to have a delicate flavor, maybe because I do not like ginger at all. I have been about not to use it, but then it would have been complicated to ‘sell’ the definitive gingerbread cookies recipe without any ginger at all. It doesn’t matter, if you like ginger, add more, or add some cayenne if you prefer; I didn’t use it because my girls don’t like it, it will change the flavor a bit, but not the texture, and the dough will be equally easy to cut and work with.

Ingredients:

– 100 grams of muscovado sugar; I know, I’m in love with it, I use it in every recipe, but if you don’t have it, you can use brown sugar, the less refined the better. 

–  75 grams of cane honey. I’ve used a local brand, very easy to find in this area.

–  200 grams of butter, room temperature.

– 1 egg (S)

–  400 grams of flour, plus whatever amount it needs.

–  1 tsp. of powdered nutmeg

–  1 tsp. of powdered ginger.

–  1 ½ of pink pepper (or 1 tsp of black pepper).

–   2  tsp. of cinnamon

Elaboration:

In the Thermomix or in any other robot we grind the sugar and the spices, pink pepper seeds included, until we get a fine powder. Then we add the butter and beat well. Add the cane sugar and the egg and beat until obtain a uniform dough. Incorporate the 400 grams of flour in two batches and mix very well. Put the dough on a floured surface and little by little start adding all the flour it needs; when it asks for more, we knead a bit and flatten the dough until we get a height that is more or less double the one we want for our cookies. Let it cool in the fridge and roll out. When we roll it out cold, this guarantees us a complete smooth surface. We put it back in the fridge and after a while we cut it and bake it.

horno

A trick to bake huge cookies: bake them for 10 minutes, 180ºC or until the dough gets matt, then lower the temperature to 150ºC and bake for another 10 minutes, 15 in my case. Turn off the oven and let the cookies inside for as long as you can

Let’s go with the decoration.  The white you see on the cookie is royal icing, the rest is dough. And most of the dough used as decoration goes into the oven with the gingerbread man, as that’s the way it sticks to the cookie:

detalles

– The eyes are made with chocolate dough dyed in black, my daughters’ favorite, that’s why they plucked them out and ate them first. 

– The eyebrows are made with gingerbread dough with a bit of white food coloring.

– Blush: very thin gingerbread dough, less than 1mm. I tell you how I make it: I take the white rolling pin that you use with fondant, and without any of the leveling rings I roll out the dough extremely thin, mark the circle, cool the dough, and when it is very cold I take the circle out of the dough and put it on the gingerbread man. Note: my hands are very cold, that helps.

– Buttons are made of red vanilla dough, with some glitter. Yes, glitter can be baked. You roll out the red dough, put the glitter on it and then cut it. 

Dough transfer glued to the cookie using royal icing:

–          Holly leaves are made with colored vanilla dough. Leaves have been cut using a plunger cutter. That thing…how do you call it? Fondant cutters? They do not exist. It’s just that some cookies are big and others are small. The small red balls are also made from dough. If you baked them together, they will glue to each other.

And finally, some royal icing for the mouth, arms, legs and pupils.

genjibremaria


When you try this recipe, please let me know what you thinUn beso, Miriam G.k.

A big kiss, Miriam G.

( Thanks Gloria!)